- Email:
[email protected]
Phone:
+918010117117
StoreHippo Help Center
StoreHippo Help Center
Banners
Mr.Rajiv kumarYou can use banners on your StoreHippo site to make it look more attractive. Banners are static images that appear across a particular section on a store's Homepage. The banners can be changed as per the requirement of your store.
For example, you can have a banner image depicting Christmas during the month of December. With banners, your store will appear both dynamic and beautiful.
You can have a series of banners listed on your store's admin. You can search, add and edit the banners in the admin panel.
Go to Site > Banners section in StoreHippo Admin Panel to manage banners.

Searching banners
You can look up for a particular banner that you have added in the past.

Add New Banner
You can make new entries to your banner list by adding a new banner. You can add a new banner by two types.
UsingAdmin panel
Let us now take a look at how to add a new banner. Click on Add New to add a new banner. A new page as displayed below will open.

Fill in the details in the given fields:
Name
Enter a name for your new banner.
Image
Upload the banner image you wish to add to the site.
URL
Enter the URL of the page that you want your customers to be redirected to when they click on the banner.
Title
Enter the title that you want to be displayed on the banner image.
Subtitle
Enter the subtitle that you want to be displayed on the banner image.
Publish
Check on Publish if you want to show the banner on the site, else uncheck it to unpublish it and publish later.
Sort Order
Mention the position number as on which sequence the banner is to be placed.
Substores
Select the substores if you want this linked product to be visible only for those substores. Leave blank to show it for all substores.
Using Widget
Use this widget to provides object along with all the details related to that banner (title, subtitle, images, URL). 'ms-data-name' attribute specifies the banner name.
<div class="banner" ms-widget="ms.banner" ms-data-name="banner-name">
    <a ng-href="{{banner.url}}">
        <img ms-widget='ms.responsiveImage'
             ms-data-valign='middle' alt='{{banner.title}}' ms-data-halign='center'  ms-data-aspect-ratio='1:1' ng-src="{{banner.image|image:'480x480'}}">
    </a>
</div>
Steps to locate banner on the homepage
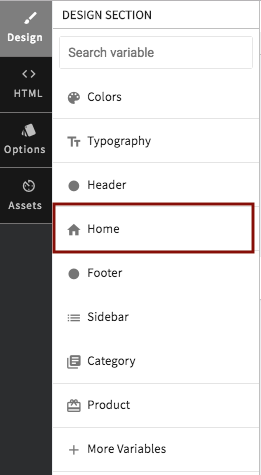
- Go to Design theme from StoreHippo Admin Panel.
- In the Design section, click on Home.

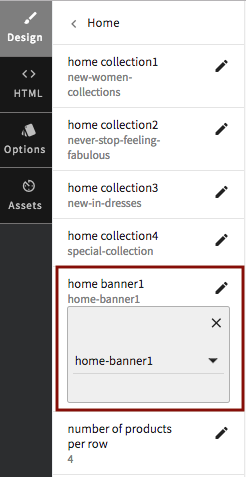
- Clicking on Home will display a list of banners with the alias name.


