- Email:
[email protected]
Phone:
+918010117117
StoreHippo Help Center
StoreHippo Help Center
- Home
- Mobile Apps
- Creating Mobile App build
Creating Mobile App build
Mr.Rajiv kumarStoreHippo provides you with the feature to build apps on your own in a few easy steps. Please follow the below-mentioned steps to build an app:
- Go to the Mobile Apps > Mobile apps section in the StoreHippo Admin Panel.
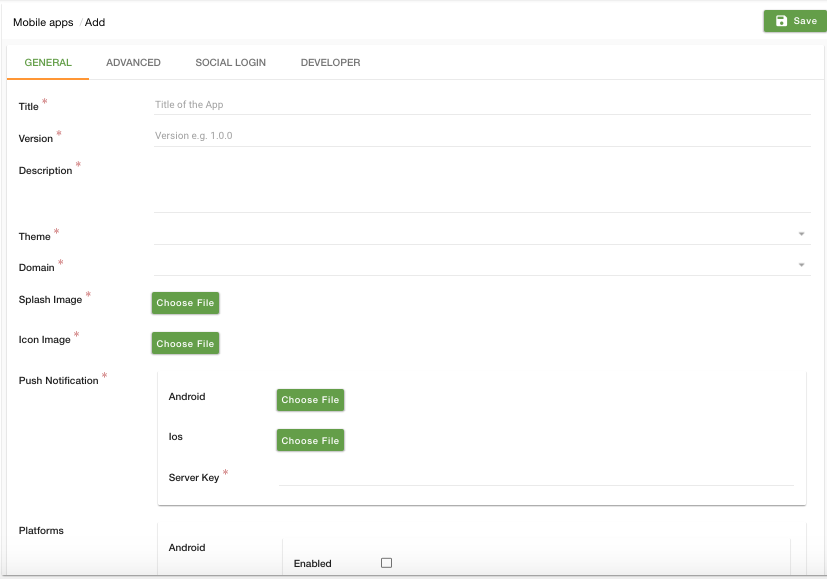
- Click Add New button to add a new record. The add new window will have the following fields:

The 4 different tabs containing the information regarding the app are explained below.
- General
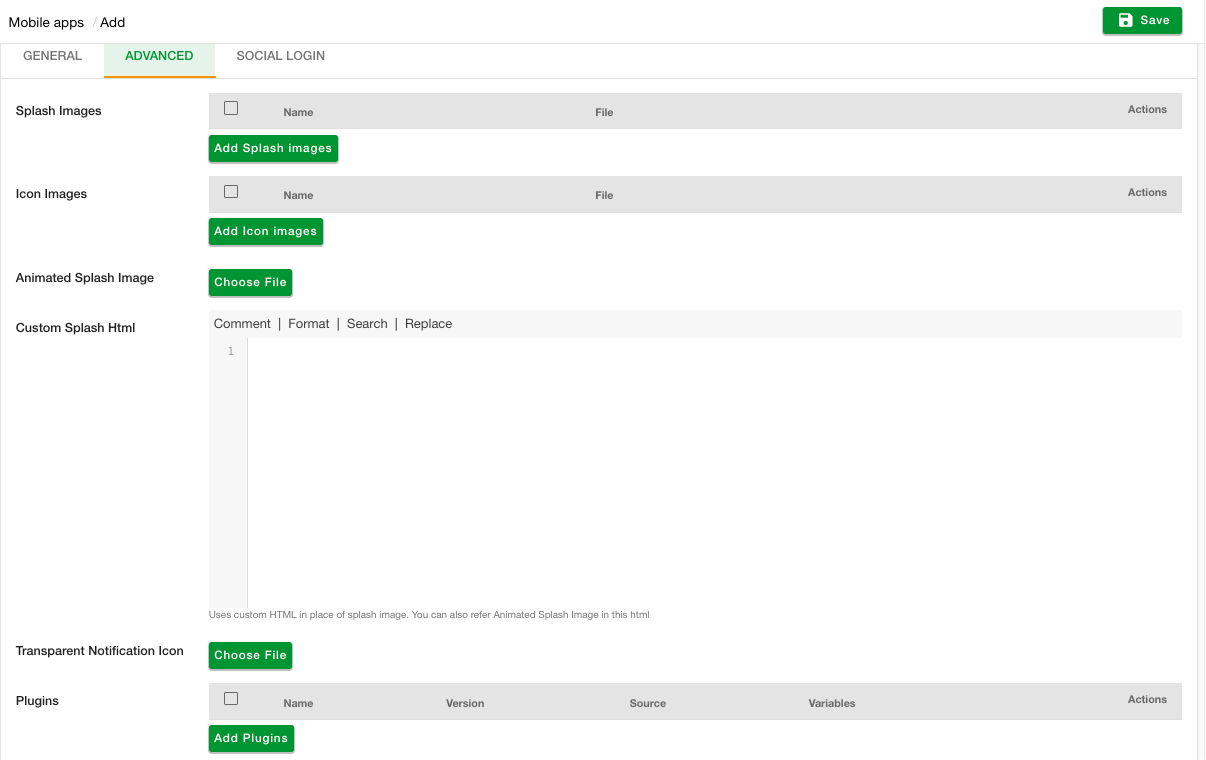
- Advanced
- Social Login
- Developer
General
In this tab, you will have to provide general information about the app, such as app name, package name, splash image, and so on.
Title
Enter the name of the app. The name appears on the device's home screen and within app-store interfaces.
Package
Enter the package here. Specify the app's reverse-domain identifier, e.g. com.storehippo.abc.
Version
Enter the full version number. It is expressed in major/minor/patch notation.
Description
Enter the metadata that may appear in-app store listings.
Theme
Choose the theme which will be used for the frontend of the app.
Domains
Select the domain from the
Splash Image
Upload an image that appears when you launch your app. Refer to this Figma design for guidance on creating the perfect splash screen.
NOTE: All the required splash images for different size devices will be automatically generated using this image.
Icon Image
Upload the icon for your mobile app. The preferred size for the icon image is 1024 X 1024.
NOTE: All the required icon images for different size devices will be automatically generated using this image.
Google Services Settings
Push notifications are used to send notification messages to your app users to drive user re-targeting and engagement. Push notifications are sent by Firebase Cloud Messaging (according to the latest Google update) for both Android as well as iOS. You get the files from the FCM used to send the notification.

For configuring the push notification in the Android app, you need:
- google-services.json: Upload the google-services.json file that you obtain from the Firebase.
- service.json: Upload the services.json file that you obtain from the Firebase.
For configuring the push notification in the iOS app, you need:
- googleService-Info.plist: Upload the googleService-Info.plist file that you obtain from the Firebase.
- service.json: Upload the services.json file that you obtain from the Firebase.
Please refer to the Firebase Cloud Messaging documentation for complete information on how to obtain these files.
Platforms
Select the platform for which you are building the mobile app. It can be either Android or iOS.
- Android
- Enabled: Check the flag if you want to build the app for Android.
- Key: The signing key which will be used to sign the app for publishing on the Google Play Store.
- Preferences: StoreHippo Mobile apps support some custom preferences for the app. Preferences are used for things like android-versionCode, android-targetSdkVersion, and others.
- Sha256 Cert Fingerprint: You can enter the SHA256 key that is provided to your app in the Google Play Console. You can get this key under the Setup -> App Integrity -> App signing section of your Google Play Console account.
- iOS
- Enabled: Check the flag if you want to build the app for iOS.
- Key: The signing key which will be used to sign the app for publishing on the Apple App Store.
- Preferences: StoreHippo Mobile apps support some custom preferences for the app. Preferences are used for things like target-device, prerendered-icon, and others.
Advanced
In this section you can add the additional app customisations, such as splash delay, plugins, and so on.
Social Login
In this section, you can set the social login providers in your app. 
The Social Login section gives you two options to log in:
You need to specify the Web Client Id in order to use Google Login on mobile apps. You first need to setup google login for mobile app to get the web client id.
In this field, you have to mention your App ID and Application name. For this, you initially have to setup facebook login for mobile App.
Once you have configured your ID and name enter the details in the respective fields.
Developer
In this section, you can enable different settings for the app.

Settings like, if you want to build the app in development mode, Which framework you want to use, Enable camera etc.
NOTE: The New Mobileapp Flow setting should always be enabled while building the app.You can either choose to build cordova app or react native app by using the setting Enable React Native.
FAQ
You can add product sharing on your mobile app through plugins. Using this feature, you can share the products through various apps available in your mobile such as WhatsApp, Instagram, Gmail, etc.
For more information, refer the following topic: How to enable product sharing on Mobile apps?


