Helpcenter +918010117117 https://help.storehippo.com/s/573db3149f0d58741f0cc63b/6969f0c18a8568e4561210d8/storehippo-logo-500-1--480x480.png" [email protected] https://www.facebook.com/StoreHippohttps://twitter.com/StoreHippohttps://www.linkedin.com/company/hippoinnovations/https://plus.google.com/+Storehippo/posts
B4,309-10 Spaze iTech Park, Sector 49, Sohna Road, 122001 Gurgaon India
Create a Trial Store StoreHippo.com Contact Us
- Email:
[email protected]
Phone:
+918010117117
StoreHippo Help Center
StoreHippo Help Center
call to replace anchor tags contains '/admin' in href2017-04-11T07:50:52.287Z 2024-08-27T08:37:14.925Z
- Home
- Order options
- How to add delivery date option on checkout?
How to add delivery date option on checkout?
Mr.Rajiv kumarScenario
You want to add a delivery date option on the checkout so that your customers can select a date for delivery.
Example

Steps
To add delivery date option on checkout, you can enable calendar option on the checkout. For providing calendar on the checkout page, you need to add calendar widget. To do so, you are required Order Option form and then add the calendar widget to your store. Follow the
Creating Order Option form
- Go to Site > Forms section in StoreHippo Admin Panel.
- Click on Add new to create the Order option form.
- Provide the name of the form as 'order_option'.
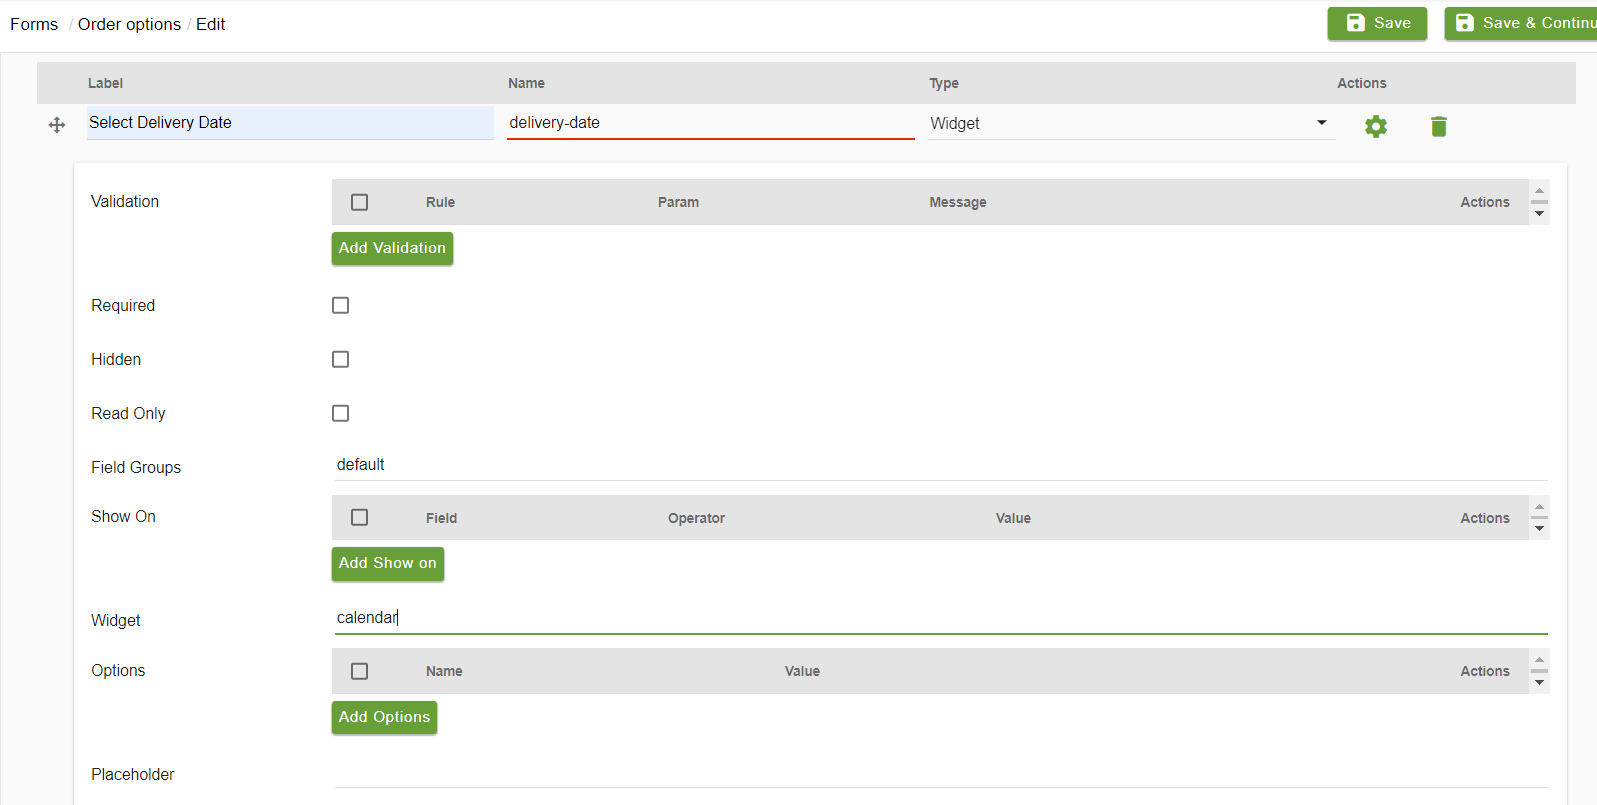
- In the order options form, create a field for delivery date.
- Enter label as 'Select Delivery Date' and name as 'select_delivery_date'.
- Select type as Widget.

- Click on the field settings icon next to type to edit the field. In the Widget field, enter the name of the widget (say "calendar").

- Click on Save to save the form.
Adding Widget
- Go to StoreHippo Design Theme.
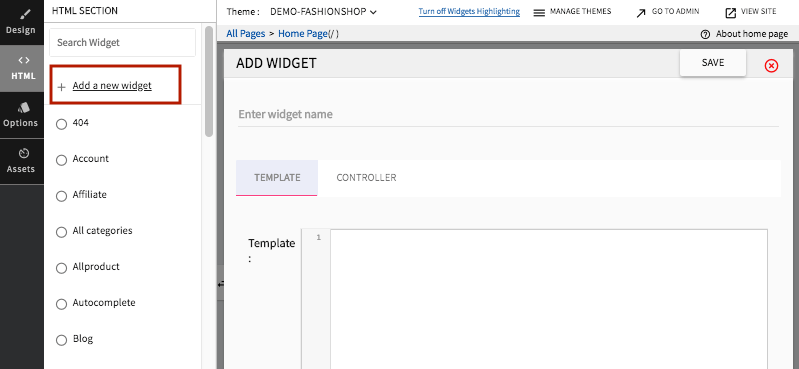
- Go to HTML section and click on Show all widgets.
- Click on Add new widget.

- Add new store widget, name it as "calendar" (mentioned above), add the
below-mentioned code:for VueJs code (New themes):Template:<input type="date" :min="minDate" class="form-control" :class="{'is-invalid': form.errors[field.name]}" v-model="data[field.name]" :id="field.id" :placeholder="field.settings.placeholder" :disabled="field.settings.read_only" autocomplete="off">
Controller:
Note: add 3 settings in custom widget - form, data and field if any widget called in forms$scope.minDate = $ref(''); if (window.serverTimestamp) { $scope.minDate.value = new Date(parseInt(window.serverTimestamp)).toISOString().split('T')[0]; }for angularJs codeTemplate:<div class="form-group"><div ng-init="optionData[option.name].value = ''"></div> <input type="text" ui-date="dateOptions" ng-model="optionData[option.name].value" ng-change="temp=optionData[option.name].value;getDateValue(temp);setMyDate(temp);" placeholder="{{'Select Delivery Date'|msTranslate}}" class="form-control" readonly> </div>Controller:
function ($scope) { var formatDate = function (date) { var d = new Date(date), month = '' + (d.getMonth() + 1), day = '' + d.getDate(), year = d.getFullYear(); if (month.length < 2) month = '0' + month; if (day.length < 2) day = '0' + day; return [year, month, day].join('-'); } $scope.setMyDate = function (date) { $scope.optionData[$scope.option.name].value = formatDate(date); } $scope.dateOptions = { changeYear: true, yearRange: '-50:+01', changeMonth: true, minDate: 0 } } - Click on Save to save the widget.
Related Topics
In This Topic


