- Email:
[email protected]
Phone:
+918010117117
StoreHippo Help Center
StoreHippo Help Center
Categories
Mr.Rajiv kumarCategories are used to organise the products by the type of product. StoreHippo allows multi-level categories to allow hierarchical organisation of your products. For example, "Clothes" , "Clothes > Men", "Clothes > Men > Casuals" could be possible categories.
Go to Products > Categories section in your StoreHippo Admin Panel to manage the categories.
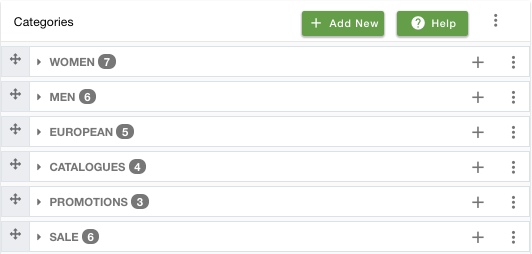
In the Categories section, you can add, update, delete categories, add sub-categories and reorder categories.
You can add multiple levels of a category to make it easy for your customers to browse your product range.
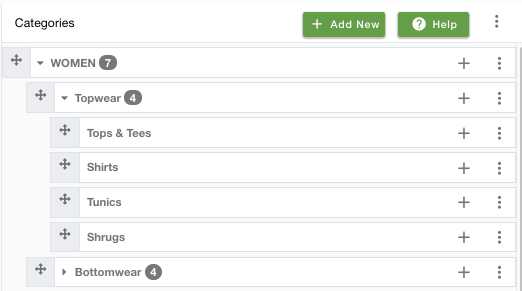
Adding a New Category
A category can be added to a store by clicking on the Add new button on the category page. Clicking on Add new will open the following form:
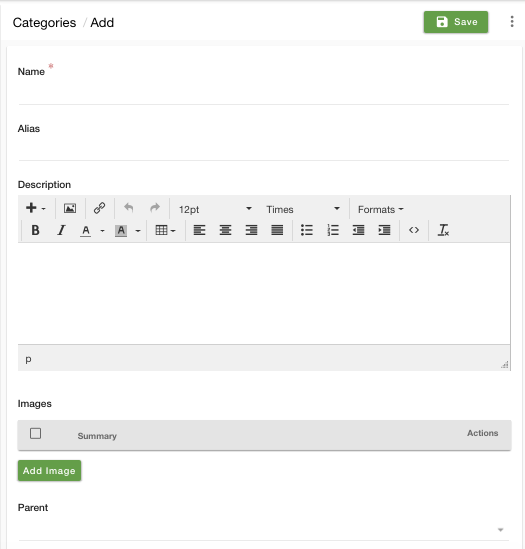
Following are the information fields that need to be filled for creating a category:
Name
Enter the name of the category that will appear in your store.
Alias
Aliases are used to create a unique URL for the category on your storefront. Aliases are created automatically, but you can always modify it to create an SEO friendly URL for the category.
Description
Enter the description for the category created, to let your customers know about the details of the particular category.
Images
Upload one or more images for a particular category by following steps given below:
Click on Add Image button.
Click on Choose a File button and select the image.
Click on Insert Image to upload the image.
Parent
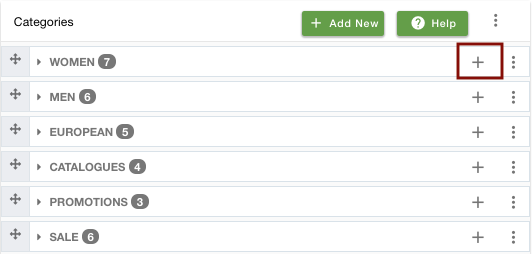
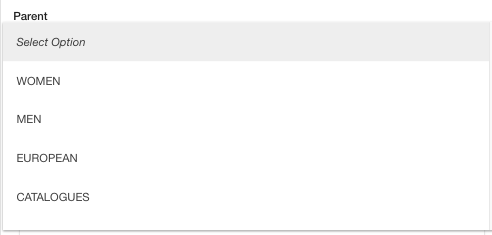
Select another category from the drop-down if you want this category to be placed under the selected category. If you come to the Add Form by clicking on the + icon next to any category then that category will be automatically populated in the parent field.
SEO
Provide custom information needed for effective SEO of your categories. 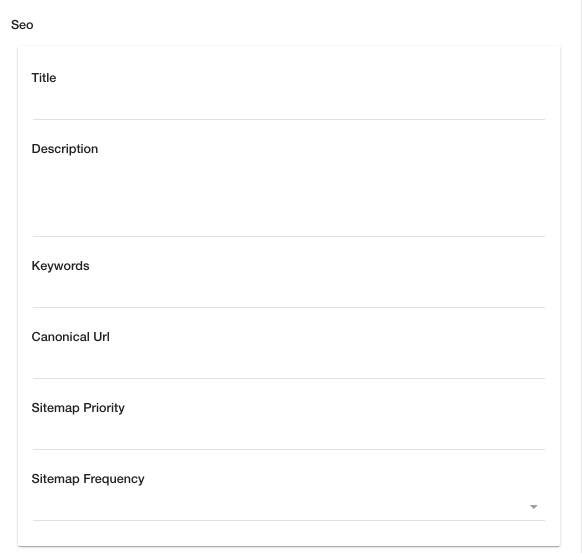
Title
Enter the title of the product to specify a custom title for the product page for SEO. If you do not specify this field, the product name is used as the title.
Description
Enter the description of the product to specify a custom meta description for the product page for SEO. If you do not specify this field, the product description is used as the meta description.
Keywords
Enter the keywords to specify a custom meta keywords for the product page for SEO.
Canonical URL
The canonical URL used to declare a single page as its source or for duplicate pages to reference their source/originating page. This is an advanced SEO option and should be used carefully.
Sitemap Priority
Sitemap priority defines the priority of the particular page in your store; pages with higher priorities are crawled by Google more often. Provide the sitemap priority to the pages within a range of 0.0 to 1.0. Default priority used is 0.5.
Sitemap Frequency
The sitemap frequency (Change Frequency) tells the search engines how frequently content is likely to change. The default value of the sitemap frequency for the category is weekly.
Publish
If you do not wish to make a particular category visible on the store, then you can just uncheck the Publish tab to hide it, and the same tab can be rechecked to make it live on the store.

Default Sort Order
You can sort the products in a given category based on various parameters using Sort Order. By default, the product in a category on the storefront is listed in the order newest to oldest based on their creation date. You can choose a different

Sort Order
This field is used to set the specific sort order of your categories. Default sort order is 0 for the new category. By default, categories are displayed in increasing sort order.
Substores
Select the substores if you want this linked product to be visible only for those substores. Leave blank to show it for all substores.
Creating Sub Category
Method 1
Click on the + icon next to the category on the listing tab. This will automatically use the current category as the parent of the newly selected category.
Method 2
Click on Add New button and then select the category in the parent field.
Operations on Categories
You can perform operations on categories by clicking on the ellipsis button against categories. The following drop-down appears: 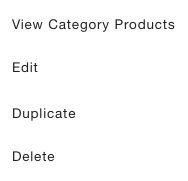
View Category Products
The View Category Products takes you to the category page on the storefront. Here you can review your categories.
Edit
Choose the Edit option to edit the category.
Duplicate
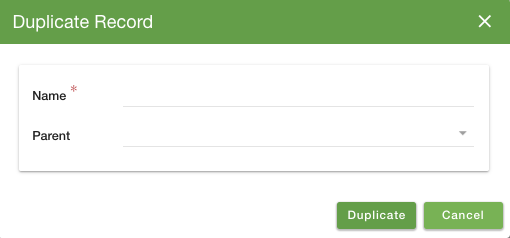
Choose the duplicate option to duplicate the category. The following popup appears. Fill up the name and parent category.
Delete
Choose the delete option if you want to delete the category.
Rearranging Categories
You can rearrange categories on storefront by dragging and dropping the categories. To reorder the categories, click on the drag icon and drop the category where you want to place it.
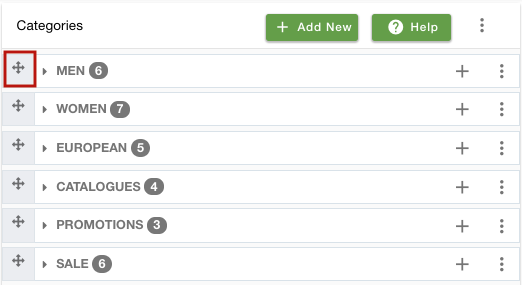
You can also reorder the sub-categories under different parent categories in the same way.


