StoreHippo Help Center
StoreHippo Help Center
Enable e-commerce tracking
Mr.Rajiv kumarYou can implement Google's Ecommerce tracking at two different degrees of detail:
-
Basic Ecommerce tracking if you just want transaction and revenue data
-
Enhanced Ecommerce tracking if you want additional information about visitor behavior
Enable basic Ecommerce tracking
-
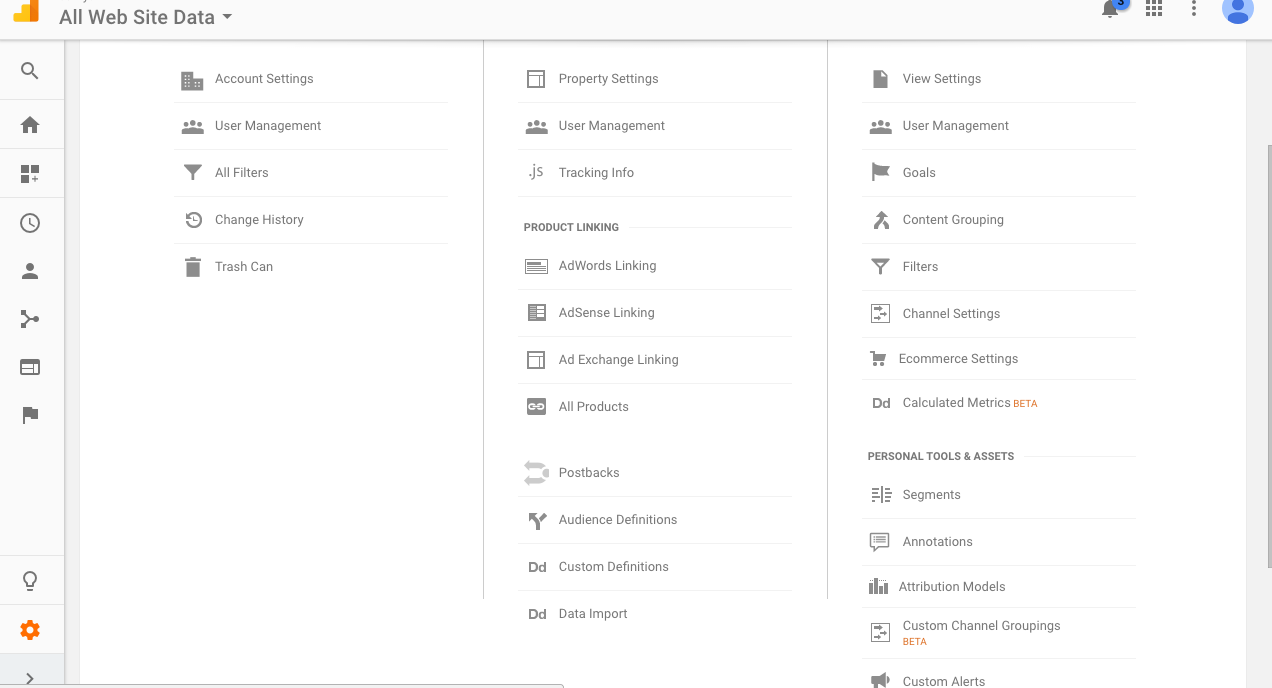
Go to Google Analytics menu bar and click Admin.
-
The window that will appear will show the settings like Account, Property, and View that you want to track as shown below:
-
Click on Ecommerce Settings.
-
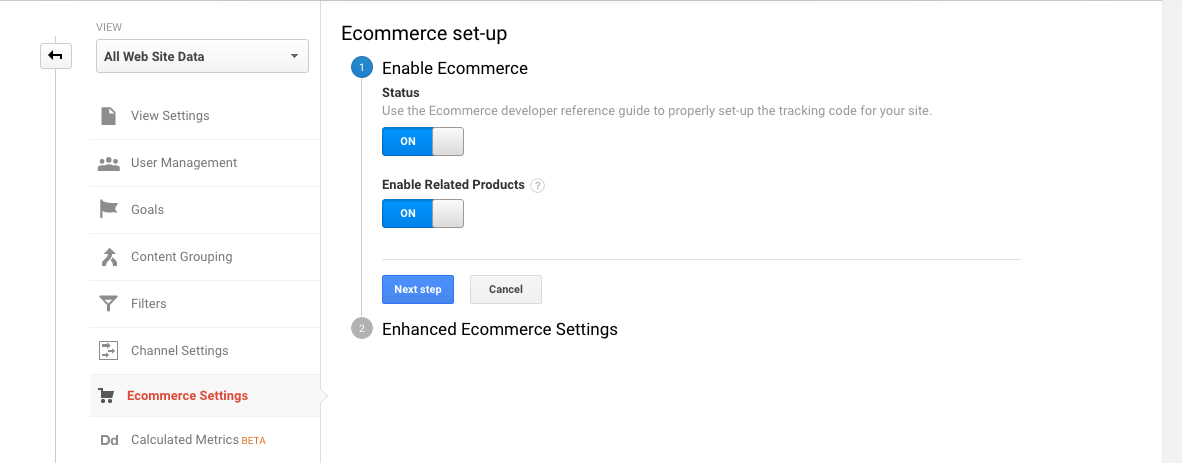
When the Ecommerce Setup window appears, click the Enable Ecommerce Status toggle to ON:
-
Your basic setup is complete. If you want to generate Related Products data, click the Related Products Status to ON.
-
Click Next step.
Enable Enhanced Ecommerce tracking
-
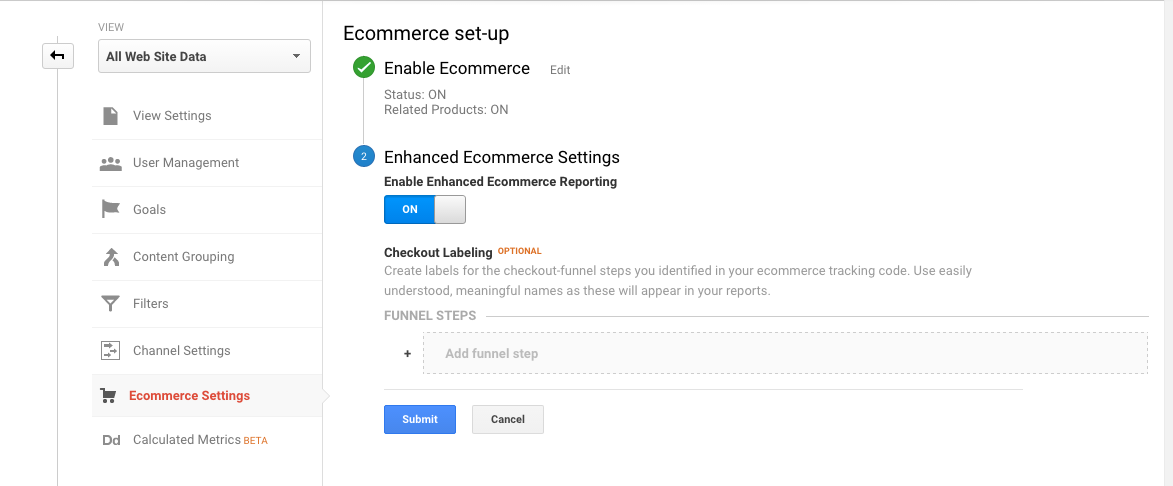
If you need more detailed tracking information, you can enable Enhanced Ecommerce tracking.
-
After clicking on Next step, click the Enable Ecommerce Status toggle to ON.
-
Click the Enable Enhanced Ecommerce Reporting toggle to ON:
-
Click Submit to complete the setup.


