- Email:
[email protected]
Phone:
+918010117117
StoreHippo Help Center
StoreHippo Help Center
Files
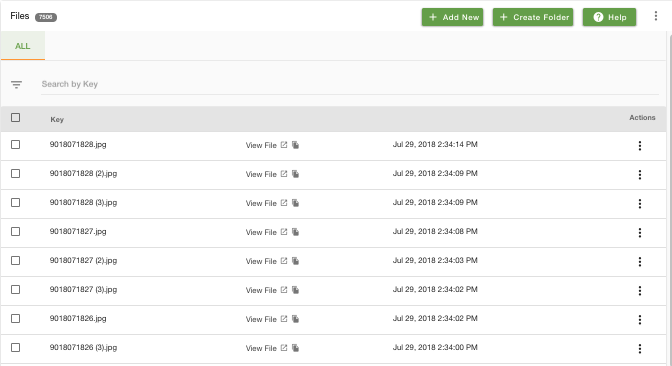
Mr.Rajiv kumarFiles section allows you to upload files that you can use in product imports, static pages, theme widgets, product description, and in any entity field that supports HTML.
You can manage files in Site > Files section in StoreHippo Admin Panel.

Adding Files
Follow these steps to add a new file(s):
- Click on Add New button in the top right corner. Clicking the button will open a new page.

- Drag and drop a single file or multiple files from your desktop in the highlighted area or simply click inside highlighted area and select files from a specific location on your hard drive.

- Once files are selected, click the Save button. The file will now be added to file list with the file name mentioned under the key column.
- You can also check if the file is uploaded correctly by simply clicking on View File.
Copying URL of the uploaded file
When you click on view file, it opens the file in new window. To copy the URL to the clipboard, click on the copy icon next to View File.
Organizing Files using folders
If there are many files in the files section, you can organize the files using folders. You can create folders for different categories and keep files related to the same category in a particular folder.
Create a new folder
- Click on Create Folder button from the top right corner on files entity listing page. A pop-up will open up.

- Enter the name of the folder in the folder field in the pop-up.
- Click on the Create button. The newly created folder with the name entered in the folder field will appear at the top of your files listing page.
Add Files in the folder
- Click on the Folder Name.
- Follow the same steps mentioned as above in Adding Files.
Using Files in Product Import
Once the files are uploaded in the Files section, you can refer the image names in your product CSV files that you use to import products in bulk. For example:
If you uploaded abc.jpg directly in the files section, then use "abc.jpg" in the image column of the CSV file.
If you uploaded abc.jpg in xyz folder in the files section, then use "xyz/abc.jpg" in the image column of the CSV file.
You can also use the full URL of the uploaded file in the image column of the CSV file.
So, there's no need to upload the same image again and again. You just need to mention the name in the .csv file and your file with the same name or path will be automatically added.


