Helpcenter +918010117117 https://help.storehippo.com/s/573db3149f0d58741f0cc63b/6969f0c18a8568e4561210d8/storehippo-logo-500-1--480x480.png" [email protected] https://www.facebook.com/StoreHippohttps://twitter.com/StoreHippohttps://www.linkedin.com/company/hippoinnovations/https://plus.google.com/+Storehippo/posts
B4,309-10 Spaze iTech Park, Sector 49, Sohna Road, 122001 Gurgaon India
Create a Trial Store StoreHippo.com Contact Us
- Email:
[email protected]
Phone:
+918010117117
StoreHippo Help Center
StoreHippo Help Center
call to replace anchor tags contains '/admin' in hrefExamples
2018-02-12T13:46:15.299Z 2019-03-27T12:01:34.807Z
- Home
- Importing Products (in bulk)
- How to add attributes via CSV?
How to add attributes via CSV?
Mr.Rajiv kumarScenario
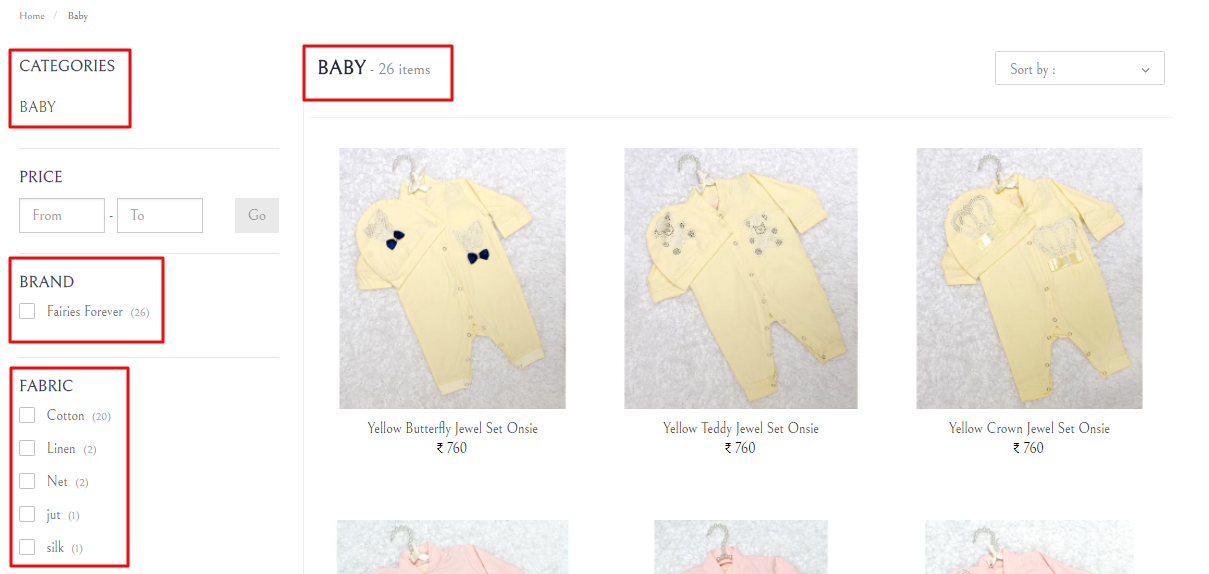
Suppose you want to add attributes to your category pages on the store so that the products listed can be filtered accordingly. You want these attributes to be inserted directly via CSV file.
Examples
Steps
StoreHippo offers an easy way to update the attributes for category pages through CSV at the same time. To do so, follow the process given below:
- Go to Products > Products section in StoreHippo Admin Panel.
- Click on the Export button to export all products or specific products for which you want to add attributes.

- A
dialog box for exporting file opens. Fill up the fields as shown below: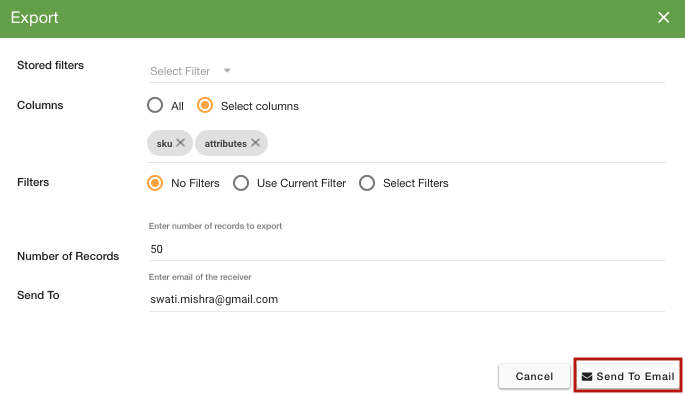
- Click on Send to Email. The CSV file is sent to you in the email or you can download the file from Export logs.
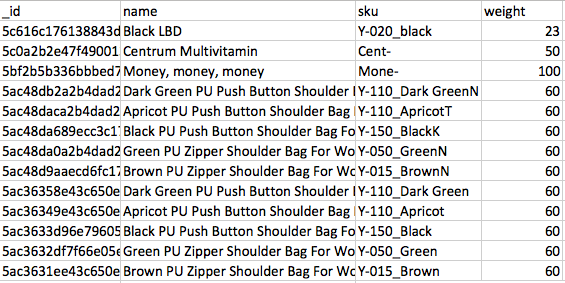
- View the downloaded CSV file. The CSV file appears like this:
- First, create a column for the above-mentioned attributes by the name attributes
.Size and attribute.Color . Go to the attributes.Size and attribute.Color 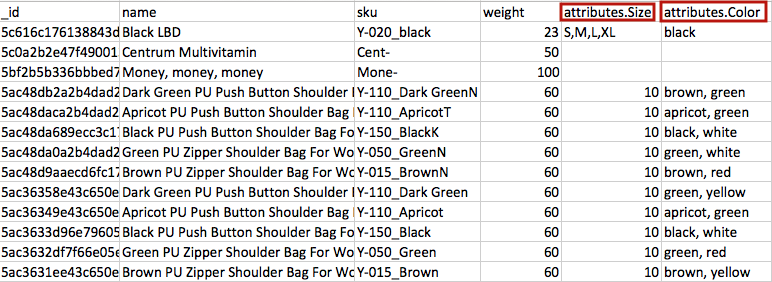
- Also, if you wish to add more attributes you can subsequently create columns for the same as attributes.attribute_name and provide value to it with respect to a particular product row.
- When you have entered all the desired attributes and provided the attribute values for each product, go to the Products section of the admin panel. Click on the Import button to import the edited CSV file.

- The
dialog box for importing file opens. Upload the file in which you made changes and click on Import file.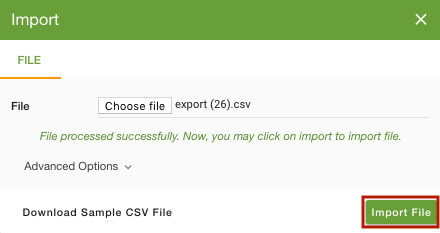
- You can check the status of the imported CSV file by clicking on the notification icon or in Import logs.
- The attributes will be updated in the admin panel and the respective category pages.


