- Email:
[email protected]
Phone:
+918010117117
StoreHippo Help Center
StoreHippo Help Center
- Home
- Importing Products (in bulk)
- How to add images via CSV?
How to add images via CSV?
Mr.Rajiv kumarScenario
Suppose you own a store selling varieties of products. You need images for your products. Let us take the example of a bag. You want to upload various images of the bag displaying different angles without wasting your time in the manual upload.
Example
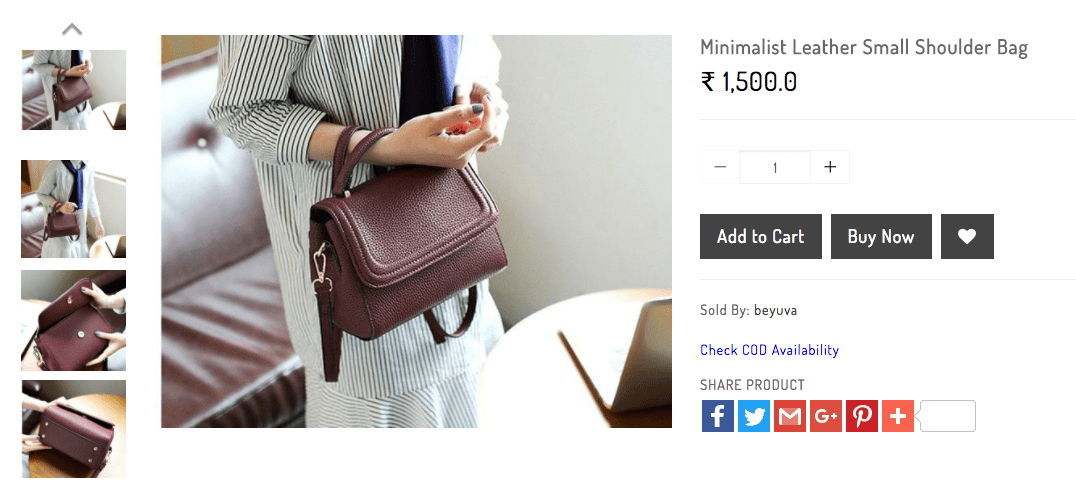
Steps
StoreHippo provides the effortless process to upload your products in bulk via CSV file. As you can only provide the URL of the images in the CSV file, you first need to prepare the images for uploading them to your store.
Preparing Images for CSV file
A CSV file can only contain text. So you need to ensure all product images are on an existing website. Those image URLs will be used during the CSV importing process.
If the files are on your computer only, you can upload them in bulk to the Site > Files section of your StoreHippo Admin Panel. Once uploaded to the files section you can use the relative path of the file. For example, abc.jpg, folder1/abc.jpg, etc. or use the full URL of the uploaded image file. Please refer to Files for more details.
If you are switching to StoreHippo from another platform, you're all set. Just copy the current image URLs and use them in the CSV file.
If the product CSV file was produced by exporting your products from StoreHippo, then you don't need to do anything since your images are already on your website.
Uploading Images
For uploading images to your store, follow the below steps:
- Go to Products > Products section in StoreHippo Admin Panel.
- Click on the Export button to export all products or specific products for which you want to add images.

- A
dialog box for exporting file opens. Fill up the fields as shown below: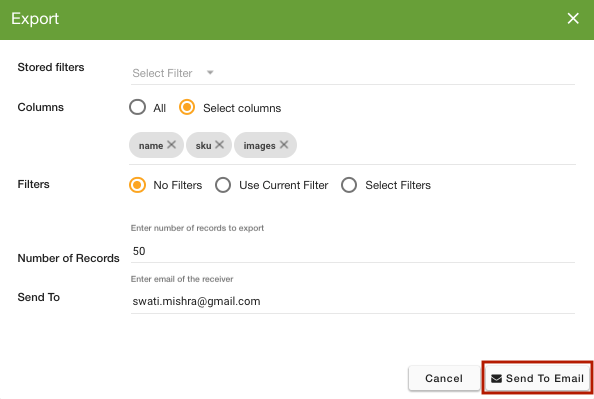
- Click on Send to Email. The CSV file is sent to you in the email, or you can download the file from Export logs.
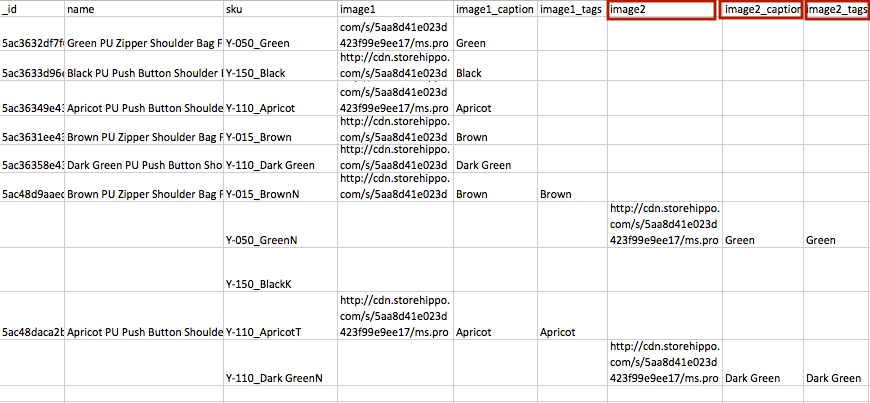
- View the downloaded CSV file. The typical CSV file with images appears like this:
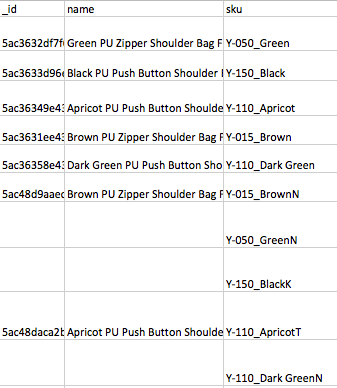
- To add images, go to the image1 column of the product for which you want to add images. Provide the URL of the image. Then enter the caption of the image in the image1_caption column. Provide tags for the image in image1_tags if you have product variants. For example; you can put the image as
http://cdn.storehippo.com/s/593cd26.jpg, caption as Brown and tag as Brown.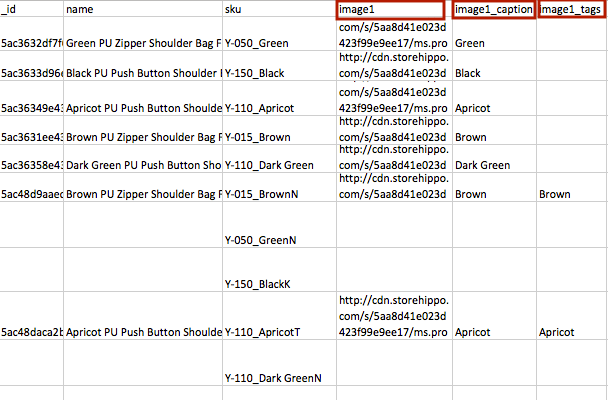
- If you want to add more such images, add more fields such as images2, images2_caption & image2_tags and so on in the header column and provide their values.
- When you have entered all the required images, go to the Products section of the admin panel. Click on the Import button to import the edited CSV file.

- The
dialog box for importing file opens. Upload the file in which you made changes and click on Import file.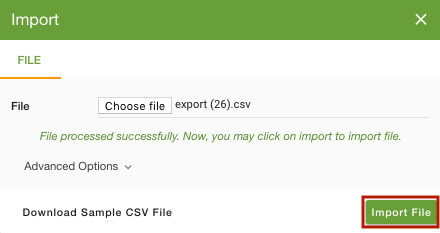
- You can check the status of the imported CSV file by clicking on the notification icon or in Import logs.
- The images will be updated in the admin panel and storefront.


