Helpcenter +918010117117 https://help.storehippo.com/s/573db3149f0d58741f0cc63b/6969f0c18a8568e4561210d8/storehippo-logo-500-1--480x480.png" [email protected] https://www.facebook.com/StoreHippohttps://twitter.com/StoreHippohttps://www.linkedin.com/company/hippoinnovations/https://plus.google.com/+Storehippo/posts
B4,309-10 Spaze iTech Park, Sector 49, Sohna Road, 122001 Gurgaon India
Create a Trial Store StoreHippo.com Contact Us
- Email:
[email protected]
Phone:
+918010117117
StoreHippo Help Center
StoreHippo Help Center
call to replace anchor tags contains '/admin' in href2021-12-07T12:53:55.594Z 2022-07-28T09:51:20.583Z
- Home
- Substores (Multi Store)
- How to add substore based store locations?
How to add substore based store locations?
Mr.Rajiv kumarStoreHippo allows you to different store locations based on the substores. With this feature, you can add different store locations for different substores.
Steps
StoreHippo's multi-store e-commerce platform allows you to set up multiple substores within a store having different navigations, store locations, pages, languages, themes, blogs, etc. To add different store locations for different substores, follow the steps mentioned below:
Enable Multistore
- Go to the Settings > MISC section in the StoreHippo Admin Panel.
- Select the Enable Multistore checkbox to enable the multistore e-commerce functionality.

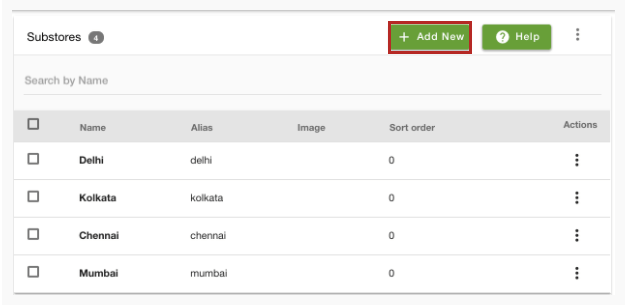
- Go to the Settings >Substores section in the StoreHippo Admin Panel to create substores.
- Click the Add New button.

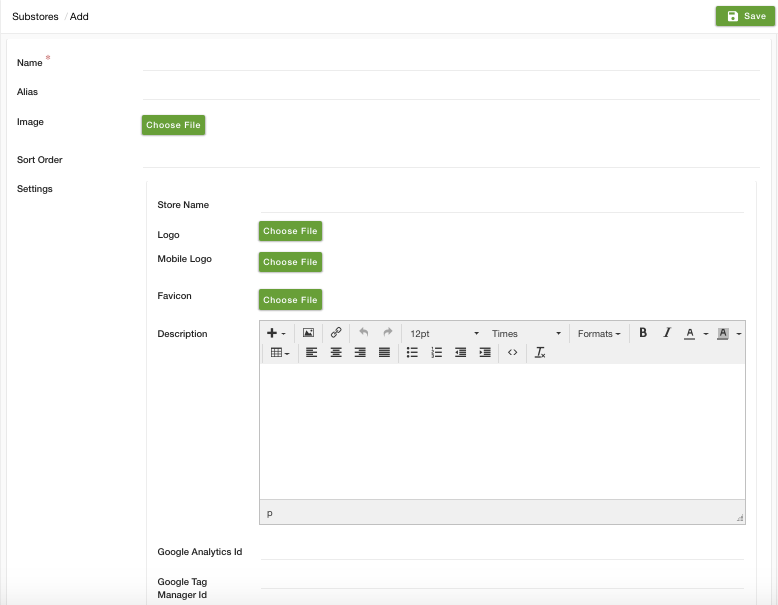
- Provide the substore details and save the changes.

Similarly, you can more substores. Click here to know more about adding substore.
Adding the Multistore Entities
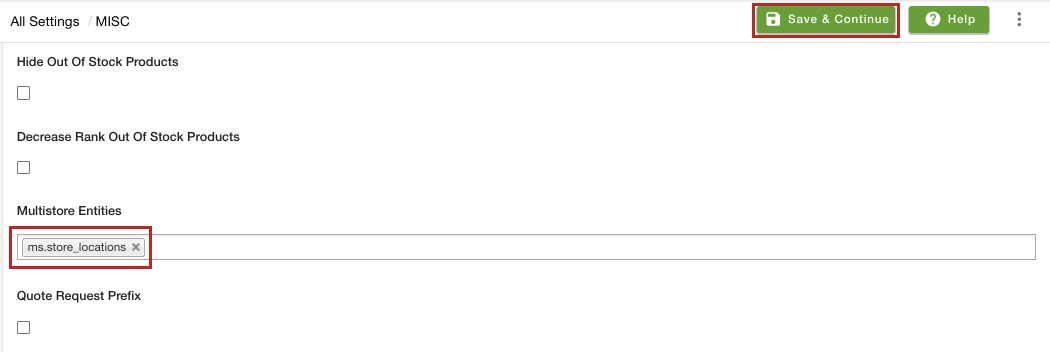
- Go to the Settings > MISC section in the StoreHippo Admin Panel.
- In the Multistore Entities field, select the "ms.store_locations" option.

- Click the Save & Continue button to apply the changes.
Assigning substores to the store location
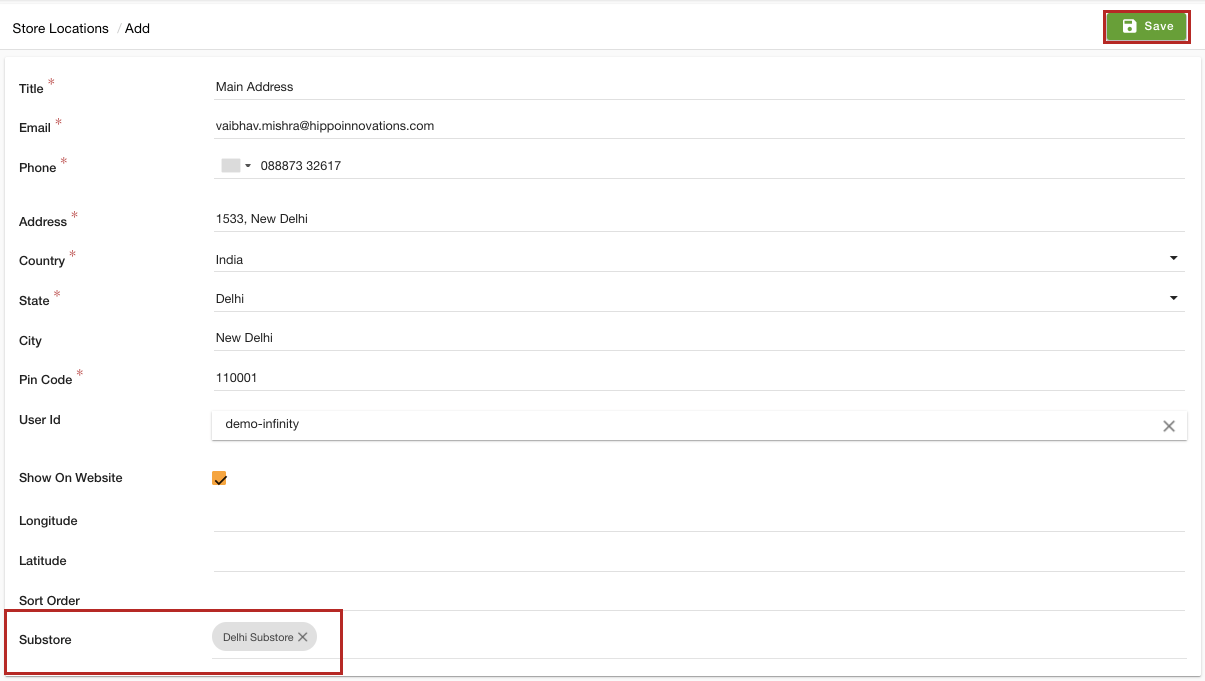
- Go to the Settings > Store Locations section in the StoreHippo Admin Panel.

- Click the Add New button. A page will open up with multiple fields.

- Provide the details for the store location. Select the substore from the Substore dropdown.
- Click the Save button to apply the changes.


