Helpcenter +918010117117 https://help.storehippo.com/s/573db3149f0d58741f0cc63b/6969f0c18a8568e4561210d8/storehippo-logo-500-1--480x480.png" [email protected] https://www.facebook.com/StoreHippohttps://twitter.com/StoreHippohttps://www.linkedin.com/company/hippoinnovations/https://plus.google.com/+Storehippo/posts
B4,309-10 Spaze iTech Park, Sector 49, Sohna Road, 122001 Gurgaon India
Create a Trial Store StoreHippo.com Contact Us
- Email:
[email protected]
Phone:
+918010117117
StoreHippo Help Center
StoreHippo Help Center
call to replace anchor tags contains '/admin' in href2018-10-15T11:03:14.865Z 2024-08-05T12:10:02.538Z
- Home
- Metafields
- How to provide image upload option on the product page?
How to provide image upload option on the product page?
Mr.Rajiv kumarScenario
You want to provide an option to upload an image on the product pages of your store.
Example
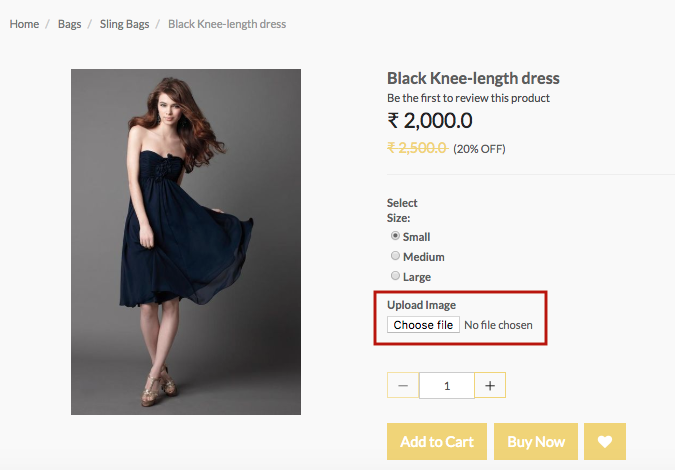
Steps
You can show some extra content on your product page with the help of metafields. StoreHippo provides the metafield functionality to provide additional data on the storefront and extended field in the admin panel. To provide the image upload field on the product page, you are required to create a metafield and then display it on the storefront.
Follow the below steps to add the metafield to a product page:
Adding metafield in Admin Panel
- Go to Advance Settings > Metafields section in StoreHippo Admin Panel.
- Click on Add New to add a metafield.
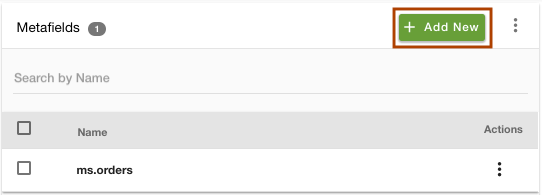
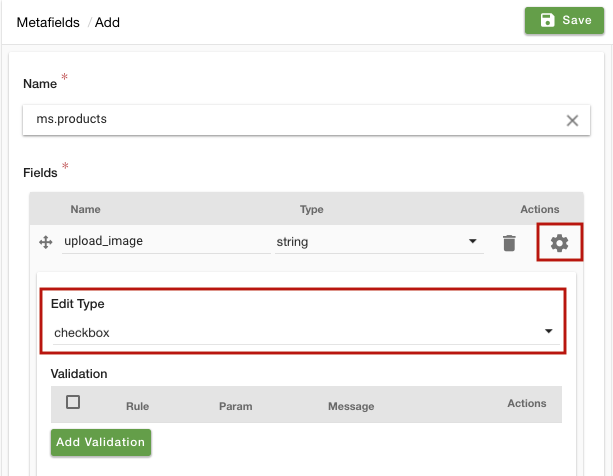
- Select the entity "ms.products" from the drop-down in which you want to add the metafield.
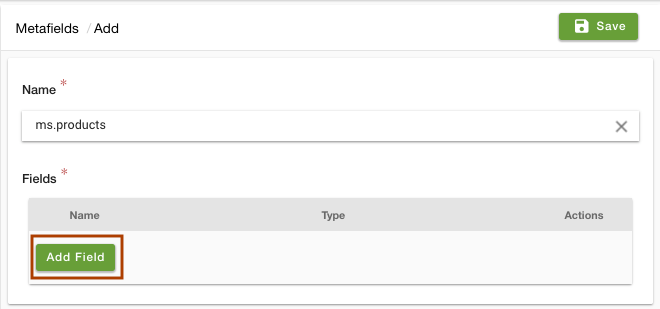
- Now to define the fields, click on Add Field.
- Enter the field name as "upload_image" and type as "string".
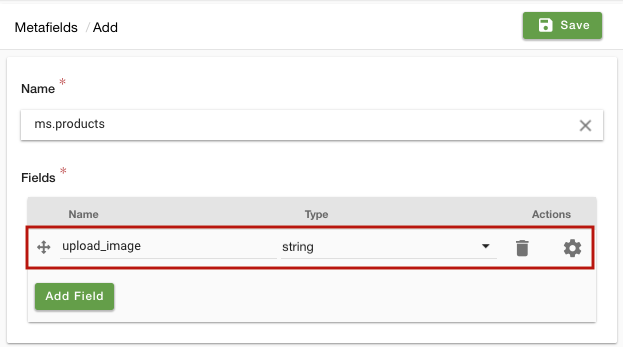
- Click on the field settings and choose the Edit type as "checkbox" from the drop-down.
- Click on Save to store the metafield.
- Go to Products > Products section in StoreHippo Admin Panel.
- Add/edit a product.
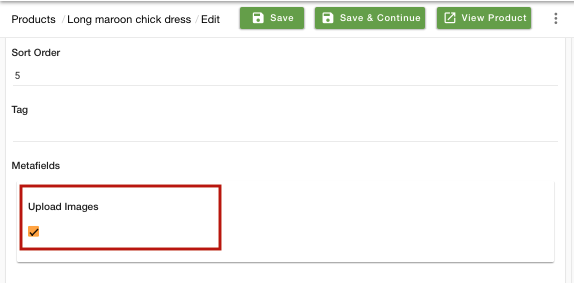
- Find the Upload Image metafield. Select the Upload Image checkbox.
- Save the changes.
Displaying Metafields on Storefront
- Go to Design Theme from admin panel.
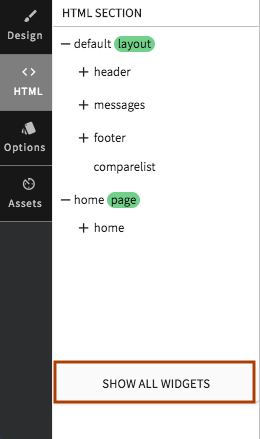
- In the HTML section, click on Show all widgets.
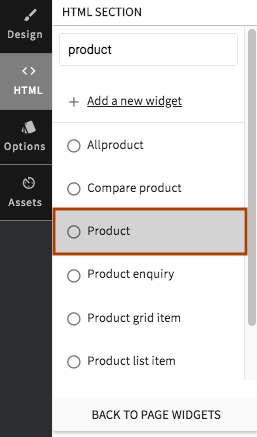
- Search for the Product widget.
- Paste the following snippet in the product code wherever you wish to show the metafield. Here we paste it below the "Check COD availability" code.for VueJs code (New themes):
<div v-if="product?.metafields?.metafield_name">
    <ms-form-file-upload :field="{'name':'metafield_name'}" :data="product.selected_options">
        <input type="file" @change="handleFileChange" id="metafield_id" placeholder="ms.filters.translate('Upload Image')" autocomplete="off" />
    </ms-form-file-upload>
</div>
for angularJs code<div class="form-group" ng-if="product.metafields.<metafield_name> == 1"> <div ms-widget="ms.instantFileUpload"> <label class="option-name">Upload Image</label> <input type="file" id="file" name="<metafield_name>" ng-model="product.selected_options['<metafield_name>']" required/> <div ng-if="uploading"> <p><i class="text-center ms-p-xs"> <span class="fa fa-cog fa-spin ms-mr-xs"></span> <b> File is Uploading....</b></i> </p> </div> <div ng-if="!uploading"> <div ng-if="previewUrl"> <img ng-src="{{previewUrl}}" style="height:100px;"/> </div> </div> </div> </div>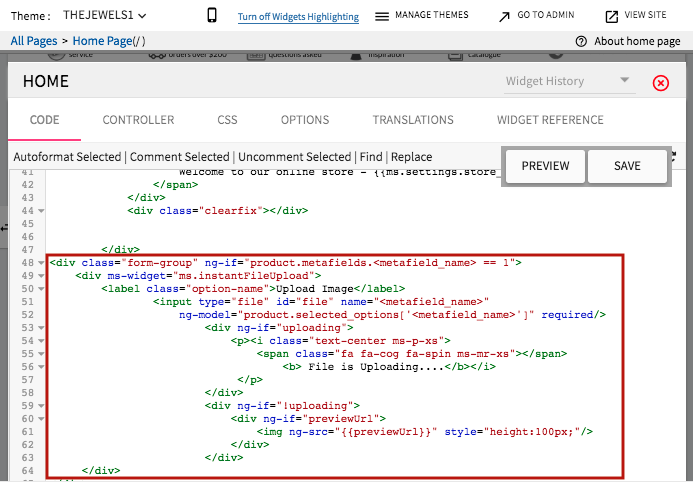
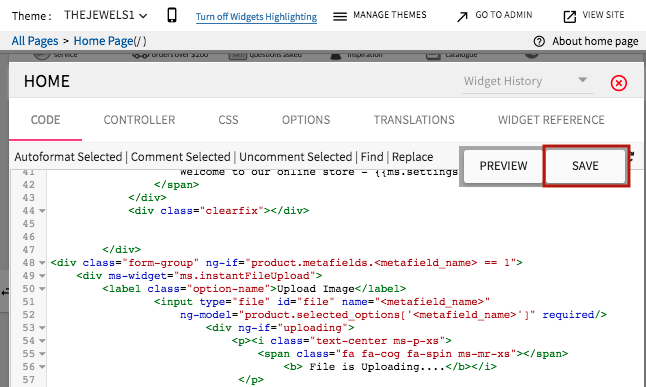
- Save the changes.
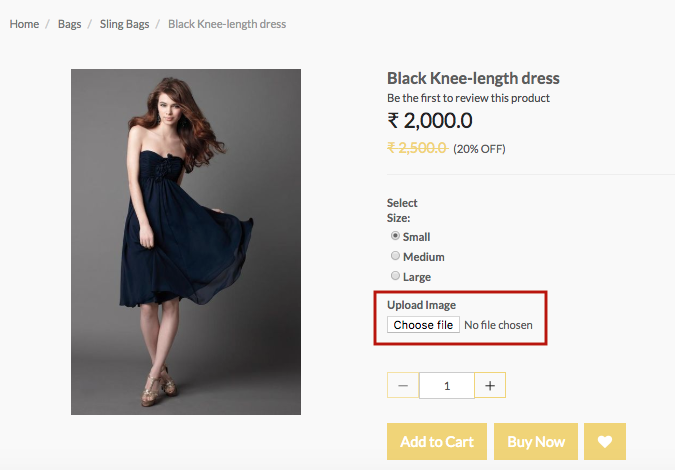
- The metafield will now appear on your product page as shown below. Click on the Choose file to upload an image.
Related Topics


