- Email:
[email protected]
Phone:
+918010117117
StoreHippo Help Center
StoreHippo Help Center
- Home
- Store Settings
- Login Providers
Login Providers
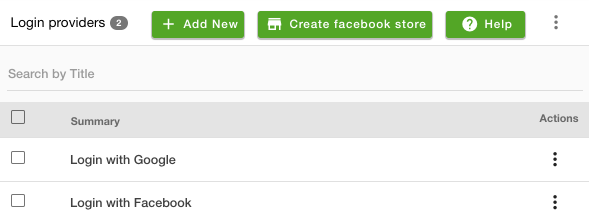
Mr.Rajiv kumarLogin Providers allow you to set up social logins to enable your customers to log in using providers like Facebook, Google, etc.
Go to the Settings > Login Providers section in your StoreHippo Admin Panel to manage the login providers for your store. 
Adding Login Providers
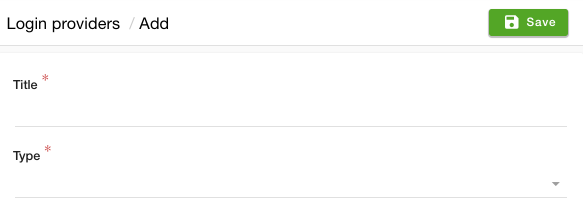
To add a new login provider, click on Add New button. The window appears with the following fields:
Title
Enter the title of the login provider.
Type
The type defines which social network you would like to configure or associate with your store. You need to specify the credentials of the provider account according to the selected type. However, if you do not wish to configure the login provider using your credentials, StoreHippo also offers built-in ready to go social login options that are turned on by default.
- Facebook via StoreHippo: If you want to use the StoreHippo inbuilt Facebook login, you need to select this option. When you select Facebook via StoreHippo, you don't require to enter any credentials for login provider setup.
- Google via StoreHippo: When you select Google via StoreHippo, the StoreHippo's Google login is enabled. When you select Google via StoreHippo, you don't require to enter any credentials for login provider setup.
- Facebook: If you want to configure your own Facebook login, you need to select this option. Click here to know more about configuring Facebook login on your store.
- Google: If you want to configure your own Google login, you need to select this option. Click here to know more about configuring Google login on your store.
Enabling login providers
After you have added the login provider, you now need to allow it to complete the setup. Click on the ellipsis button against the provider and choose the Enable Provider option to activate the login provider.

Clicking on the Enable Provider button will add the login provider from the login/register page.
Deleting Login Providers
You can delete the login providers of your stores to not show them to the users on the login/register page. If you wish to delete any login provider, click on the ellipsis button and choose the Delete option from the drop-down.

Clicking on the Delete button will remove the login provider from the login/register page.
Create a Facebook store
StoreHippo allows you to create a store on your Facebook page to sell products. Once you have your own Facebook Page set up, you can set up your Facebook store as one of the tabs on your Page. StoreHippo can automatically synchronize all your products to your Facebook store.


