-
Email:
[email protected]
Phone:
+918010117117
StoreHippo Help Center
StoreHippo Help Center
- Home
- Mobile Apps
- Mobile signing keys
Mobile signing keys
Mr.Rajiv kumarTo create any mobile apps, you need platform-specific app signing keys. Mobile apps need to be signed with a digital signature before publication, distribution, and installation on any device for testing. These signatures are used by both app stores and devices to verify that apps are authentic. This signing identity consists of a public-private key pair.
The public-private key pair is stored in your keychain, and used by cryptographic functions to generate the signature. Code signing is used to ensure that:
- Your app is built and signed by you or a trusted team member.
- Apps signed by you or your team run only on designated development devices.
- Apps run only on the test devices you specify.
- Your app isn’t using app services you didn’t add to your app.
- Only you can upload builds of your app to App Store Connect in the case of iOS App.
StoreHippo provides you with an easy way to upload the signing keys and digitally sign your app. You just need to upload the signing keys and build the app for adding a digital signature.
You can manage or access the app signing keys in the Mobile apps > Mobile Signing Keys section in the StoreHippo Admin Panel. 
Adding signing keys for the Android app
Once you have generated the signing key for the Android app, follow the steps mentioned below to add a signing for your Android app:
- Go to the Mobile apps > Mobile Signing Keys section.
- Click the Add New button. A new page will open up.

- Provide the following details:
- Title: Provide the name/title for the signing key.
- Type: From the Type dropdown, select the Android option.
- Keystore: Here, upload the keystone file The format for the file should be .jks.
- Key Pw: In this field, enter the key password associated with your Keystore file.
- Alias: Enter the Alias password here.
- After providing the details, click the Save button to apply the changes.
Adding signing keys for the iOS app
Once you have the Certificate and Provisioning profile, you can proceed to add the signing key for the iOS app. To do so, follow the steps mentioned below:
- Go to the Mobile apps > Mobile Signing Keys section.
- Click the Add New button. A new page will open up.

- Provide the following details:
- Title: Provide the name/title for the signing key.
- Type: From the Type dropdown, select the iOS option.
- Certificate Type: Select the certificate type. If you select the .CER type, you need to have a Private key and CSR as well. Click here to know how to generate CSR and key. On the other hand, if you have selected .p12 option, then you don't need to upload the private key.
- Private Key: Here, you need to upload the Private key that you have got while generating the CSR and key.
- Provisioning Profile: In this section, you need to upload the provisioning profile that you have obtained from the Apple Developer account.
- Password: Enter the password to secure the signing key.
- Click the Save button to apply the changes.
Adding signing key to app
After you have added the signing key (Android or iOS), you need to add this to your respective app and build the app. To do so, follow the steps mentioned below:
- Go to
Mobile Apps > Mobile Apps section in the StoreHippo Admin Panel.
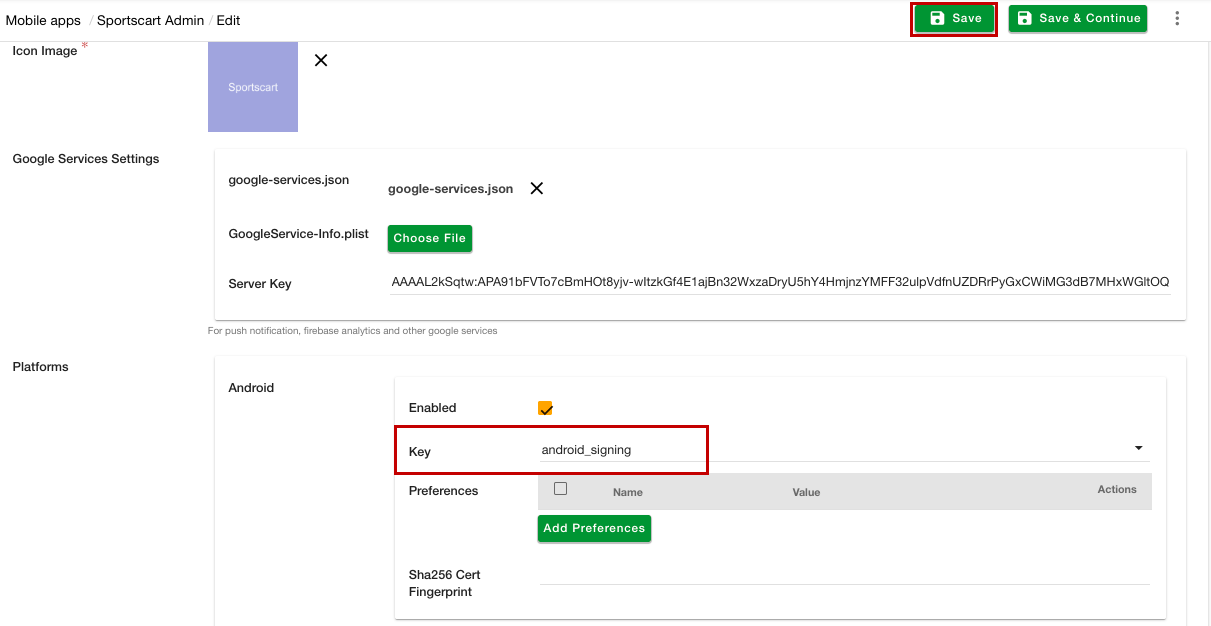
- Proceed to add or edit an app.

- From the Key dropdown under the Platforms section, select the signing key respective to your app.
- Click the Save button.

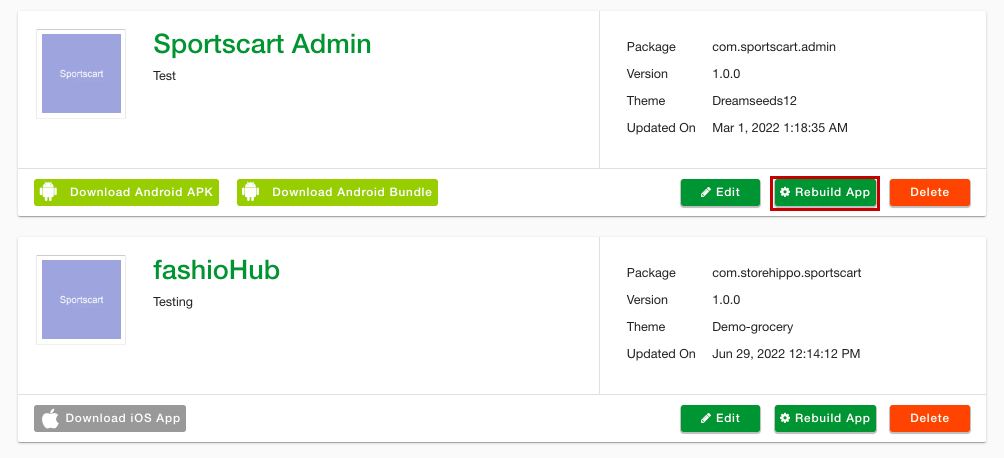
- After saving the details, click on the Rebuild button to reflect the changes in the new build.
Once the app is rebuilt, the app will be signed with the selected signing key.


