- Email:
[email protected]
Phone:
+918010117117
StoreHippo Help Center
StoreHippo Help Center
- Home
- Store Settings
- Substores (Multi Store)
Substores (Multi Store)
Mr.Rajiv kumarAvailable in Enterprise Plan and above.
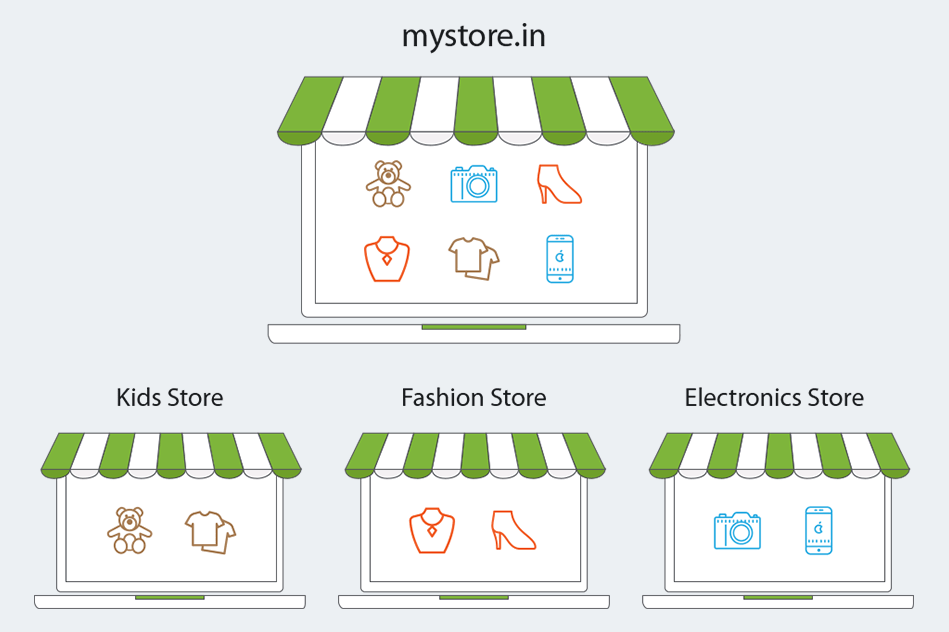
Multi-store ecommerce platform allows you to create sub/child stores within your store. These sub-stores are controlled from a single central dashboard. Your customers can switch between substores to browse products that belong to the selected Substores. You can assign different products, slides, and banners to a particular substore using the same dashboard. The multi-store ecommerce solution can be used for a myriad of use cases. For example:
- You can create substores based on location e.g. you can define one store for each of the city, country or area that you are catering.
- You can have separate substores for different sellers/vendors selling on your website.
- You can also create different substores for different categories of products e.g. you can have separate substores for kids, fashion and electronics categories as given below.

Enable Substores functionality
StoreHippo's multi-store ecommerce software allows you to enable Substores functionality right from the admin console.
To do this;
Go to Settings > Misc section in StoreHippo Admin Panel. Select the Enable Multistore checkbox to enable the multistore functionality.

Create Substores
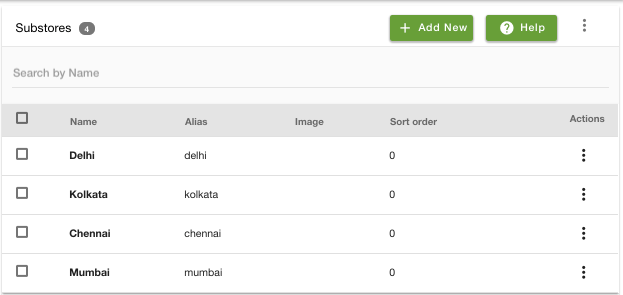
You can manage your substores in Settings > Substores section in StoreHippo Admin Panel. To create a substore, click on Add New button.

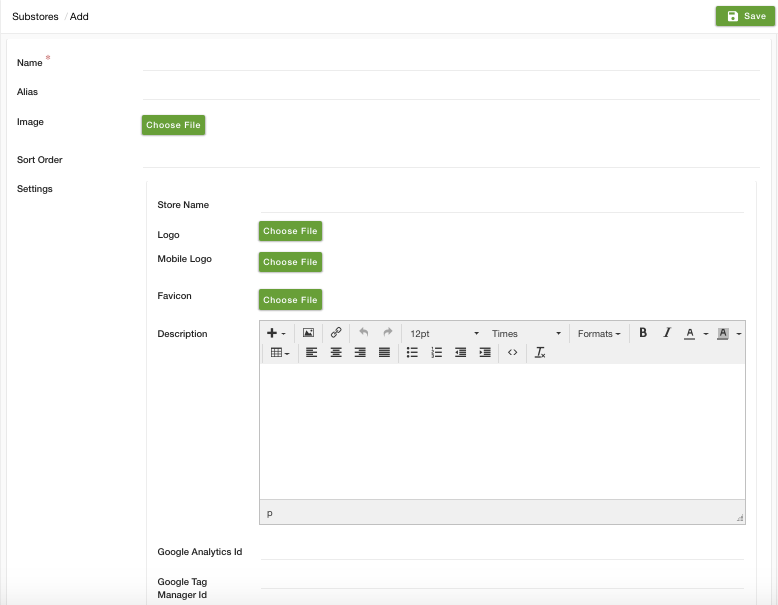
The following form will appear when Add New button is clicked.

Populate the following fields in the form as described as below:
Name
Enter the name of the Substore here. This name will be the display name of the substore on the storefront.
Alias
Alias is created automatically from the name of the substore. Alias is unique for each substore.
Image
Click on Choose file and upload the image for your substore here.
Sort Order
Enter the sort order for your substore in which they will appear on the storefront.
Settings
Provide the following settings about your substore:
Store Name
Enter the name of your substore.
Logo
Upload the logo of your substore here.
Mobile logo
Upload an alternate mobile logo that can be used in mobile themes.
Description
Enter the brief introduction of your substore.
Contact Email
Enter the email id through which your customers can reach out to you.
Contact Phone
Provide the Contact number which will let your customers interact with you.
Link products with Substores
After creating Substores, you need to assign products to each substore on your multi-store ecommerce platform. Once you enable the Substores functionality, the Substores field appears in different entities including products.
To specify Substores in a product, go to Products > Products section in StoreHippo Admin Panel and edit a product to specify the value for the Substore field.
.png)
Below is the list of sections in which you can assign the records to Substores.
Default Substore and Records with blank Substores
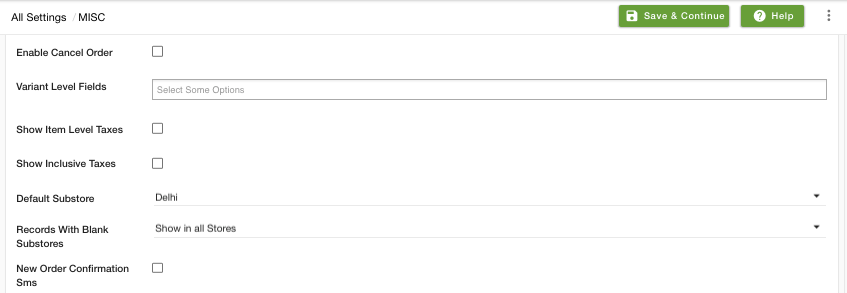
You might also want to select the default substore for your store. When the customer lands on your store the default store will be the first store that is displayed. To do this, go to Settings > MISC section in the StoreHippo Admin Panel.
Find the Default substore field and select the default substore from the drop down.

Records With Blank Substores is an advanced setting which lets you decide if you want to show/hide the records in all sub-stores. When you do not assign substore to any given record, you can select to show or hide the record in all sub-stores from the drop-down list.
Find the Records With Blank Substores field and select an option from the drop-down.
This will complete the set-up of a sub-store on your multi-store website.
Example
Following are some of the examples of different use-cases of substores that can be created using the StoreHippo multi-store solution.
FAQ
Yes, the sellers can be integrated with their own payment gateway. To do so, you need to create the seller based substores and with each substore the payment gateway can be integrated.
Your customers can access the store as per their geolocation. For this, you need to create a substore and assign the products to the substore created. You can set different substores for different locations by setting up Store variants.
Please refer to the following topic for the complete procedure: How to set IP based substore?
Customer login session is linked to the domain/subdomain so if your
When a substore is changed on the storefront, the cart gets cleared.
Yes, you can upload logos for individual substores while adding or editing a substore. Upload the logo of your substore in the Logo field.
Yes, there is a limit of 10 sub-stores in the Enterprise Plan, hosted on same domain. Platinum plan provides higher limits with subdomain & multidomain capacities.


