- Email:
[email protected]
Phone:
+918010117117
StoreHippo Help Center
StoreHippo Help Center
- Home
- Building the iOS Mobile App
- Publishing iOS mobile app on App Store
Publishing iOS mobile app on App Store
Mr.Rajiv kumarYou need to submit your app for review to make it live to the App Store. Before proceeding to submit your iOS app for review, you need to fulfill the following prerequisites:
- Register for the Apple Developer program: First of all, you need to register for the Apple Developer program. Click here, to know more about registering for the Apple Developer program.
- Building the app: After registering for using distribution certificates and profiles, you need to build the iOS app with distribution certificate and profile.
- Create an App Store Connect record for the app: You need to have an App Store Connect record to upload and publish your iOS app to the App Store. Click here to know more about creating an App Store Connect record for an app.
- Upload the app: You need to upload the build of your app that you want to push live. You can upload the app through the Transporter app.
Design Your App Store Product Page
Designing your App Store product page means providing the required screenshots, app details, and other information about the app. 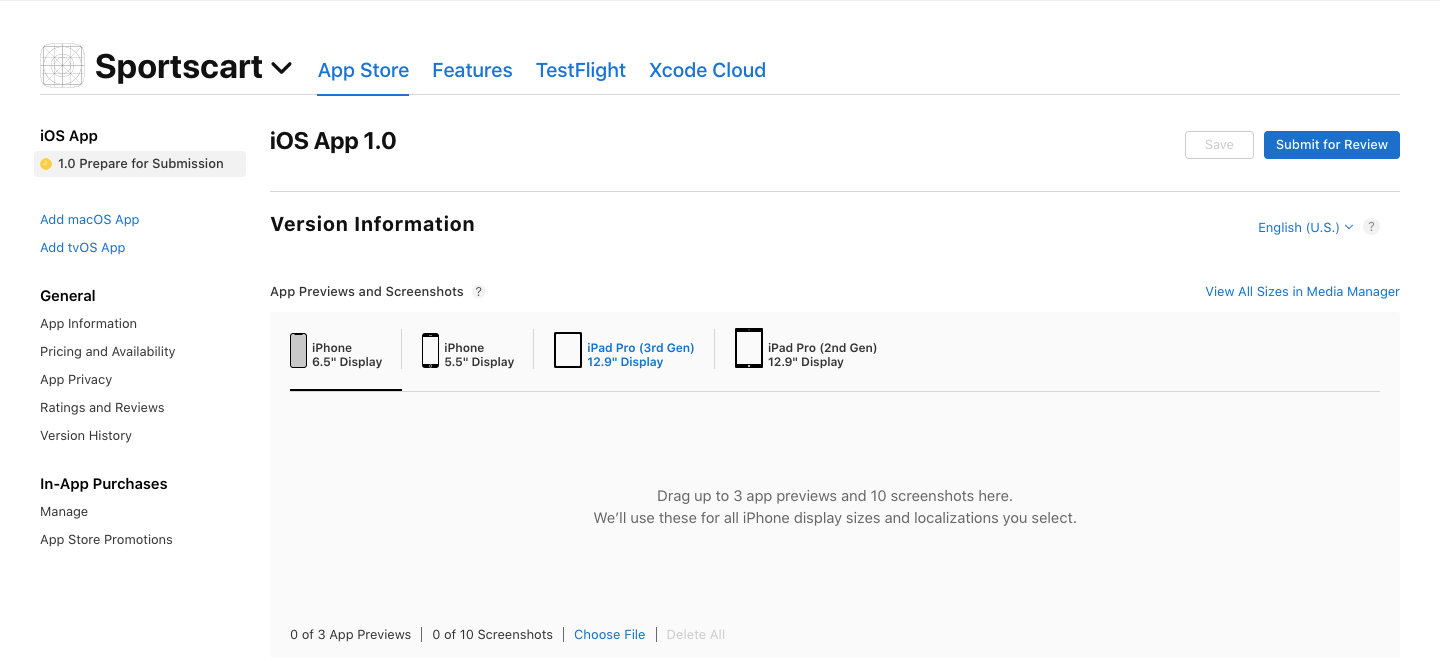
App screenshots
You need to provide app screenshots for different iOS devices. When creating screenshots to be posted to the store, you need the specific size of screenshots related to iPhone or iPad. Specifications of screenshots are to be kept in mind while uploading them. You should always provide screenshots in portrait or landscape mode and use the highest resolution Retina devices to make the screenshots.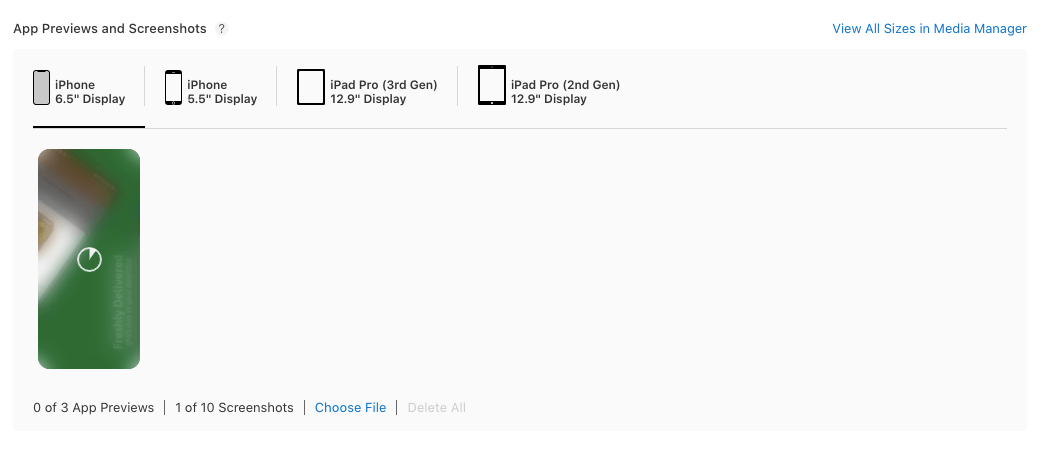
You can click on the Choose File button and upload the screenshots for each device respectively.
App details
You need to provide app details that would help your iOS app to get discovered on the App Store. The following app details will be required: 
- Promotional Text: The Promotional Text is a section of an iOS app page that provides quick information about the app. This can include short pitches or taglines, but a common purpose is to let users know about promotions and changes for the app.
- Description: Provide the description of your app, detailing features and functionality.
- Keywords: Here, you need to include one or more keywords that describe your app. Keywords make App Store search results more accurate. You need to separate keywords with an English comma, a Chinese comma, or a mix of both.
- Support URL: In this field mention a URL with support information for your app. This URL will be visible on the App Store.
- Marketing URL: Provide a URL with marketing information about your app. This URL will be visible on the App Store. This field is optional.
Select the Build
Before proceeding to submit the app for review, you need to select the iOS build. Click on the plus (+) icon. 
A pop will open up. 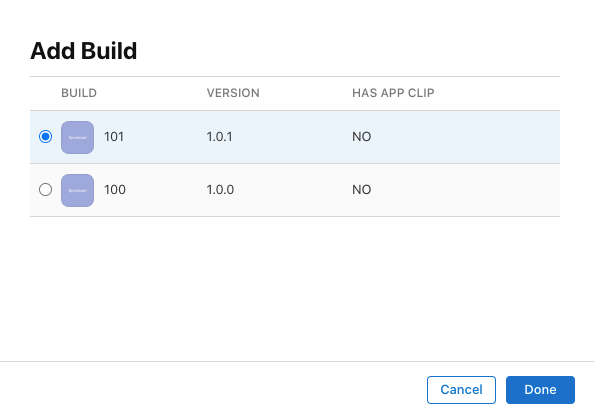
Select the build that you want to submit for review. Click the Done button.
General App Information
In this section, you need to provide the general app information, which includes app version, copyright, and routing info. 
- Version: In this field, you need to provide the version number of the app. The numbering should follow software versioning conventions.
- Copyright: Here, you need to provide the name of the person or entity that owns the exclusive rights to your app, preceded by the year the rights were obtained (for example, "2008 Acme Inc."). Do not provide a URL.
- Routing App Coverage File: In this field, you can upload the file specifying the geographic regions supported by your app. The file must be in the .geojson format and can only contain one MultiPolygon element. This field is optional.
App Review Information
In this section, you need to provide the App review information, such as if login is mandatory in your app or not, contact information if the reviewing team wants to provide any feedback, and so on. 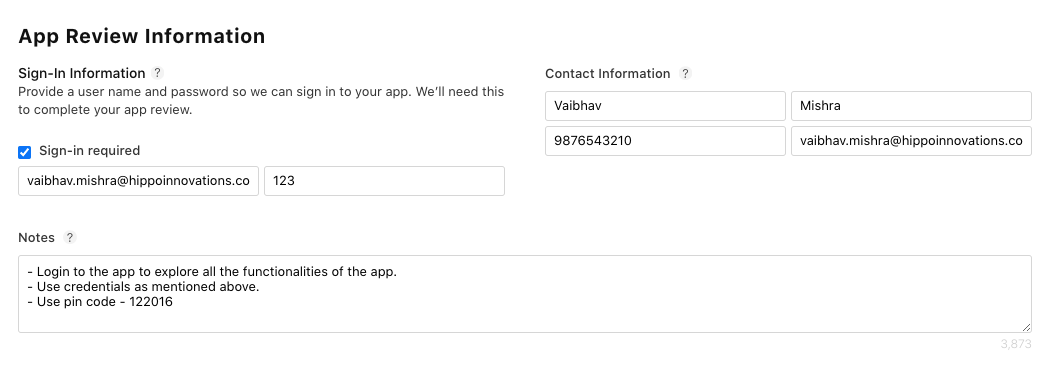
You need to provide the following app review information:
- Contact Information: Enter the First name, Last name, Email, and Phone number as the contact information. It could be the details of any person in your organization who should be contacted if the App Review team has any questions or needs additional information.
- Sign in required: Select the checkbox, if sign-in is required in your app for testing. Provide the testing username and password. The Apple team will review your app using the same credentials.
- Notes: In this field, you need to provide additional information about your apps. Additional information about your app can help during the review process. Include information that may be needed to test your app, such as app-specific settings.
Version release
In this section, you need to select when to release the version of your app. You can either automatically released the version right after it has been approved by App Review or you can also manually release it at a later date on the App Store Connect website or in App Store Connect for iOS. There are three options:
- Manually release this version
- Automatically release this version
- Automatically release this version after App Review, no earlier than
App Information
Click on the App Information button to go to the App information page. 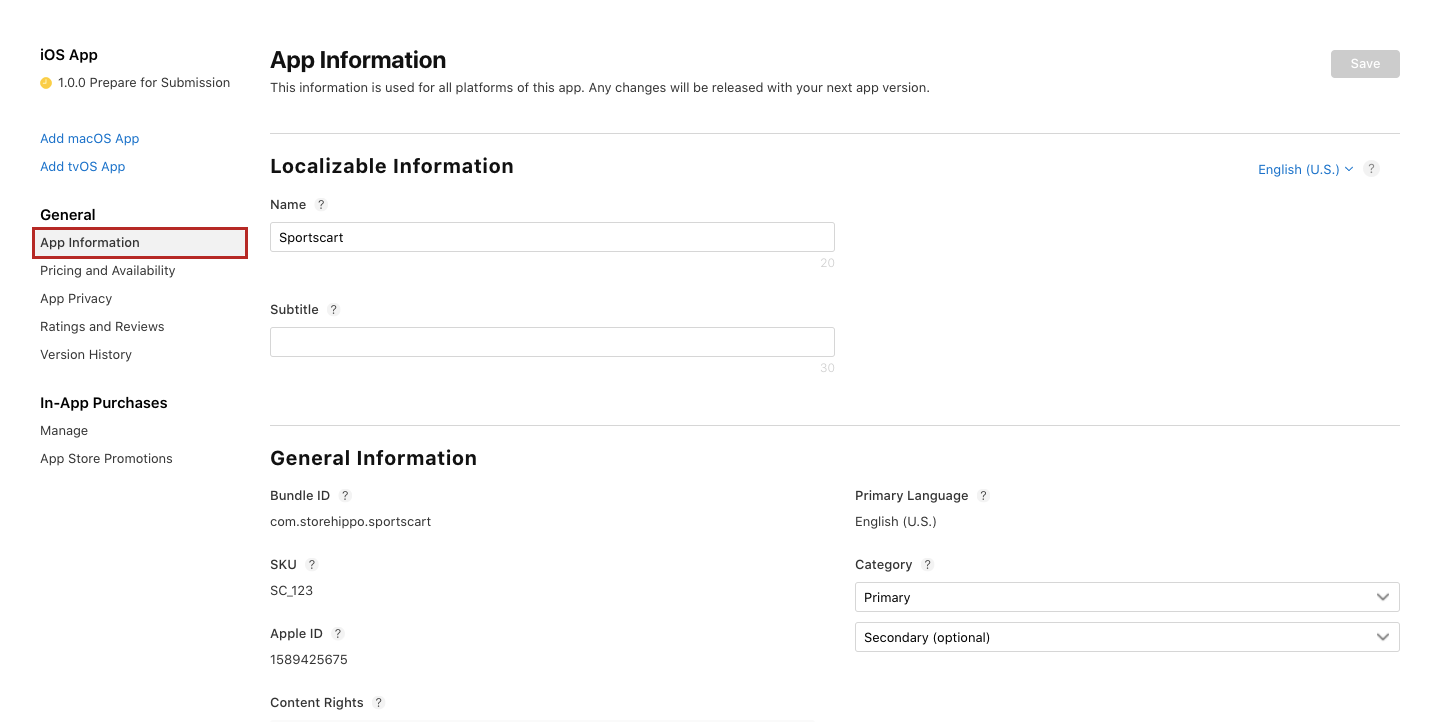
Here, you need to define the app information, such as app name, category, and so on.
Localizable Information
In this section, you need to enter the localizable information about the app. 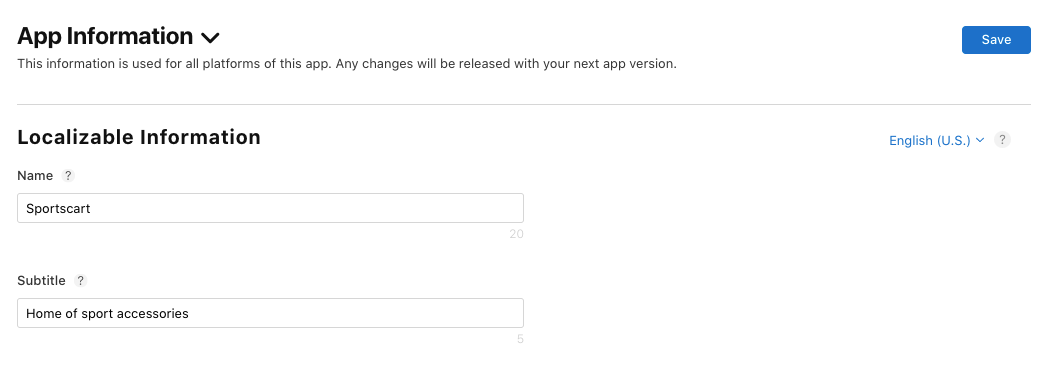
If you want to publish your app in two languages, then you will have to provide two names for the app. One for each language.
- Name: In this field, enter the localized name for your app.
- Subtitle: In this field, provide the localized subtitle for your app.
The name and subtitle of your app will be reviewed before publishing your app.
General Information
This section contains the info, such as bundle ID, the primary language of your app, SKU, app category, and so on. Some fields are pre-filed which is defined while creating an App Store Connect record for the app. 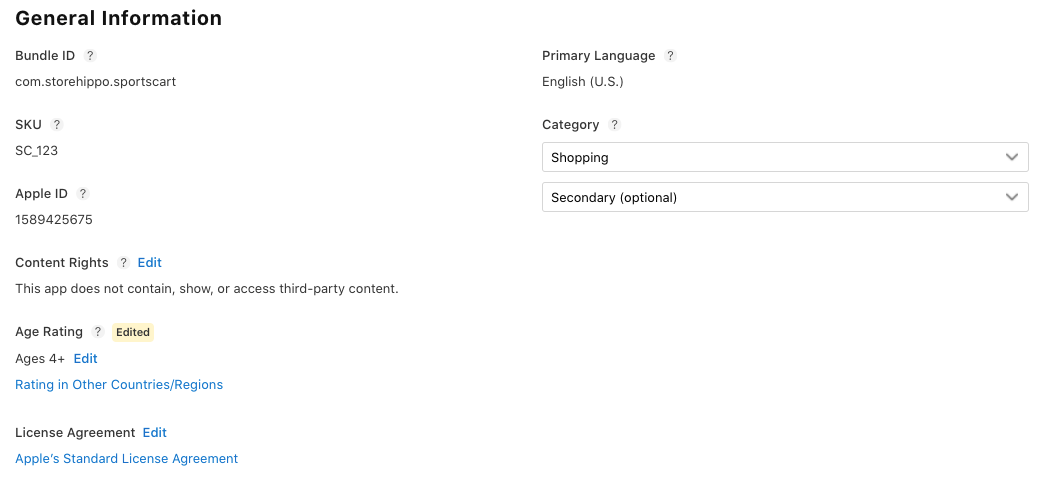
- Bundle ID: The bundle ID is provided by you while creating the app record. It acts as an identifier for your app and cannot be changed.
- Primary Language: The primary language of the app is selected while creating an app record. However, it can be changed while submitting a new app build.
- SKU: The SKU is a unique ID for your app that is not visible on the App Store.
- Category: You need to define your app category. You can also define the secondary category of your app.
- Apple ID: It is an automatically generated ID assigned to your app.
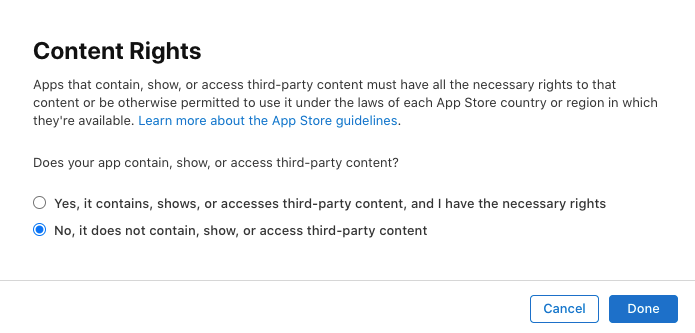
- Content Rights: In this field, you need to set up the content rights. Click on the Set up content rights information link. A dialog box will open up. Here, you need to specify the content rights.
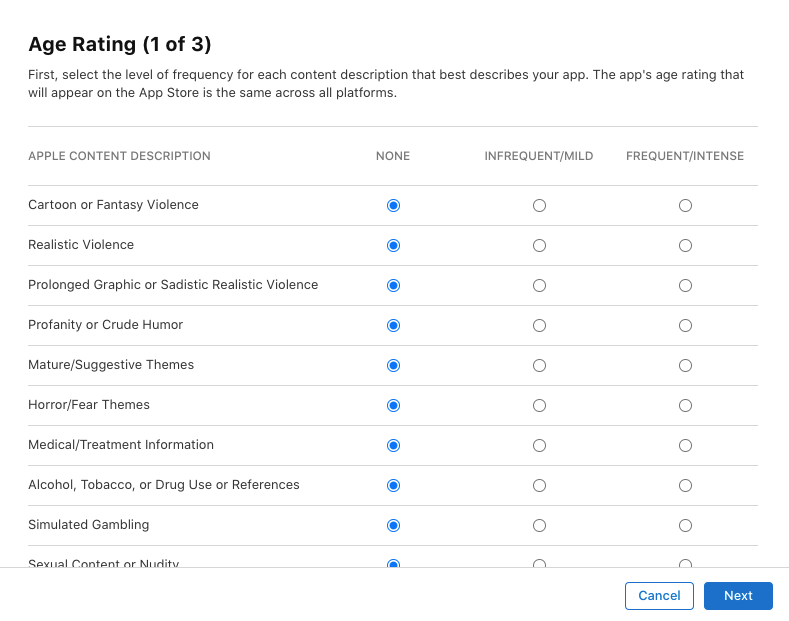
- Age Rating: In this section, you need to define the app content. After selecting the Apple content description, click the Next button.
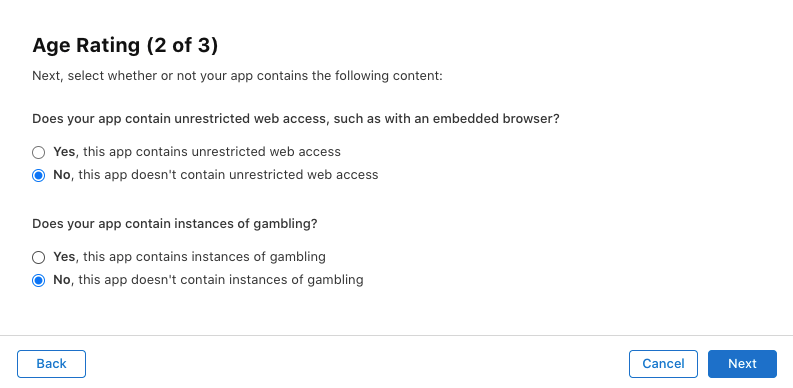
 Next, define the age rating and click the Next button.
 Select the Made for kids or Restrict to 17+ option(s) which is applicable. Click the Done button.
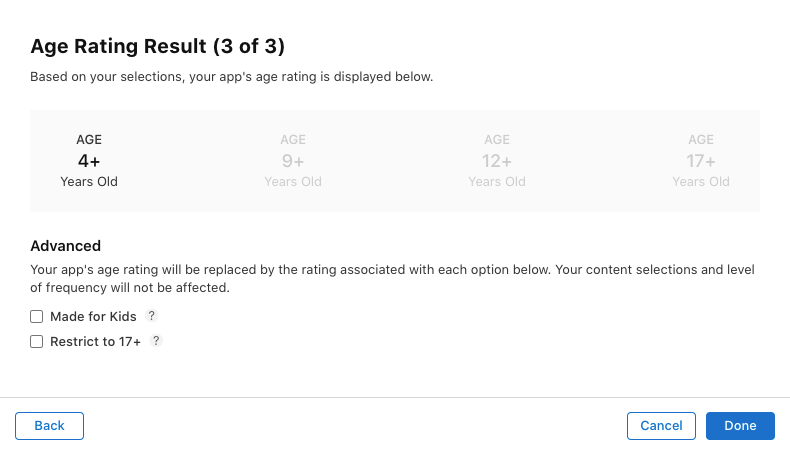 This app's age rating will appear on the App Store across all your platforms.
 - License Agreement: Select the license agreement applicable for your app.
Additional Information
In this section, you can view the app on App Store or remove the app from the App Store. You can also the edit the user access in this section.
- View on App Store: Clicking on this link will redirect you to your app page on the App Store.
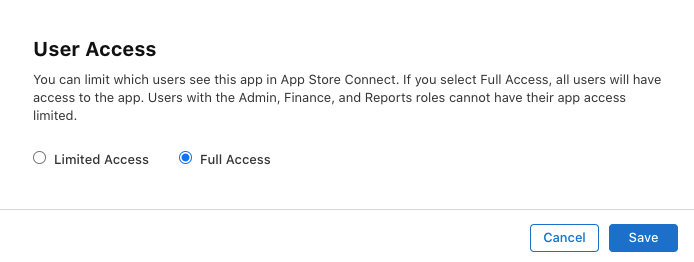
- Edit User Access: You can manage the user access.
- Remove App: Clicking on this option will remove the app from the App Store.
Pricing and Availability
In this section, you can define the pricing and availability of the app. 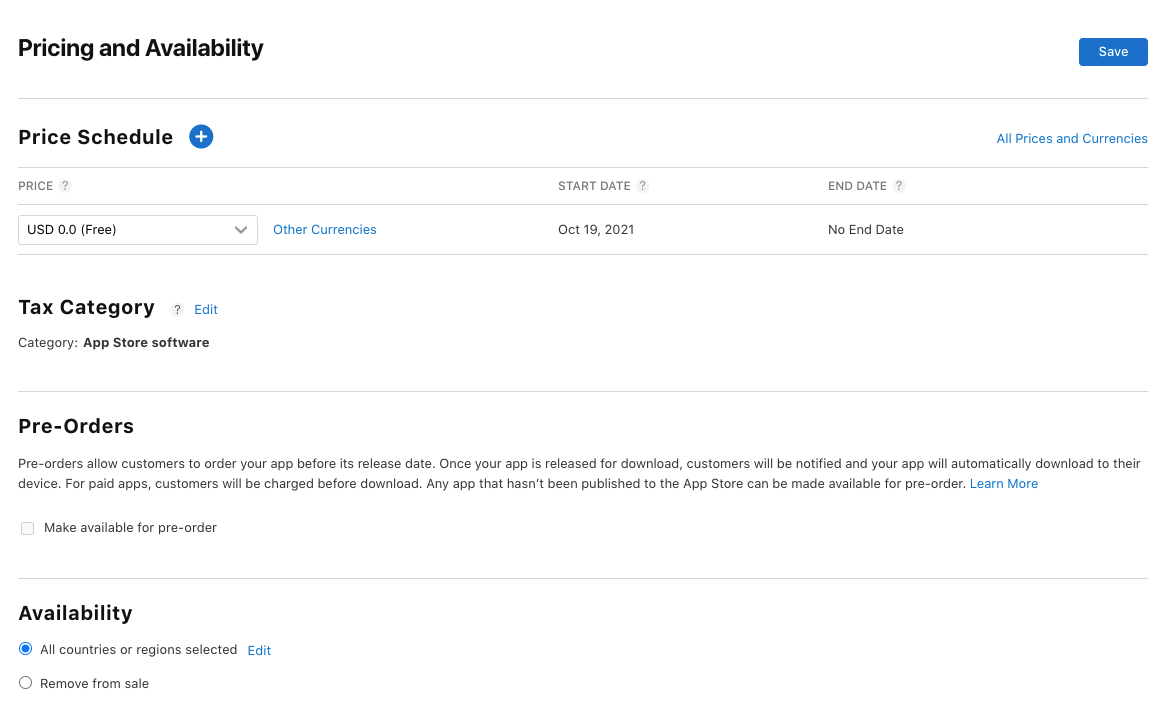
App Privacy
In this section, enter the app privacy details. The following privacy details are required: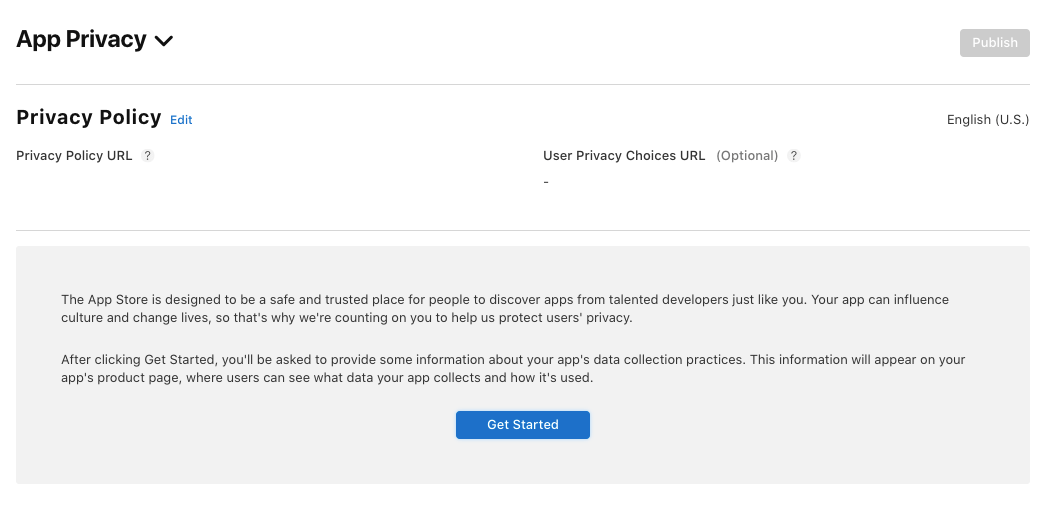
Privacy Policy
In this field, enter the privacy policy URL of your app. 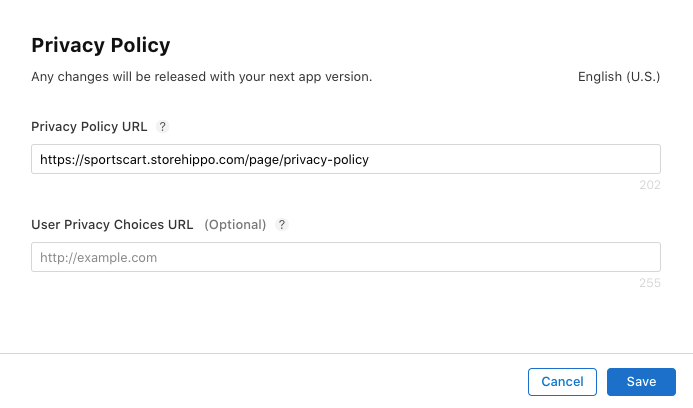
Data Collection
In this field, you need to provide information that what data your app collects from the app. 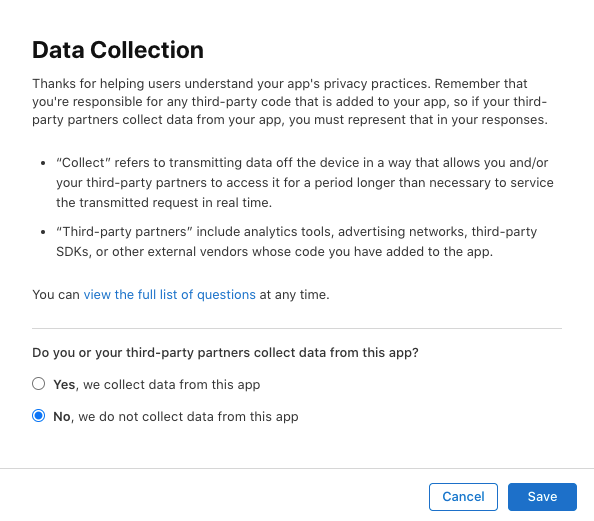
Submitting your iOS App
After providing the app details, screenshots, and privacy information, and selecting the app build, you can proceed to submit the app for review.
If Apple rejects your build or metadata, the app status changes to Rejected, and App Store Connect users are notified of the specific issues.


 Select the Made for kids or Restrict to 17+ option(s) which is applicable. Click the Done button.
 This app's age rating will appear on the App Store across all your platforms.


