- Email:
[email protected]
Phone:
+918010117117
StoreHippo Help Center
StoreHippo Help Center
- Home
- Setting up Payment Methods
- Setting Up Apple Pay As Payment Method
Setting Up Apple Pay As Payment Method
Mr.Rajiv kumarStoreHippo supports the Payfort payment gateway with the Apple Pay extension. This helps you to set Apple Pay as the payment method in your store.
Important characteristics of Apple Pay Payment Services (Payfort) Extension:
- Easy checkout after selecting the "Apple Pay" and placing a finger on the Touch ID of an Apple device.
- It also holds the central features for a safe and reliable shopping experience for customers at your store.
- Admin side configuration options.
Benefits:
- Reduced Flow in cart abandoned.
- The ability to convert customers that would not have been able to complete purchases.
- Highly Safe and confidential Payment Facilities.
Apple Pay provides an easy and secure way to make payments in your iOS apps, watchOS apps, and on websites in Safari. Setting up Apple Pay as the payment method in your store, involves the following six steps:
Creating the Payfort account
First of all, you need to create a Payfort account and register as a merchant. To register as a merchant, visit the Payfort and register yourself by clicking the Join us button.

Register for Apple Developer Program
After registering on Payfort, you need to register for the Apple developer program. To register for the Apple developer program, visit the Apple developer site and register yourself.
Generating CSR
After you have registered for the Apple developer program, you need to generate the CSR. Apple requires a CSR for generating certificates. StoreHippo provides the support to generate CSR on its platform from the Admin panel. For more information on how to generate CSR, you can refer to Generating Key and CSR.
Generating Certificates
Once you have created the CSR file, you can proceed with generating certificates. You need to generate Apple Pay Payment Processing and Apple Pay Merchant ID certificate. Follow the steps below to create certificates:
- Log on to the Apple developer account.
- Click Certificates, IDs & Profiles option.

- Click the Add (+) button.
- Select Apple Pay Payment Processing Certificate option.
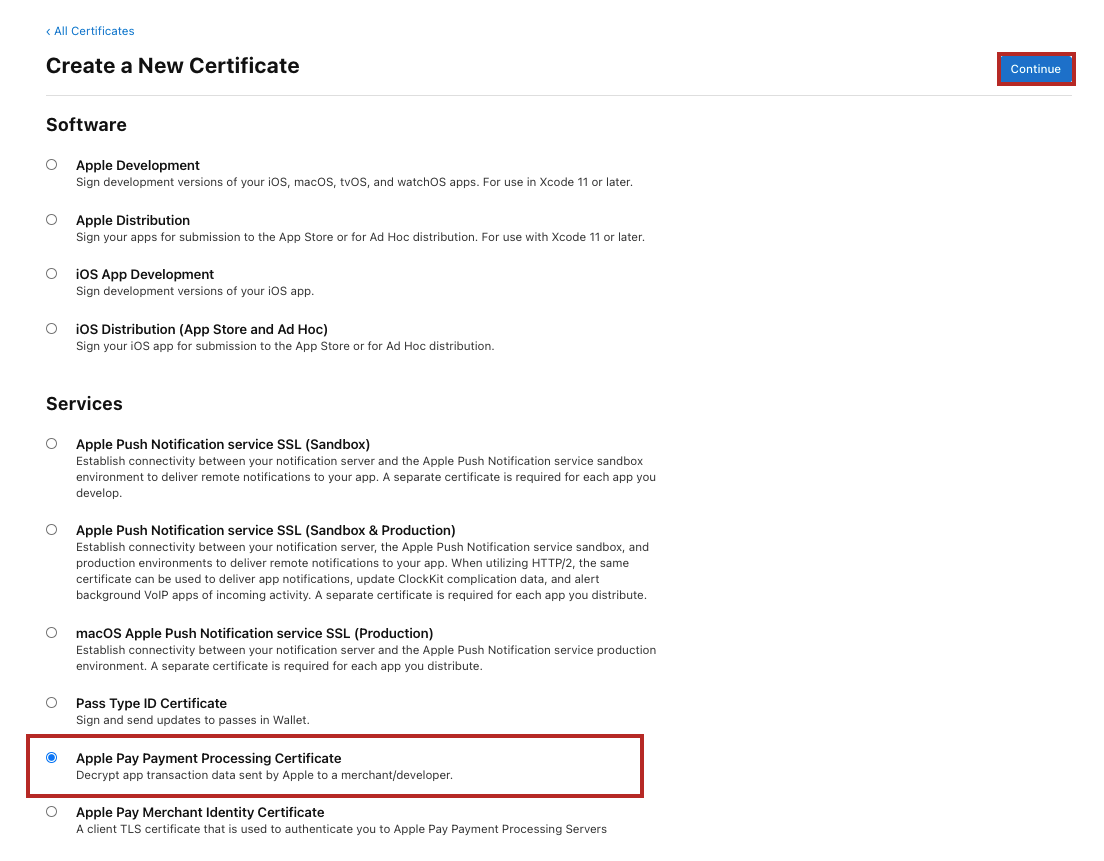
- Click the Continue button.
- Select the Merchant ID and click the Continue button.
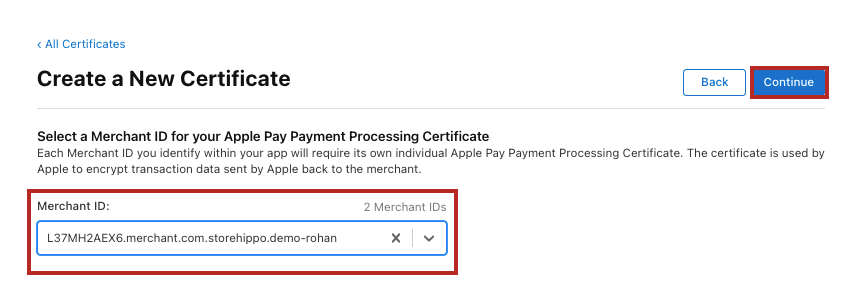
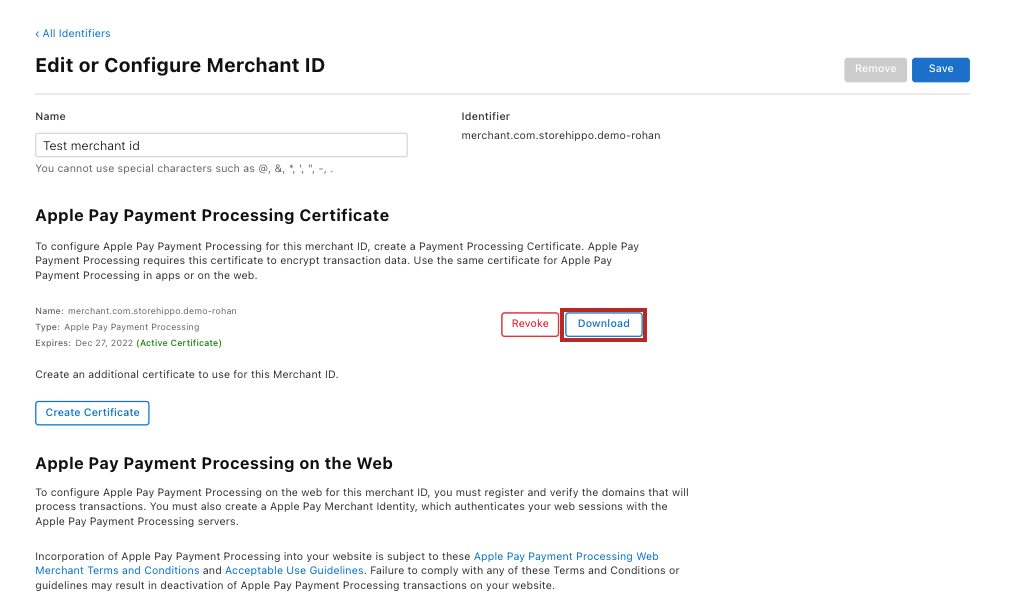
- Download the Apple Pay Payment Processing Certificate by clicking the Download option under it.
- Click the Verify button under the Merchant Domains section to get the domain verified.
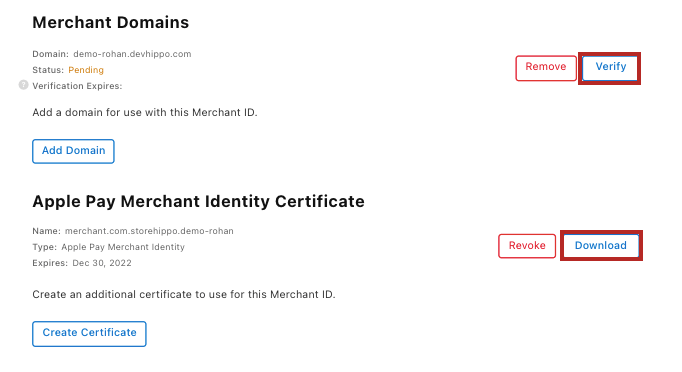
- Similarly, download the Apple Pay Merchant Identity Certificate by clicking the Download option under it.
Setting up Apple Pay As Payment Method
After you have got the certificates and keys, you can proceed to set up Apple Pay as the payment method in your store. Follow the below steps to set up Apple Pay as payment methods:
- Go to the Settings > Payment Methods section of the StoreHippo Admin Panel.
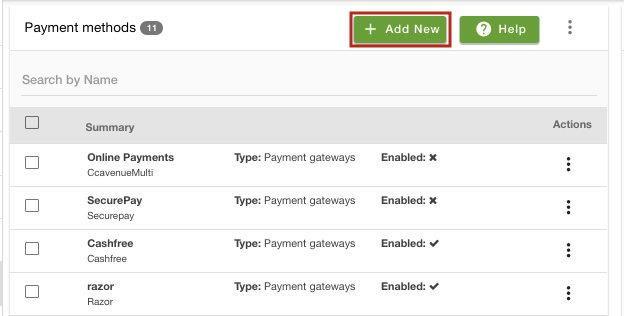
- Click the Add New button. This will open up a form.
- Enter the name of the payment method in the Name field.
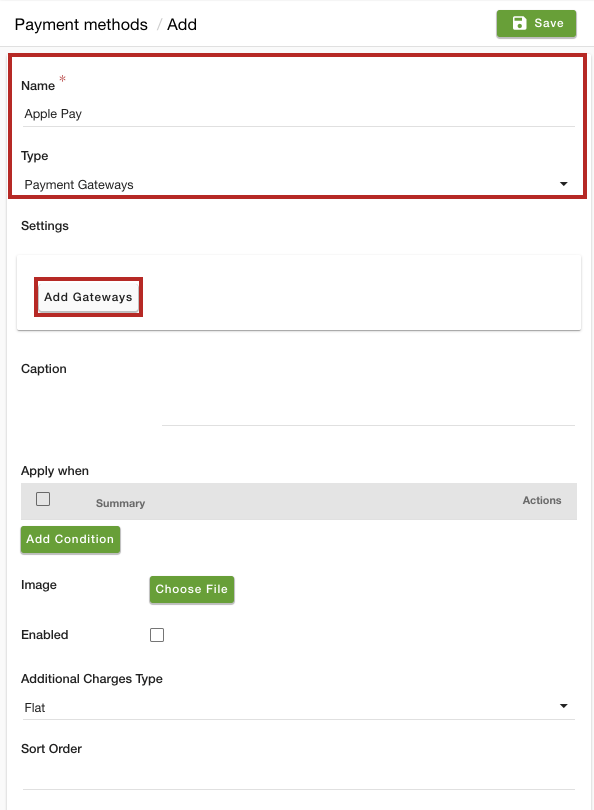
- Select the Type as Payment Gateways.
- Click the Add Gateways button.
- Select PayfortApplepay from the dropdown. The following fields will appear:
- Merchant ID: In this field, enter the merchant ID provided by Payfort. Merchant ID is the unique identifier issued to every merchant.
- Access Code: Enter the access code provided by Payfort. This is a unique access code used for the secure encryption of every request.
- SHA Request Phrase: In this field, enter the SHA Request Phrase value provided by Payfort. This value is used when the Merchant generates the request signature.
- SHA Response Phrase: In this field, enter the SHA Request Phrase value provided by Payfort. This value is used by the system to generate the response signature for the Merchant's Request.
- Apple Pay Merchant ID: Enter the Apple Pay merchant ID. A unique identifier that represents a merchant for Apple Pay.
- Apple Pay Initiative Context: Enter the fully qualified domain name associated with your Apple Pay Merchant Identity Certificate. For the initiative context parameter, you need to pass the payment gateway URL.
- Apple Pay Certificate Content: In this field, enter the content of the Apple Pay certificate.
- Apple Pay Key Content: In this field, enter the content of the Apple Pay key.
- Enter the values for these fields.
- Provide the caption, condition, and image for the payment method if needed.
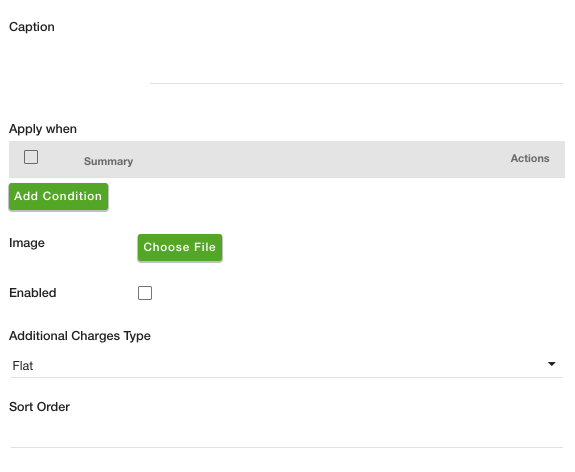
- Select the Enabled checkbox to make the payment method active.
- Choose the additional charge type and enter the sot order value if required.
- Click the Save button.
Now, the Apple Pay payment method will be added to your store.


