Helpcenter +918010117117 https://help.storehippo.com/s/573db3149f0d58741f0cc63b/6969f0c18a8568e4561210d8/storehippo-logo-500-1--480x480.png" [email protected] https://www.facebook.com/StoreHippohttps://twitter.com/StoreHippohttps://www.linkedin.com/company/hippoinnovations/https://plus.google.com/+Storehippo/posts
B4,309-10 Spaze iTech Park, Sector 49, Sohna Road, 122001 Gurgaon India
Create a Trial Store StoreHippo.com Contact Us
- Email:
[email protected]
Phone:
+918010117117
StoreHippo Help Center
StoreHippo Help Center
call to replace anchor tags contains '/admin' in href2017-01-09T06:39:15.076Z 2021-02-25T13:52:44.805Z
- Home
- Login Providers
- Setting up Google Login
Setting up Google Login
Mr.Rajiv kumarStoreHippo allows your customers to log in to their stores through Google. To set up the custom google login, you need to generate the API key and API secret through your Gmail account. To generate the API key and API secret follow the steps mentioned below:
Creating project in Google Developer Console
- Login to your Google Developer Console account.
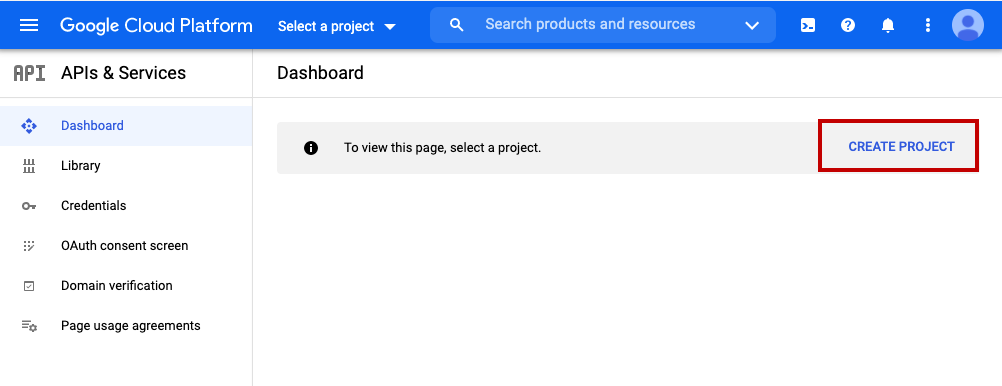
- Proceed to create a new project by clicking the Create Project button.
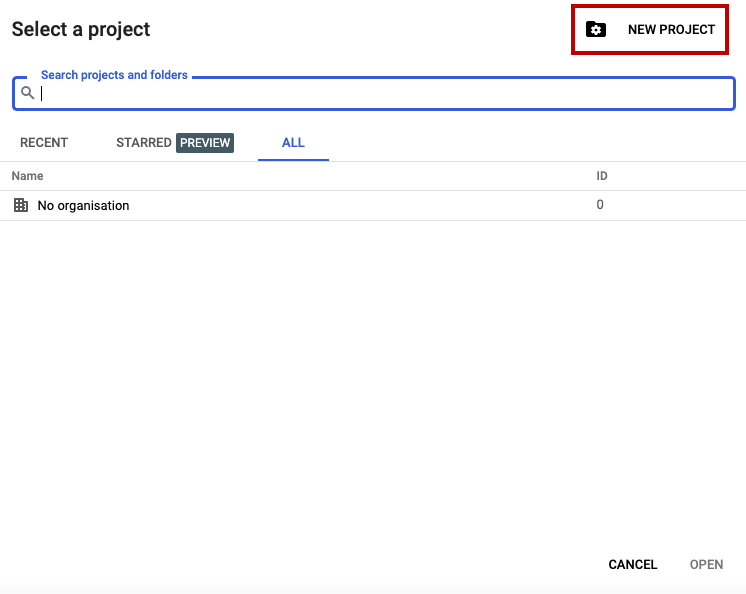
- A new page will open up. Click the New Project button to add a new project.
- Provide the name of the project in the Project Name field and select the project location if needed.
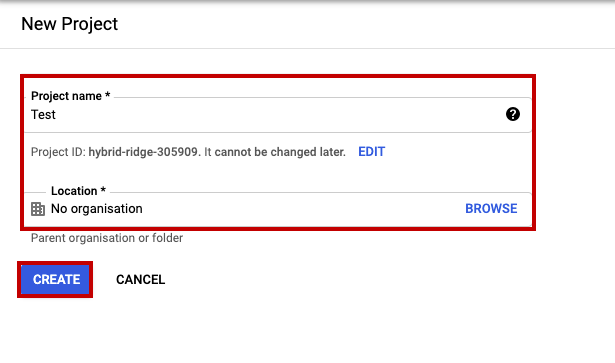
- After providing the details, click the Create button.
Enabling Google+ API
Once you have created the project, you need to enable Google+ API.
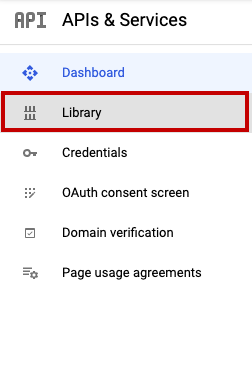
- Click the Library option in the left panel of the dashboard.
- In the API library, scroll down for Social.
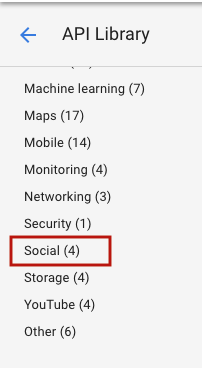
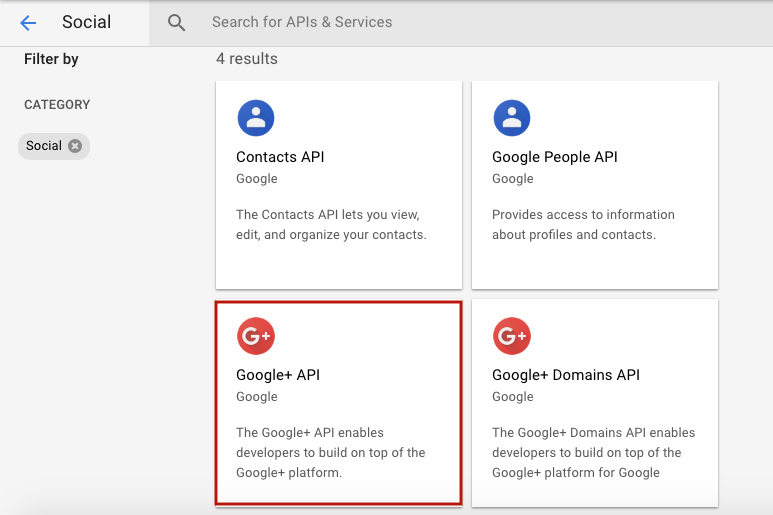
- Select the Google+ API under Social APIs.
- In the next window, click on the Enable button to enable Google+API.

The Google+ API will be enabled now.
Creating credentials
After enabling Google+ API, go back on the API and Services to create the credentials.
- Click the Credentials option.
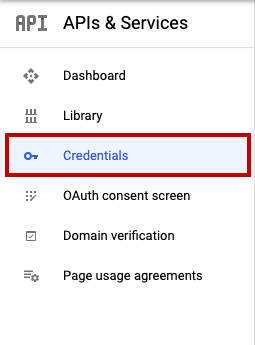
- Click on Configure consent screen.

- Select the External option and click the Create button.
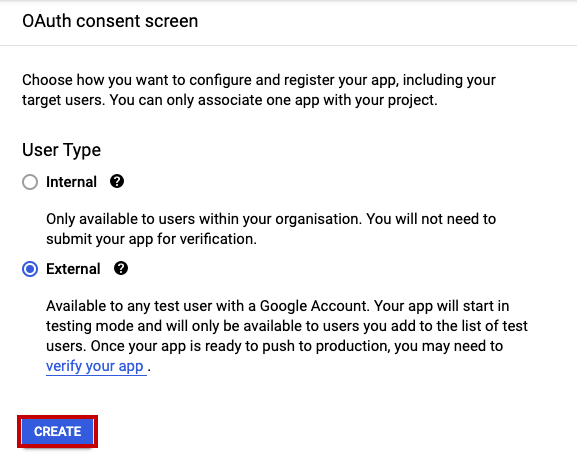
- Enter the Application name, application logo, homepage URL, etc., and save the form.
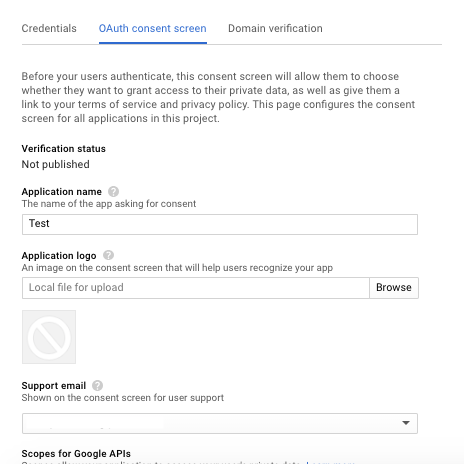
- If these details are already added, you can proceed with the next steps.
- Click the Create credentials button and select OAuth Client ID option.
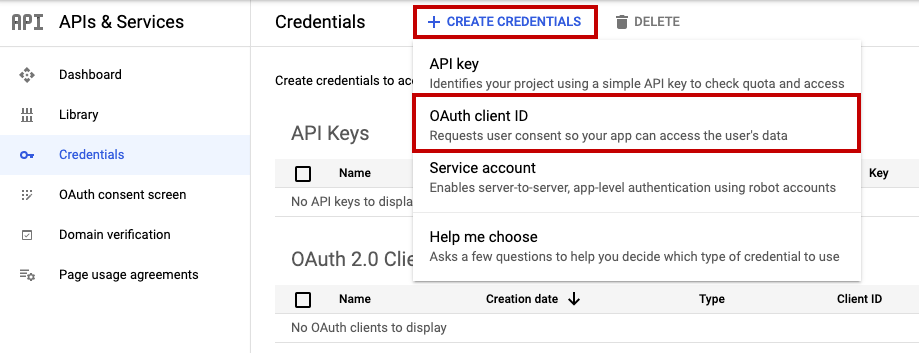
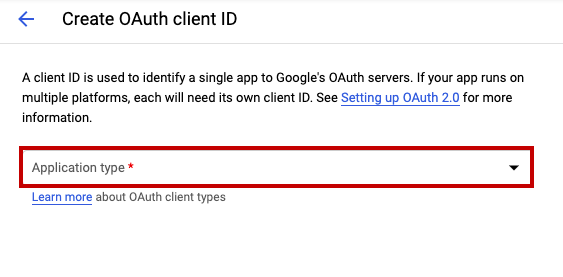
- Choose Web application from the Application type dropdown.
- Enter the name of the OAuth client in the Name field.
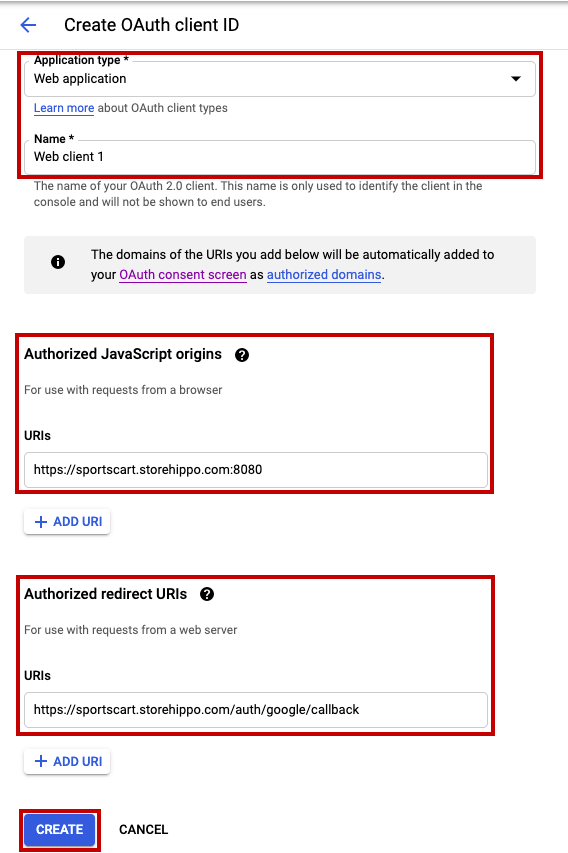
- In the Authorized JavaScript origins field, mention the domain URL as followed by ":8080", for example - https://sportscart.storehippo.com:8080.
- In the Authorized redirect URIs field, mention the domain URL followed by "/auth/google/callback", for example - https://sportscart.storehippo.com/auth/google/callback. Refer to the above image.
- Click the Create button. The credentials will be created now.
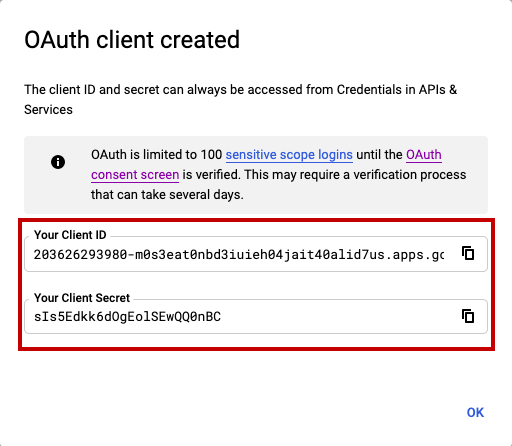
- Copy the Client ID and Client Secret generated.
Configuring Google login in StoreHippo
Once you have got the client ID and client secret, you need to configure Google login in the StoreHippo admin panel.
- Go to the Settings > Login providers section in the StoreHippo Admin Panel.
- Click the Add New button to provide login provider for Google.
- In the Title field, provide the name of the login provider.
- Select the Type as Google.
- Enter the Client ID and Client Secret that you have got from the Google Developer Console in the API Key and API Secret field respectively.
- Select Permissions from the drop-down.

- You can provide the logo if needed.
- Click the Save button to apply the changes.

- Enable the login provider.
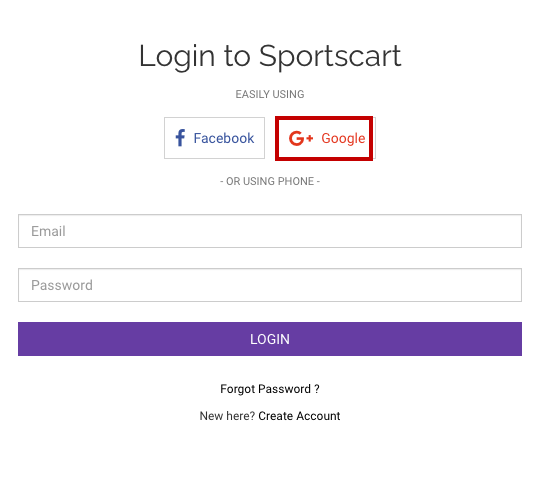
Now, the login with Google will available on the login page and the users can login via Google.
Table of Contents
Creating project in Google Developer Console
Enabling Google+ API
Creating credentials
Configuring Google login in StoreHippo
Subtopics
Related Topics
In This Topic


