
StoreHippo Help Center
StoreHippo Help Center
Ship Now
Mr.Rajiv kumarStoreHippo provides seamlessly integrated shipping solution, ShipKaro to all of StoreHippo customers. StoreHippo customers can simply start using the service to ship their orders through one of the many providers without needing to create an account with them. The integration support both regular and COD orders.
Open Ship Now from an order
Go to Orders in the StoreHippo Admin Panel and open the order you want to ship. In the order details, find Shipping Status and click Ship now. The Ship Order window opens.
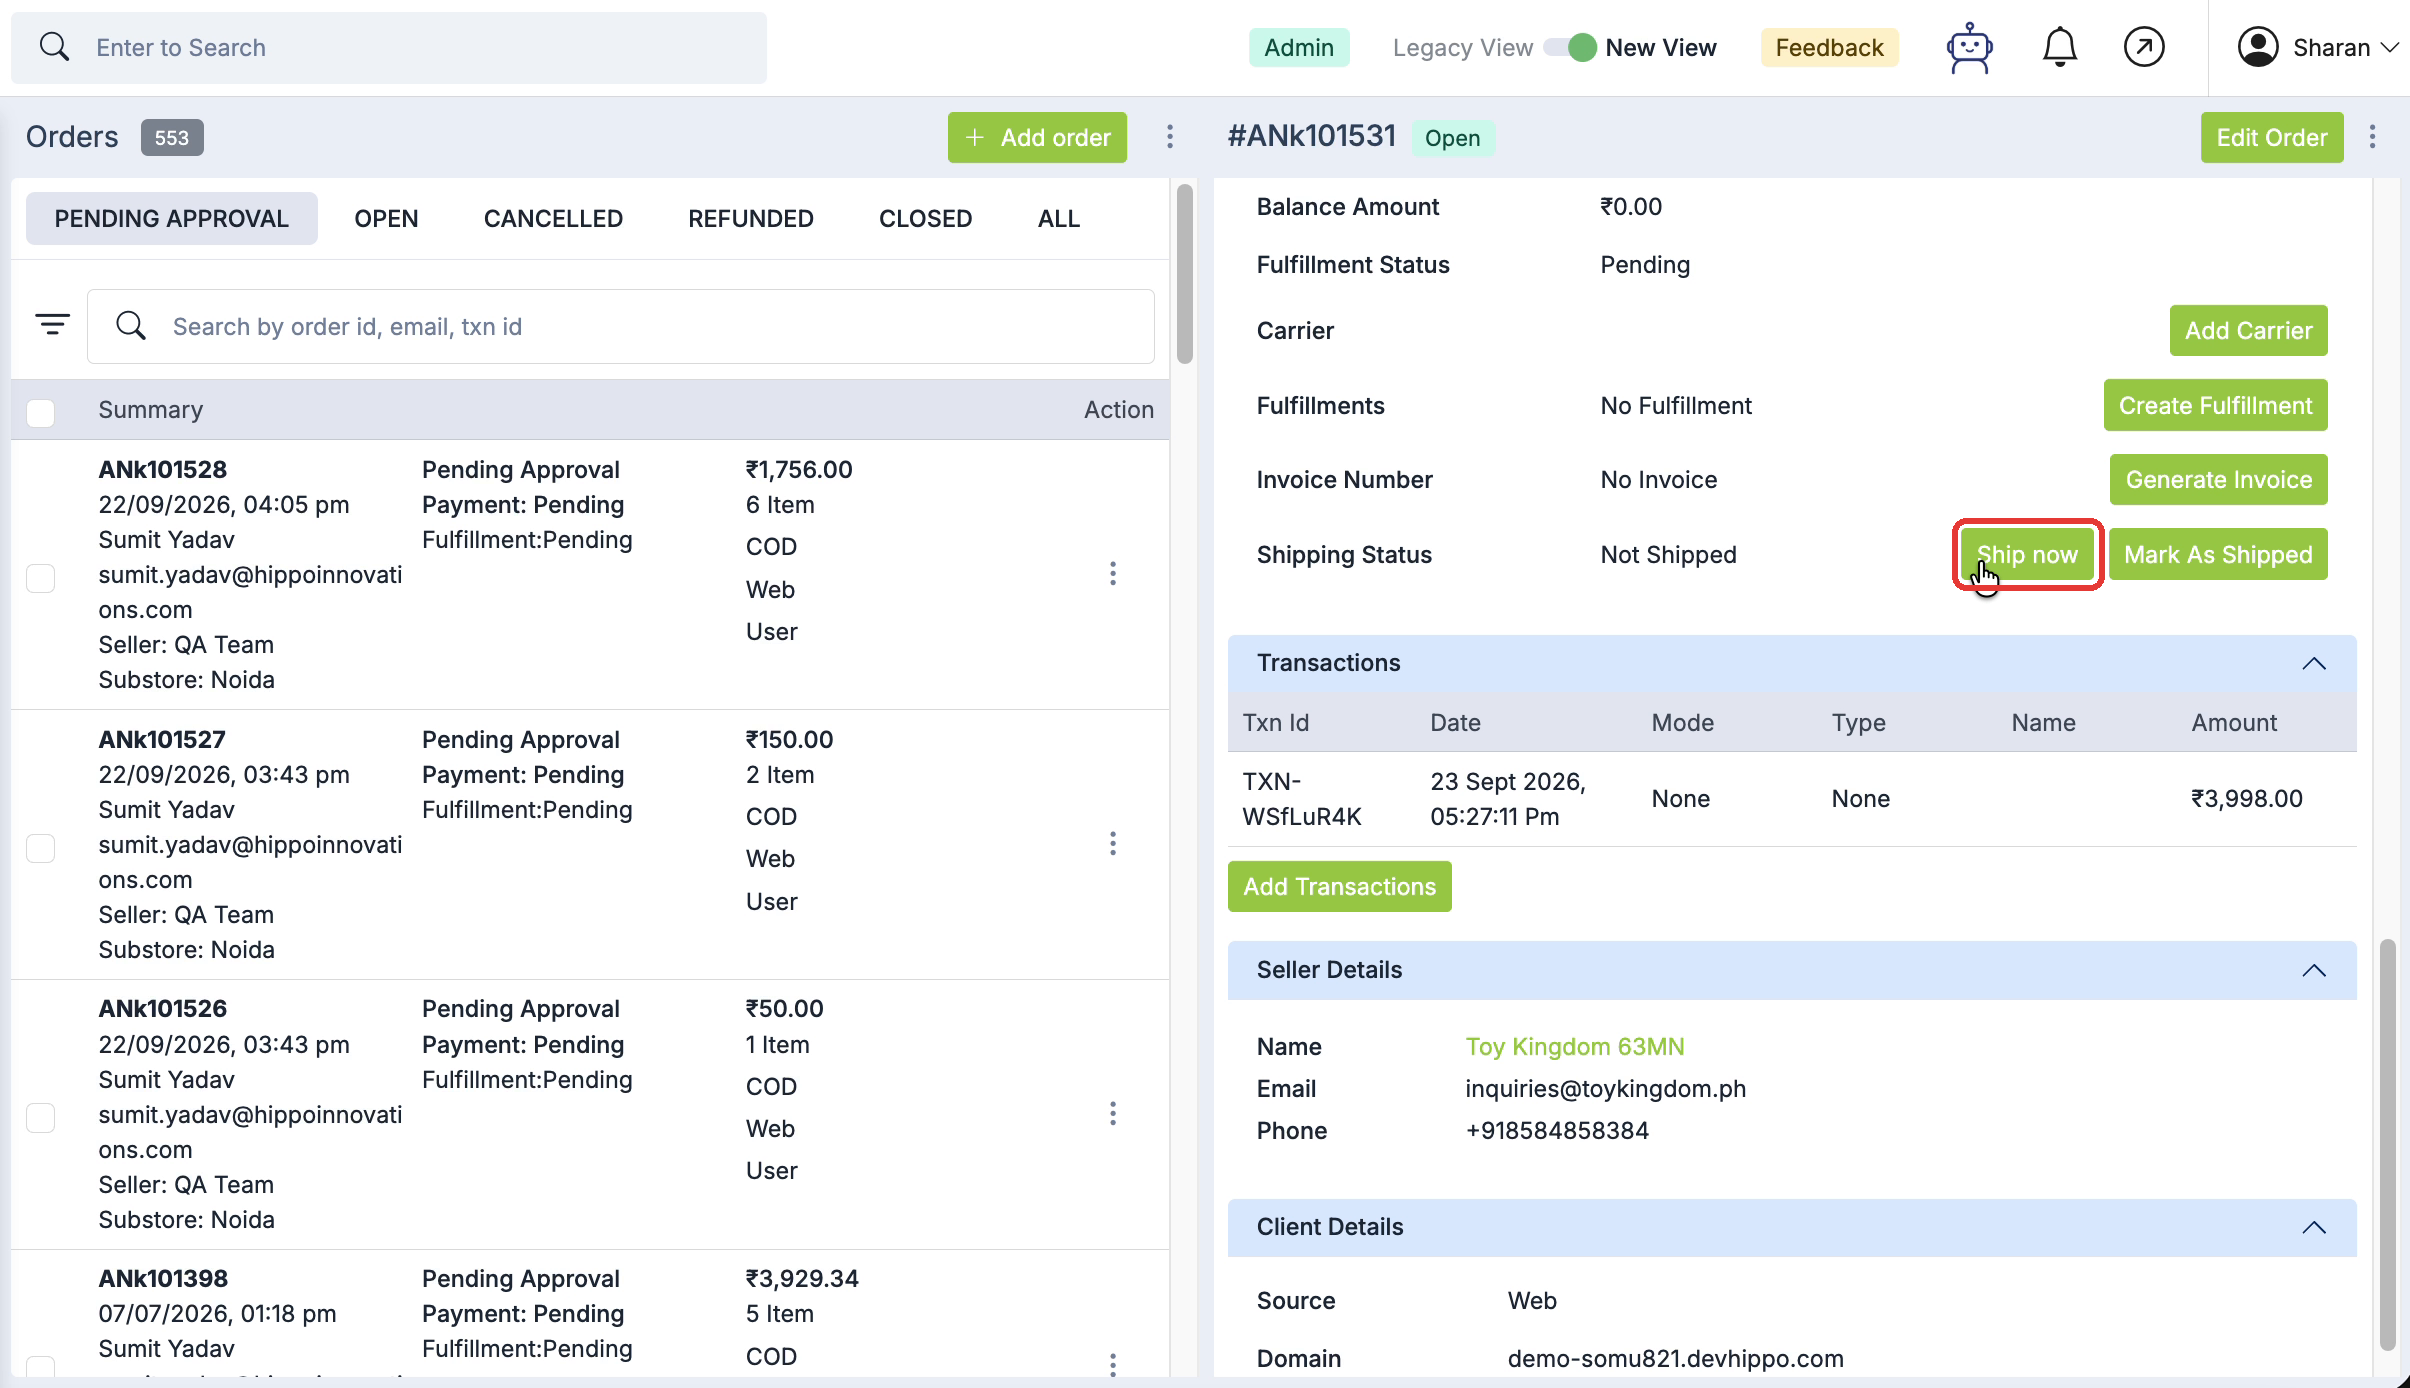
The Ship now button appears next to Shipping Status while the order is not yet shipped.
Step 1: Shipment details
The window opens on the Shipment Details step. It has three columns: pickup address, delivery address, and package details. Review each one before you fetch rates.
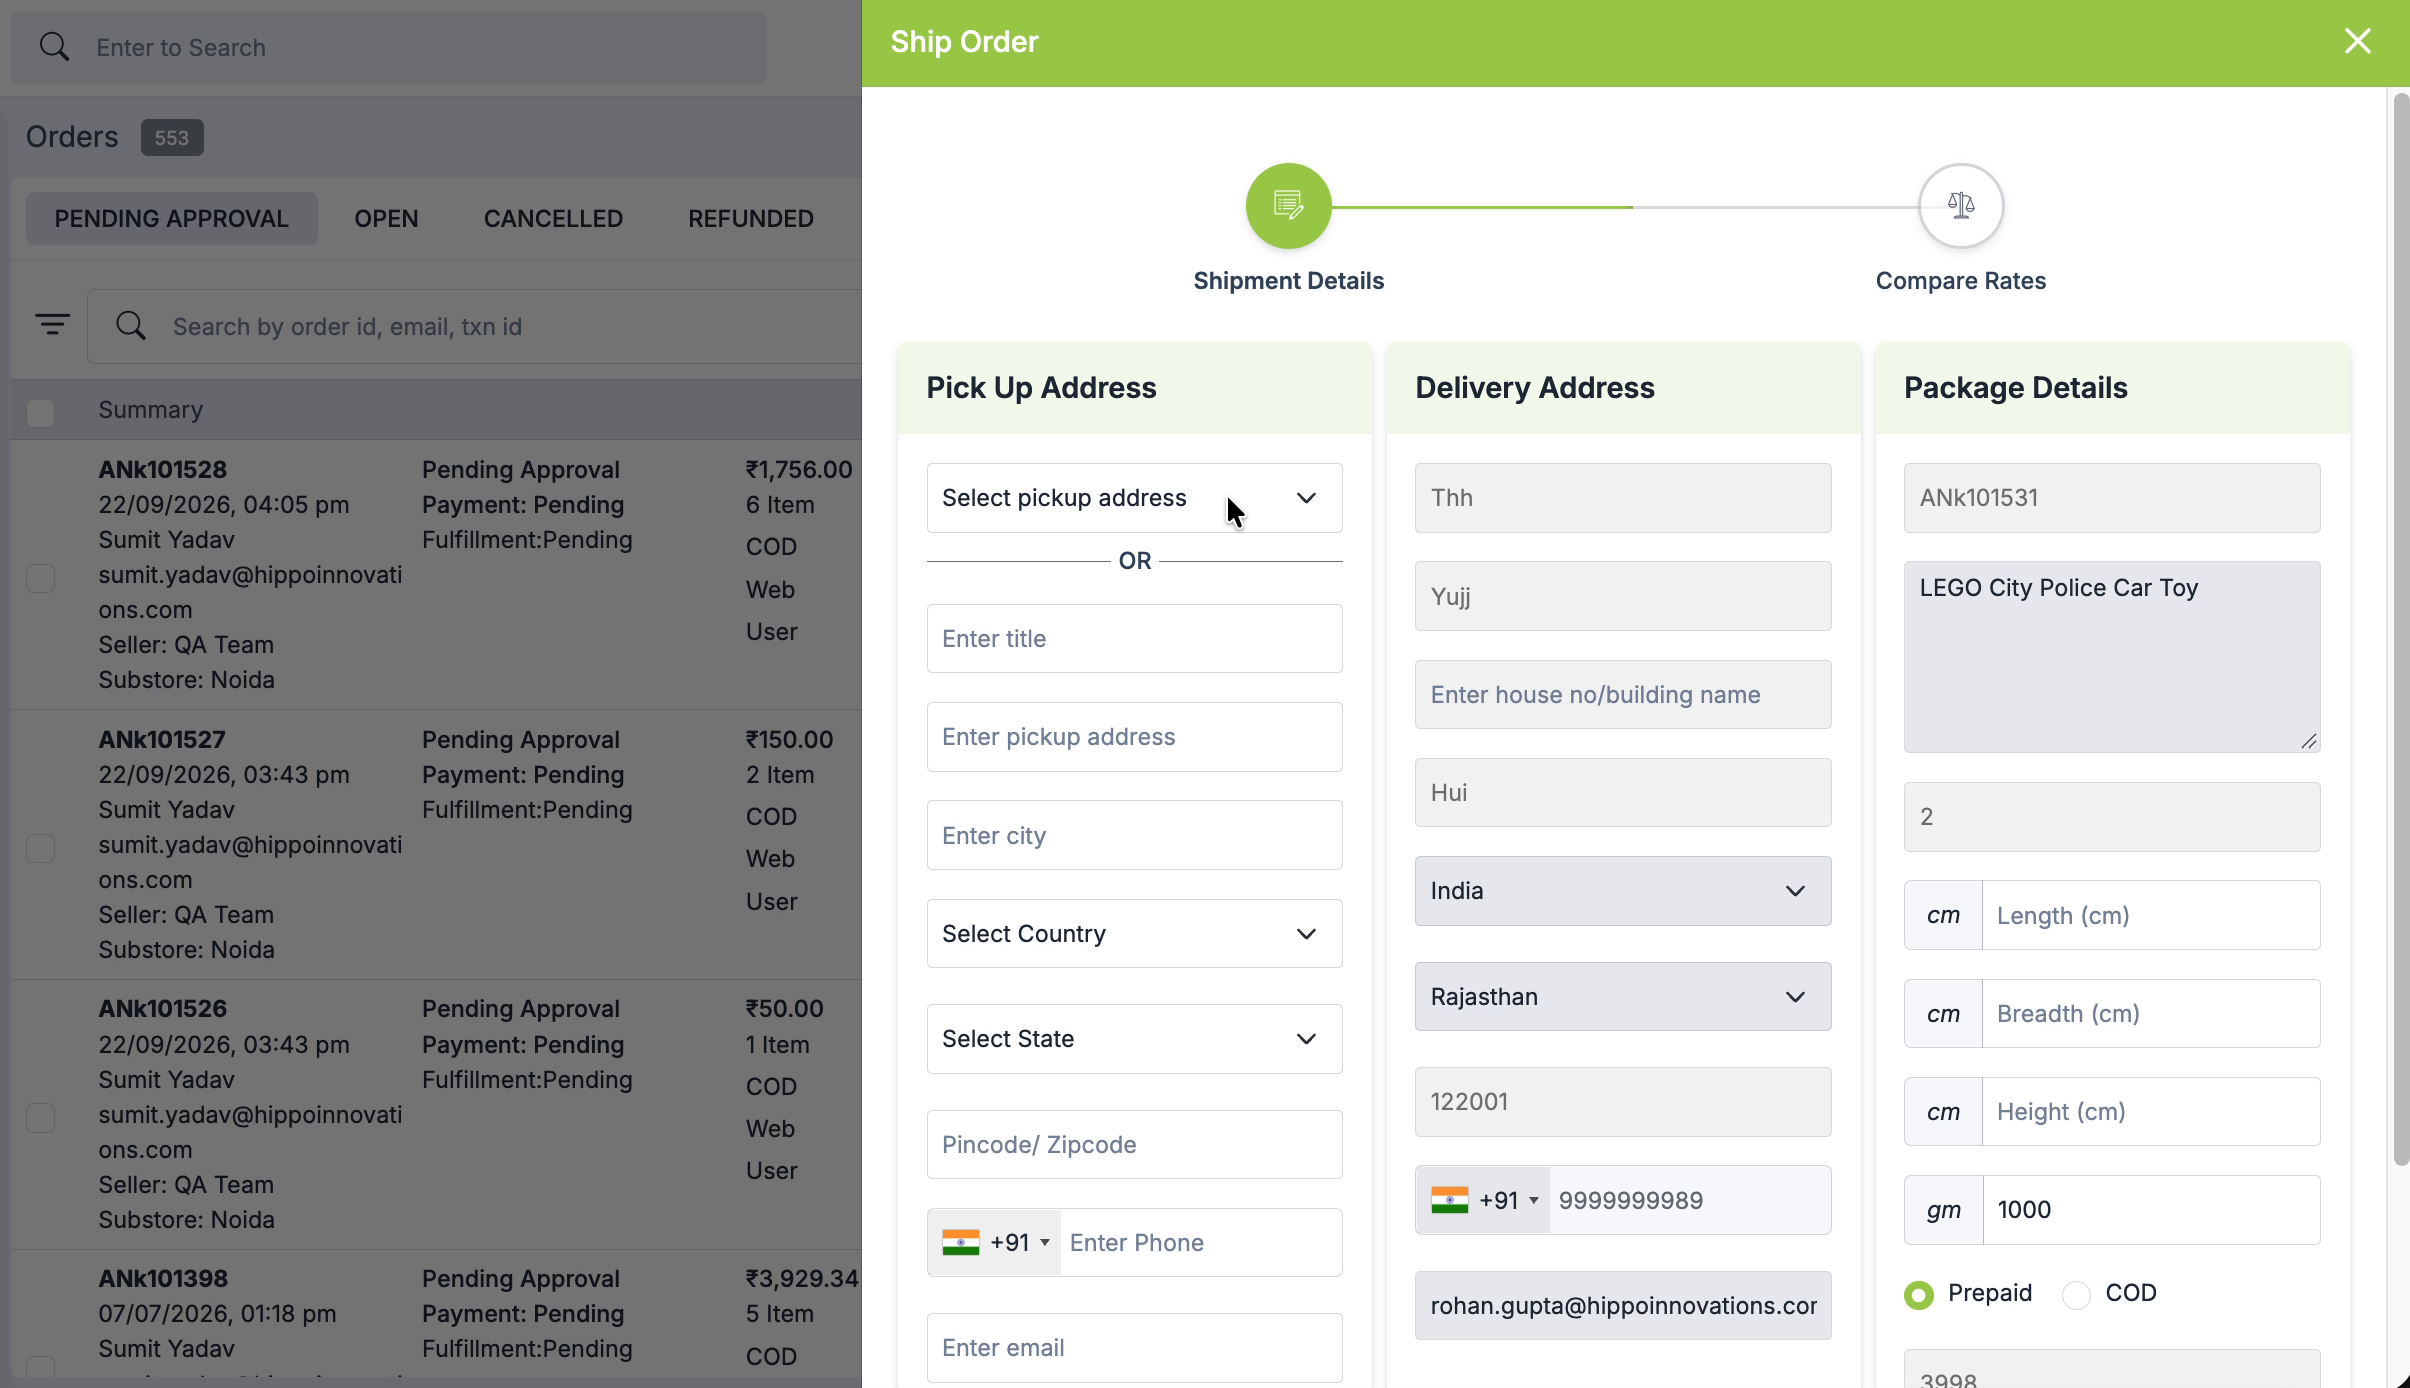
Pickup address
This is where the courier collects the package. Choose a saved address from Select pickup address and its details fill in automatically. To use a different address, type it in the fields below: title, address, city, country, state, pincode, phone and email. Tick Save Address to keep it in your store locations for next time.
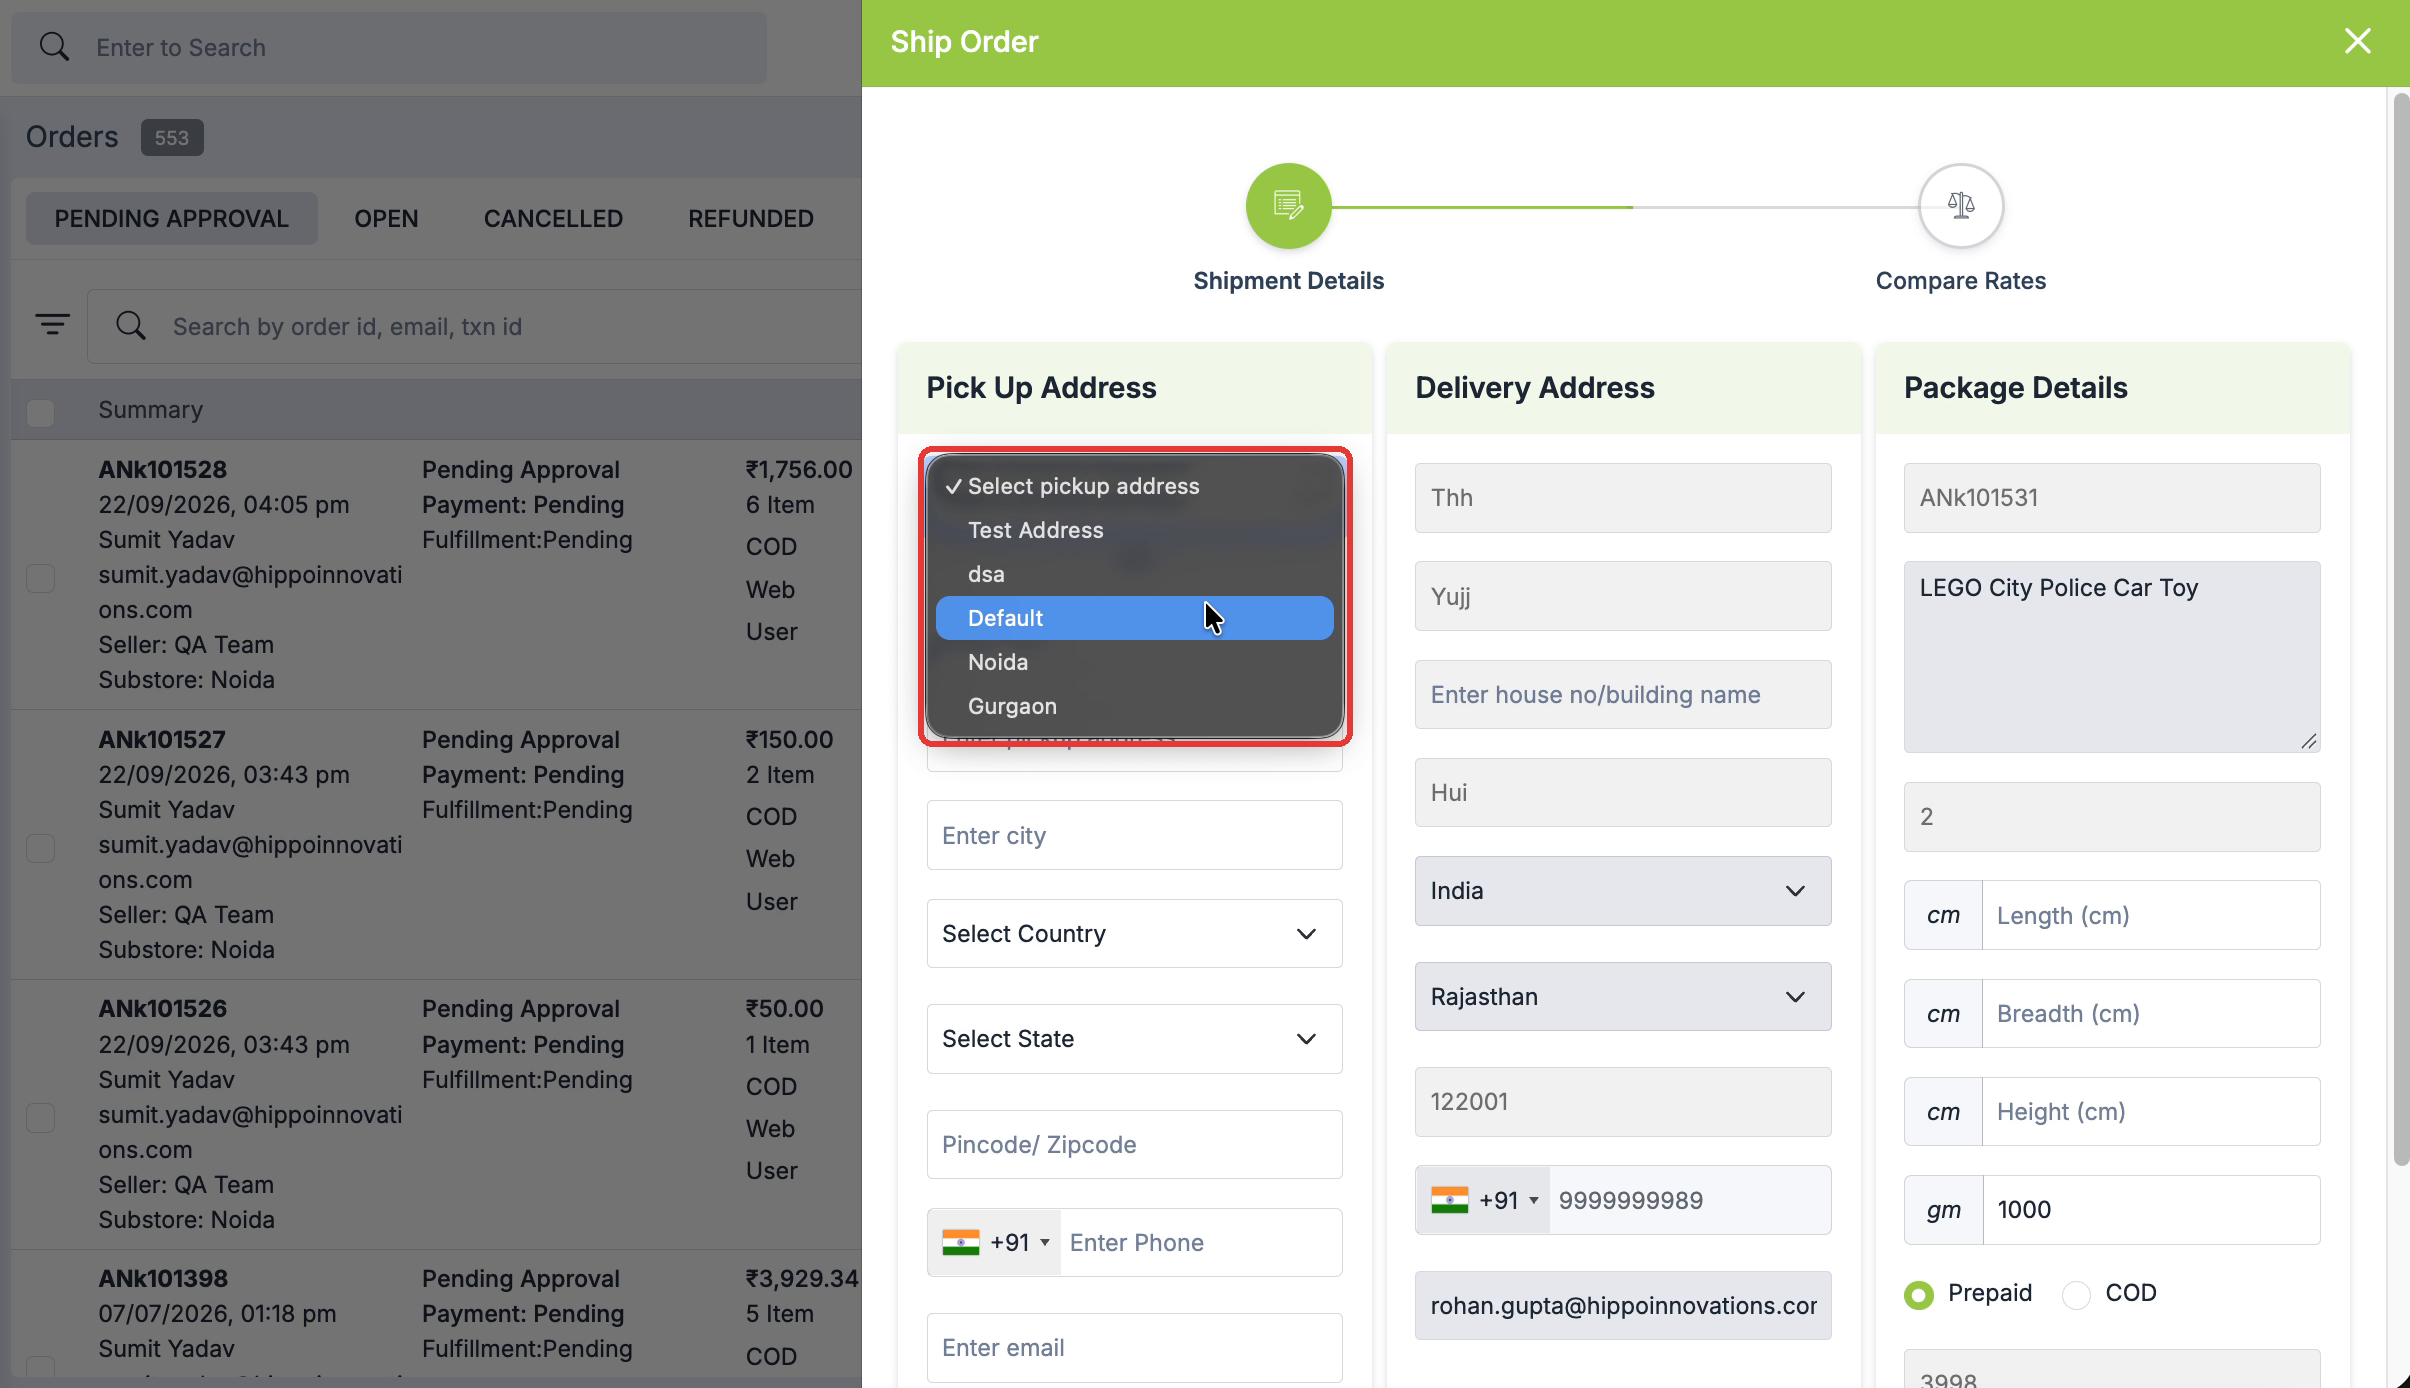
Delivery address
This is the customer's address, filled in from the order. Check it is complete before you continue.
Package details
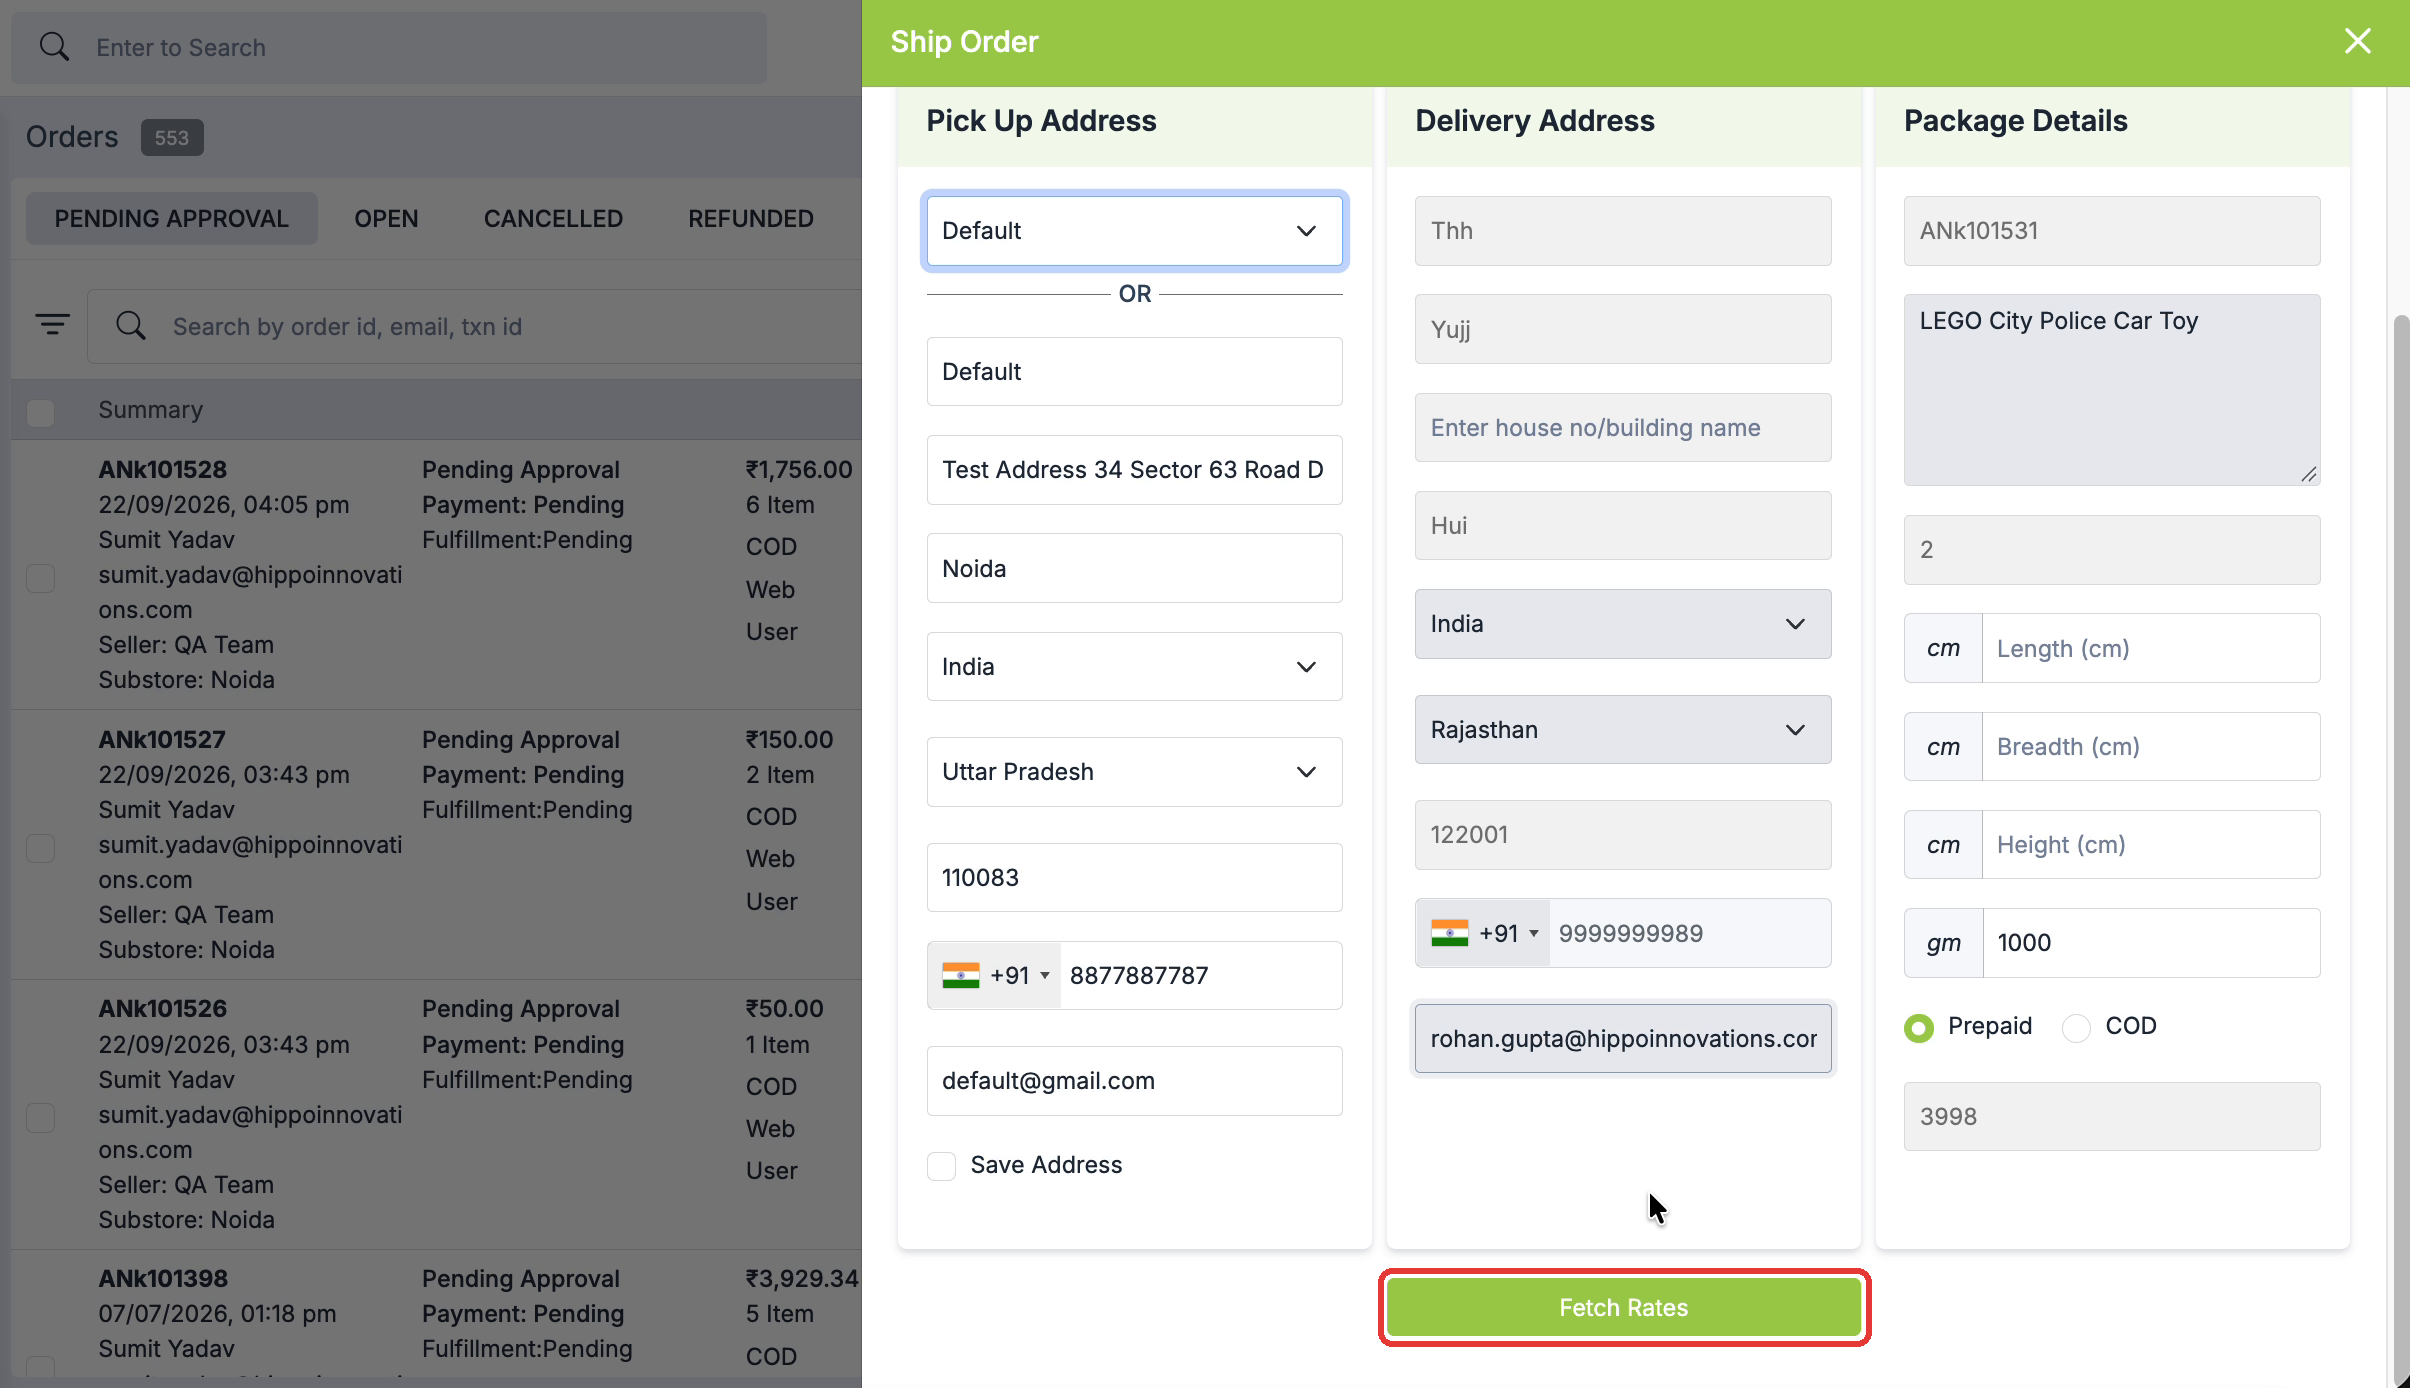
The order ID, item description and quantity come from the order. Enter the package length, breadth and height in centimetres and the weight in grams, then confirm the payment mode (Prepaid or COD) and the order value.
How couriers charge for weight: The courier bills whichever is higher: the actual weight of the packed order, or the volumetric weight worked out from its length, breadth and height. Accurate dimensions keep the rate you see here close to what you are charged.
When everything looks right, click Fetch Rates at the bottom of the window.
Step 2: Compare rates
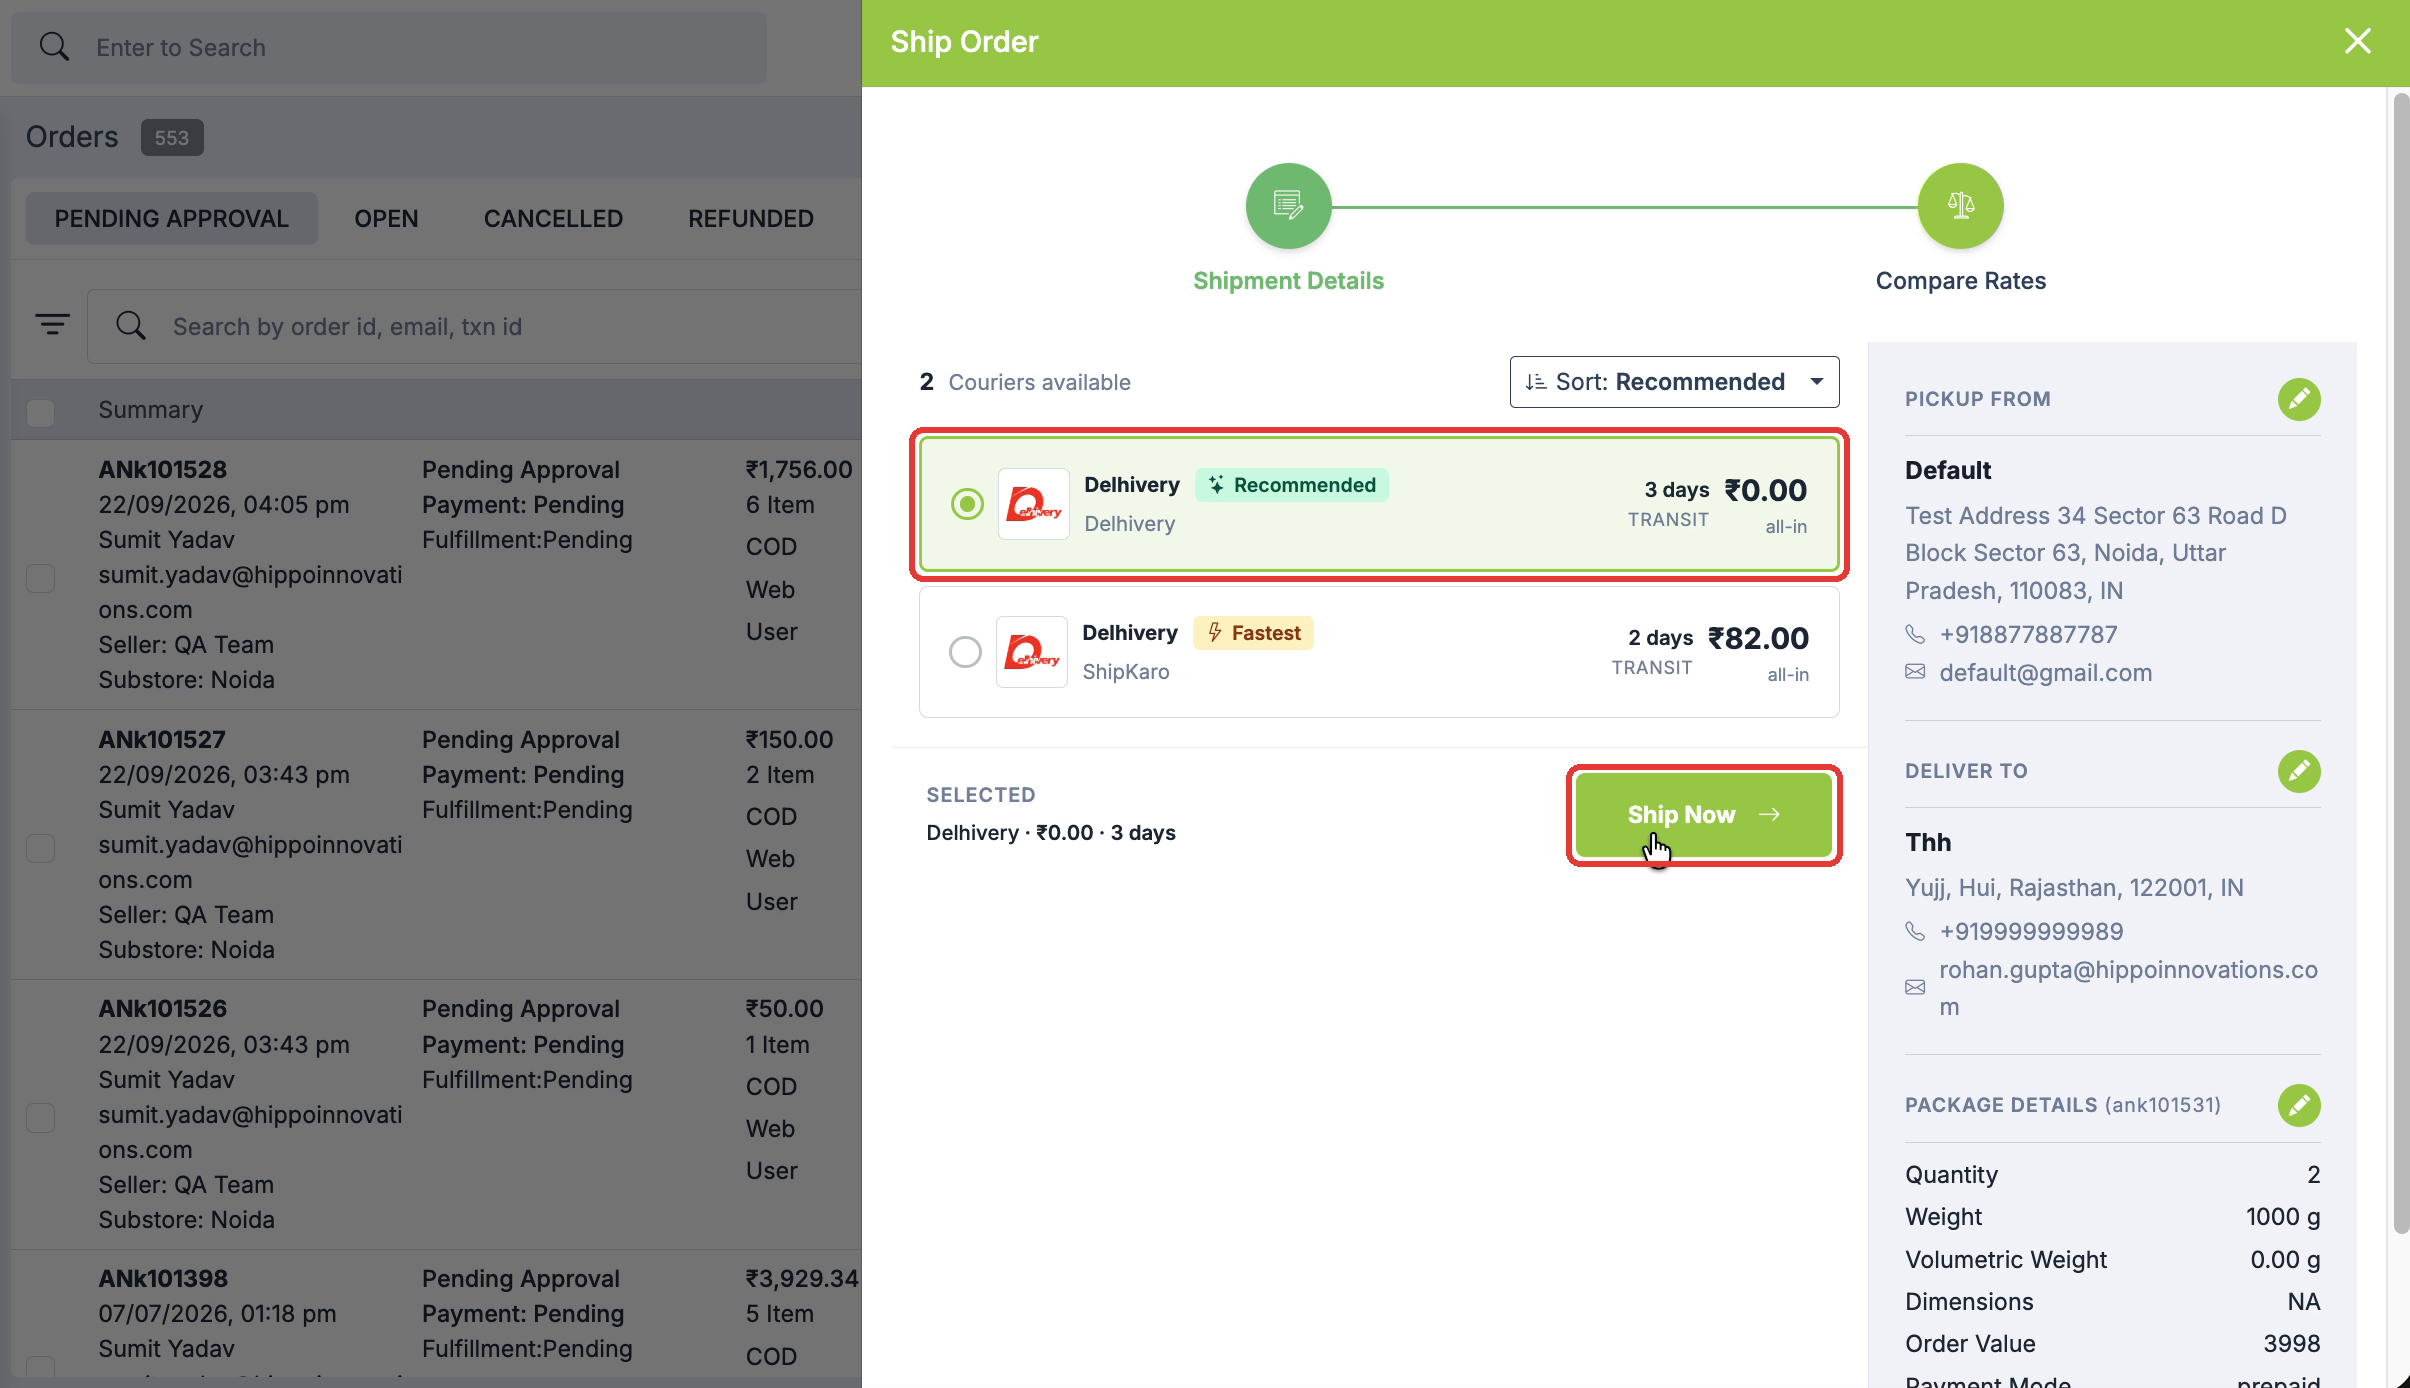
The Compare Rates step lists every courier that serves your pickup and delivery pincodes, with its transit time and all-in price. The Recommended and Fastest tags highlight the best options, and Sort changes the order of the list.
The panel on the right summarises the pickup address, delivery address and package details. Click the edit icon on any of them to go back and change it.
Select a courier. Your choice appears under Selected with its price and transit time. Click Ship Now to create the shipment.
A courier is missing from the list? If a courier does not serve the pincode, or its integration needs attention, a message about it appears at the top of the window and it is left out of the list. Check the courier's settings under Carriers, or choose another courier.
Step 3: After you ship
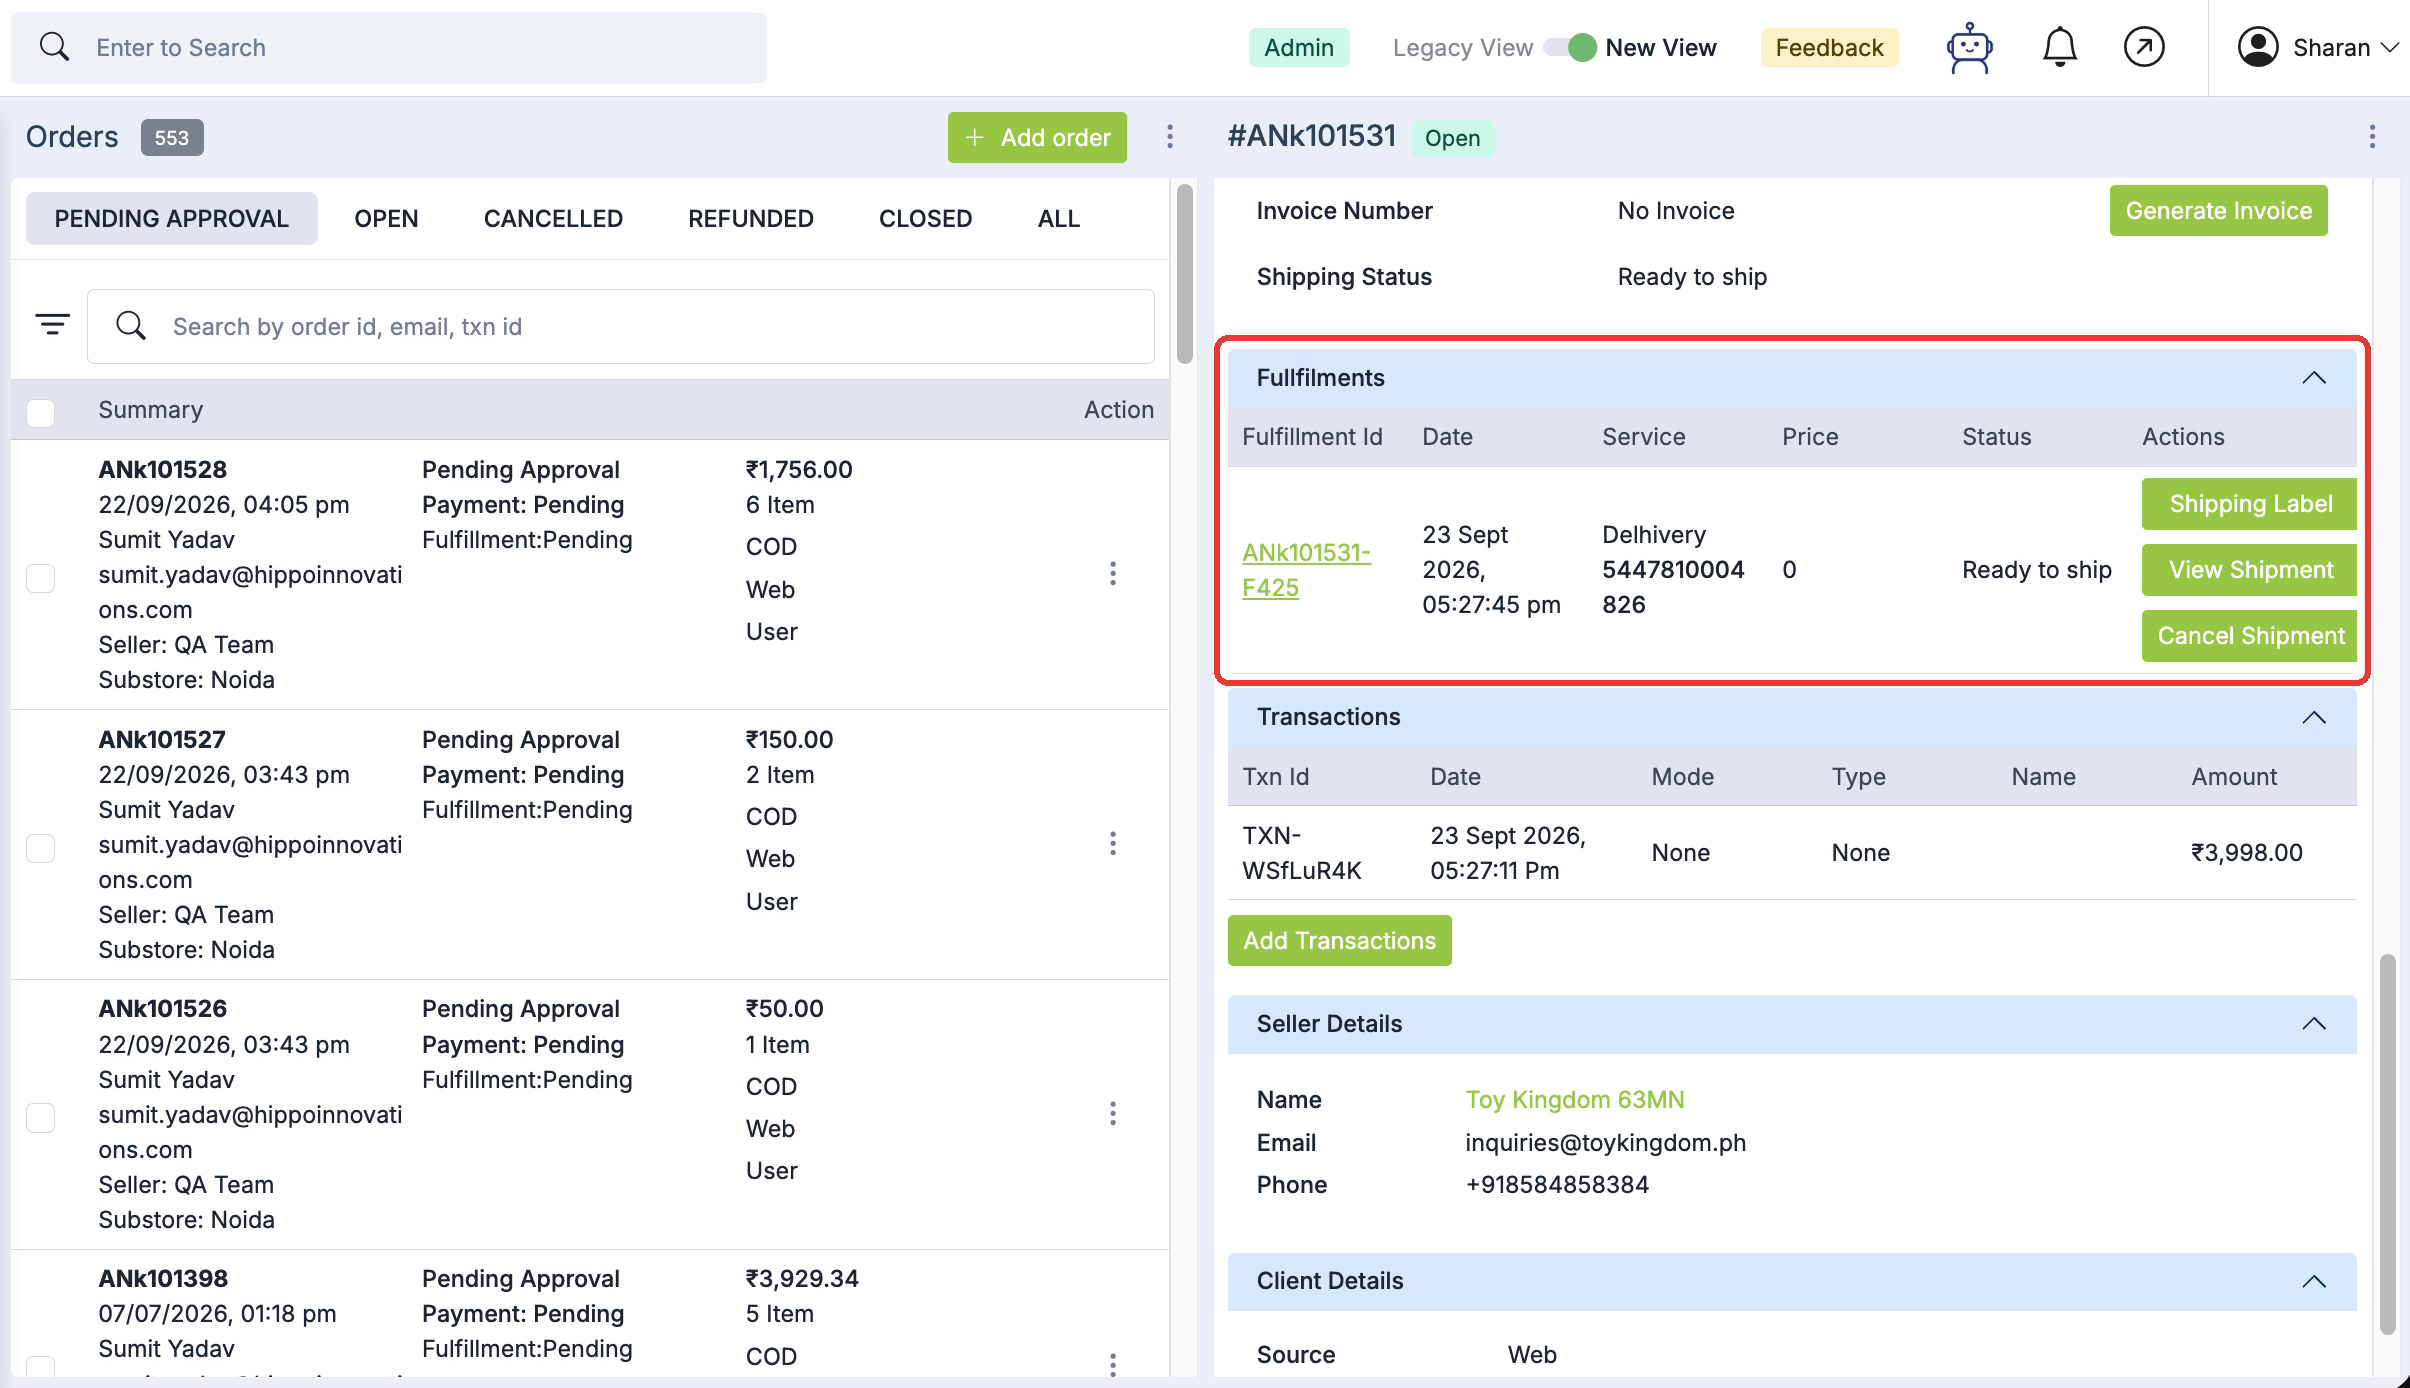
A confirmation appears once the shipment is created. On the order, Shipping Status changes to Ready to ship, and the shipment is added under Fulfillments with its fulfillment ID, date, courier, AWB number and status.
Use the actions next to the fulfillment to manage it:
- Shipping Label opens the label to print and attach to the package.
- View Shipment shows the shipment's details.
- Cancel Shipment cancels the shipment.
Rate calculator
To check courier rates before an order comes in, use the rate calculator. It estimates rates from the pickup and delivery locations and the package's dimensions and weight.


