StoreHippo Help Center
StoreHippo Help Center
Unicommerce Integration
Mr.Rajiv kumarStoreHippo provides the support for the integration with Unicommerce. With the help of Unicommerce, you can connect your store with multiple marketplaces and manage orders and sales across multiple marketplace channels seamlessly and easily. By integrating Unicommerce, you will be able to sync your orders, products, and data from all the marketplaces and fulfill the orders from the Unicommerce dashboard.
Unicommerce provides the following services:
- The multi-channel solution from one unified dashboard
- Centralized inventory on all marketplaces in real-time
- Multi-channel order management, returns management, accounting, and shipping
- List various products on multiple marketplaces and grow your business hasslefree
Integrating Unicommerce
You can integrate your store with Unicommerce very easily and integration is automated by the StoreHippo. Integrating a Unicommerce channel with your store is three steps procedure, viz adding sellers, getting the seller's access key, and accessing the Unicommerce panel.
Adding sellers
First of all, you need to add the seller to proceed. You can add the sellers in the Sellers > Sellers in the StoreHippo Admin Panel. Click the Add New button and proceed to add a new seller. 
Click here to know more about adding sellers.
Integrating your store with Unicommerce
You can integrate your store with Unicommerce on the Uniware dashboard. To integrate your store with Unicommerce, follow the steps mentioned below:
- Login to your Unicommerce account.

- In the Uniware dashboard, click the Settings icon and select the Channels option.

- Click the Add Channel button.

- Now, the page will open up containing the list of available channels.

- Under the Carts section, find and select the StoreHippo. You can search for it also in the search bar.
- When you will click on it, a new page will open.

- Provide the details and select the appropriate option as per the settings configured in your store.
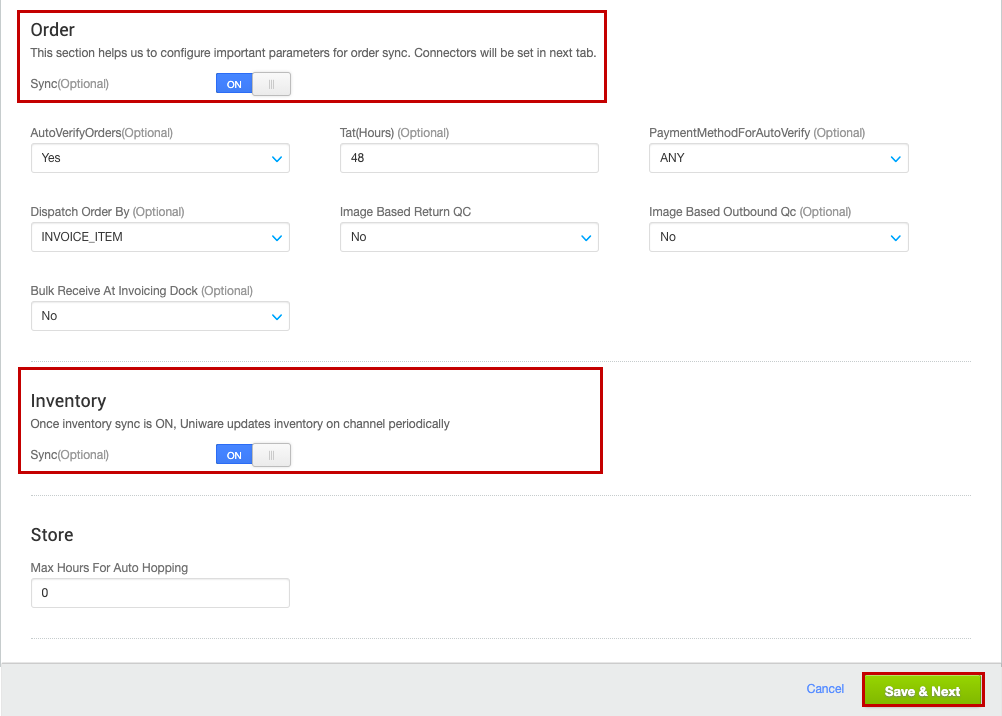
- In the Order and Inventory section, enable the Sync option if required. If you enable this option, orders and inventories will be synced respectively.
- Select the ORDER_ITEM option in the Dispatch Order By” field under the Order section.
- Provide the other details as per the settings configured in your store.
- Click the Save & Next button for proceeding to configure connectors.

- In the Username field, enter the registered email ID ( which was used while adding seller on StoreHippo panel )of the seller.
- Provide the store link ( {storename}.storehippo.com/unicommerce) in the Store Url field.
- In the Password field, enter the password ( which was used while adding seller on StoreHippo panel )associated with the selected seller.
- Click the Connect button.


Now, the connectors will be configured in Uniware. As soon as the channel is configured successfully, you can see the channel summary, and you can trigger the respective sync processes from this page itself.


