- Email:
[email protected]
Phone:
+918010117117
StoreHippo Help Center
StoreHippo Help Center
- Home
- User Verification Flow
- Verification Success Page
Verification Success Page
Mr.Rajiv kumarStoreHippo provides the support for adding a custom verification success page in your store. Usually, after the successful verification, the user is redirected to the default verification success page provided by the StoreHippo. However, you can create your own custom page and set it as a verification success page. Once you have defined the verification success page, the user will be redirected to that page after the successful verification. To add the verification success page, follow the steps mentioned below:
Adding verification success page
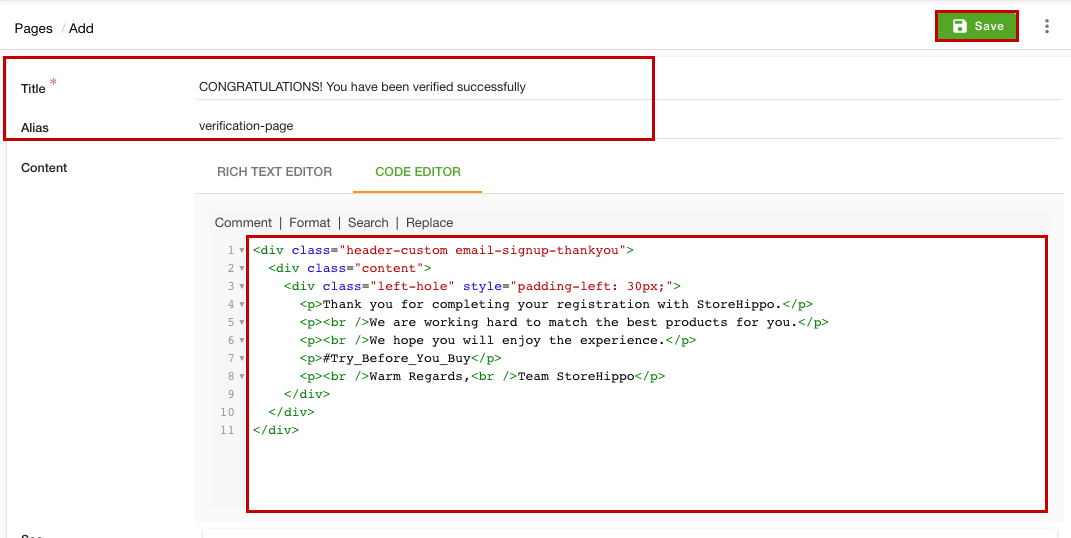
First, you need to add the template for the verification success page. To do so, follow the steps given below:
- Go to the Site > Pages section in the StoreHippo Admin Panel.
- Click the Add New button to add a new page. A page opens up with multiple fields.

- Provide title and alias in the respective fields.
- In the Content section, click the Code Editor option and paste the template code of your page.
- Click the Save button to apply the changes.
Adding startup widget
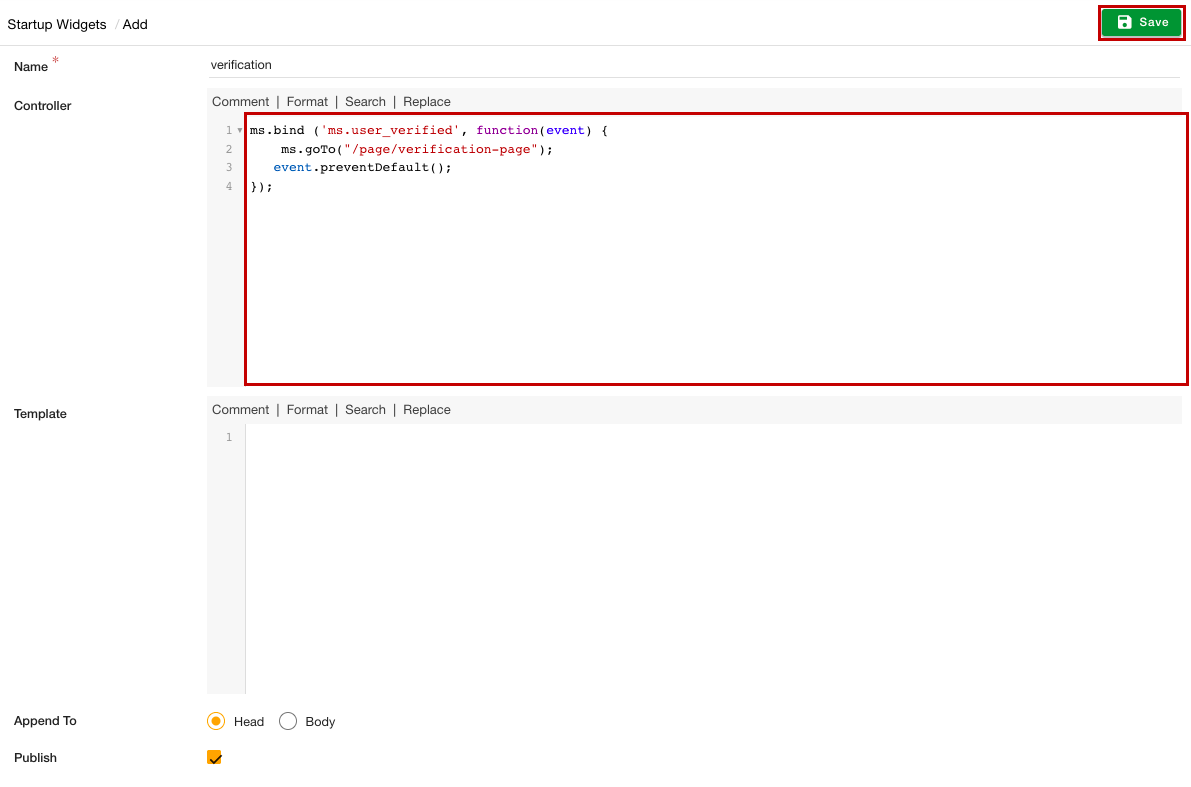
Once you have added the custom page, you need to specify the page in the redirection URL. To do so, follow the steps mentioned below:
- Go to Site > Startup Widgets section in StoreHippo Admin Panel.
- Click the Add New button to add a new widget. A page will open up with multiple fields.

- In the Name field, add the widget name.
- Paste the following code in the Controller section.
ms.bind ('ms.user_verified', function(event) {
  ms.goTo("/page/verification-page");
  event.preventDefault();
}); - In the Append To field, select the Head option.
- Select the Publish option to activate the widget.
- Click the Save button to apply the changes.
Now, the verification success page will be added. After the successful verification, the user will be redirected to this page. the verification success page is provided by StoreHippo but you can also create a custom page and provide its URL here.


